How to connect to Snowflake and retrieve data into Exploratory Desktop

Prerequisite
ODBC Driver
First, download and install the ODBC driver from Snowflake’s web site.
For information on installing and configuring ODBC, please refer to the following document
Create a connection
Open the project and select Data Connections from the hamburger menu.
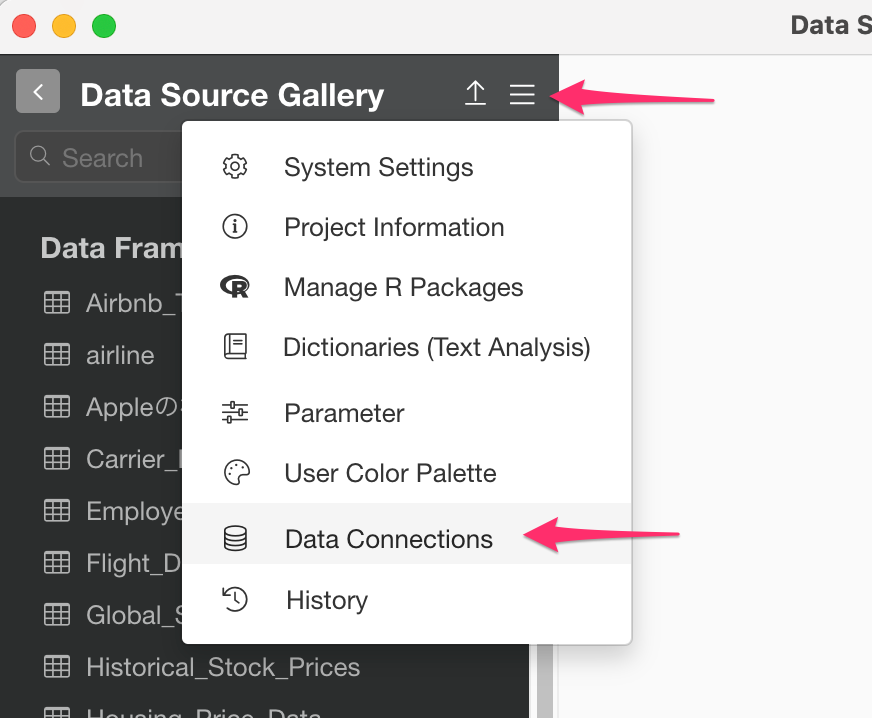
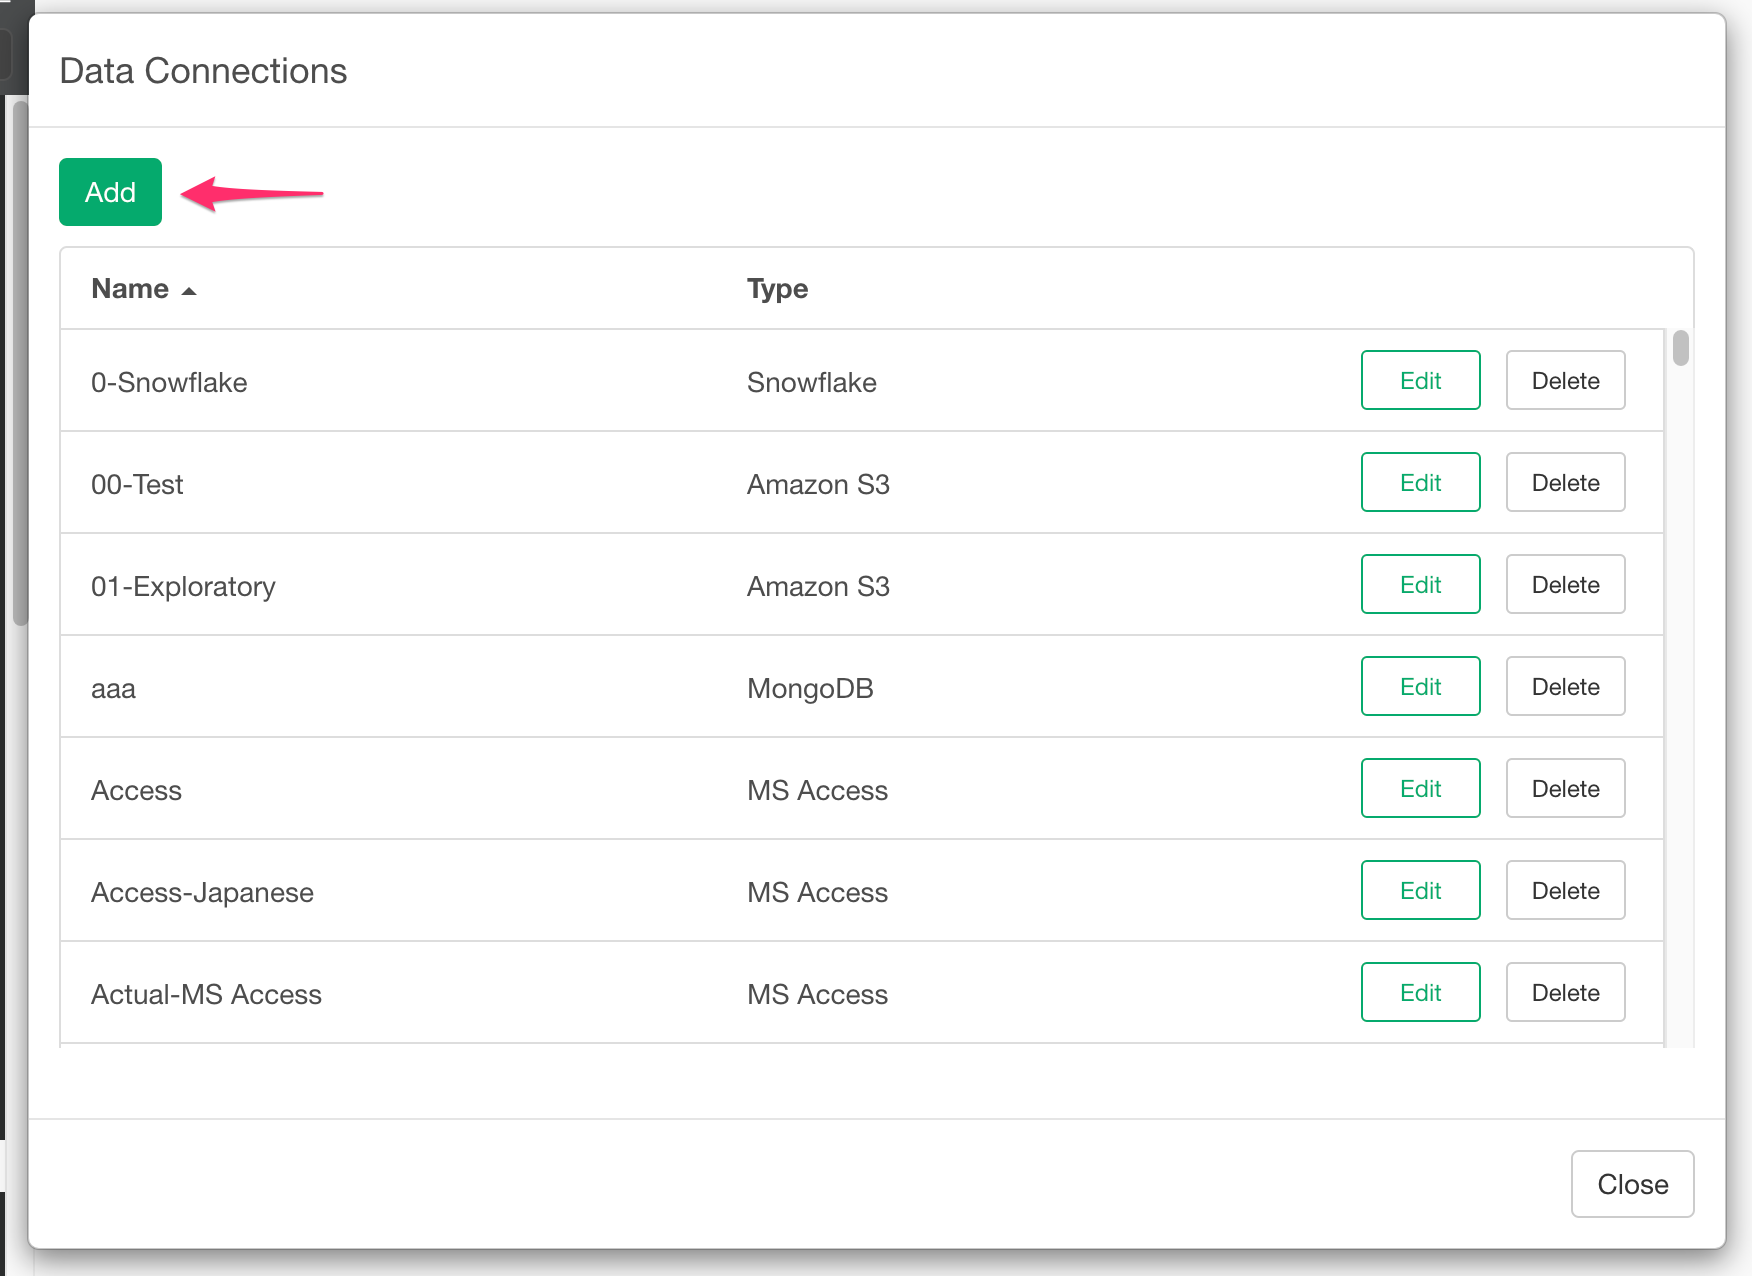
Click “Add.”
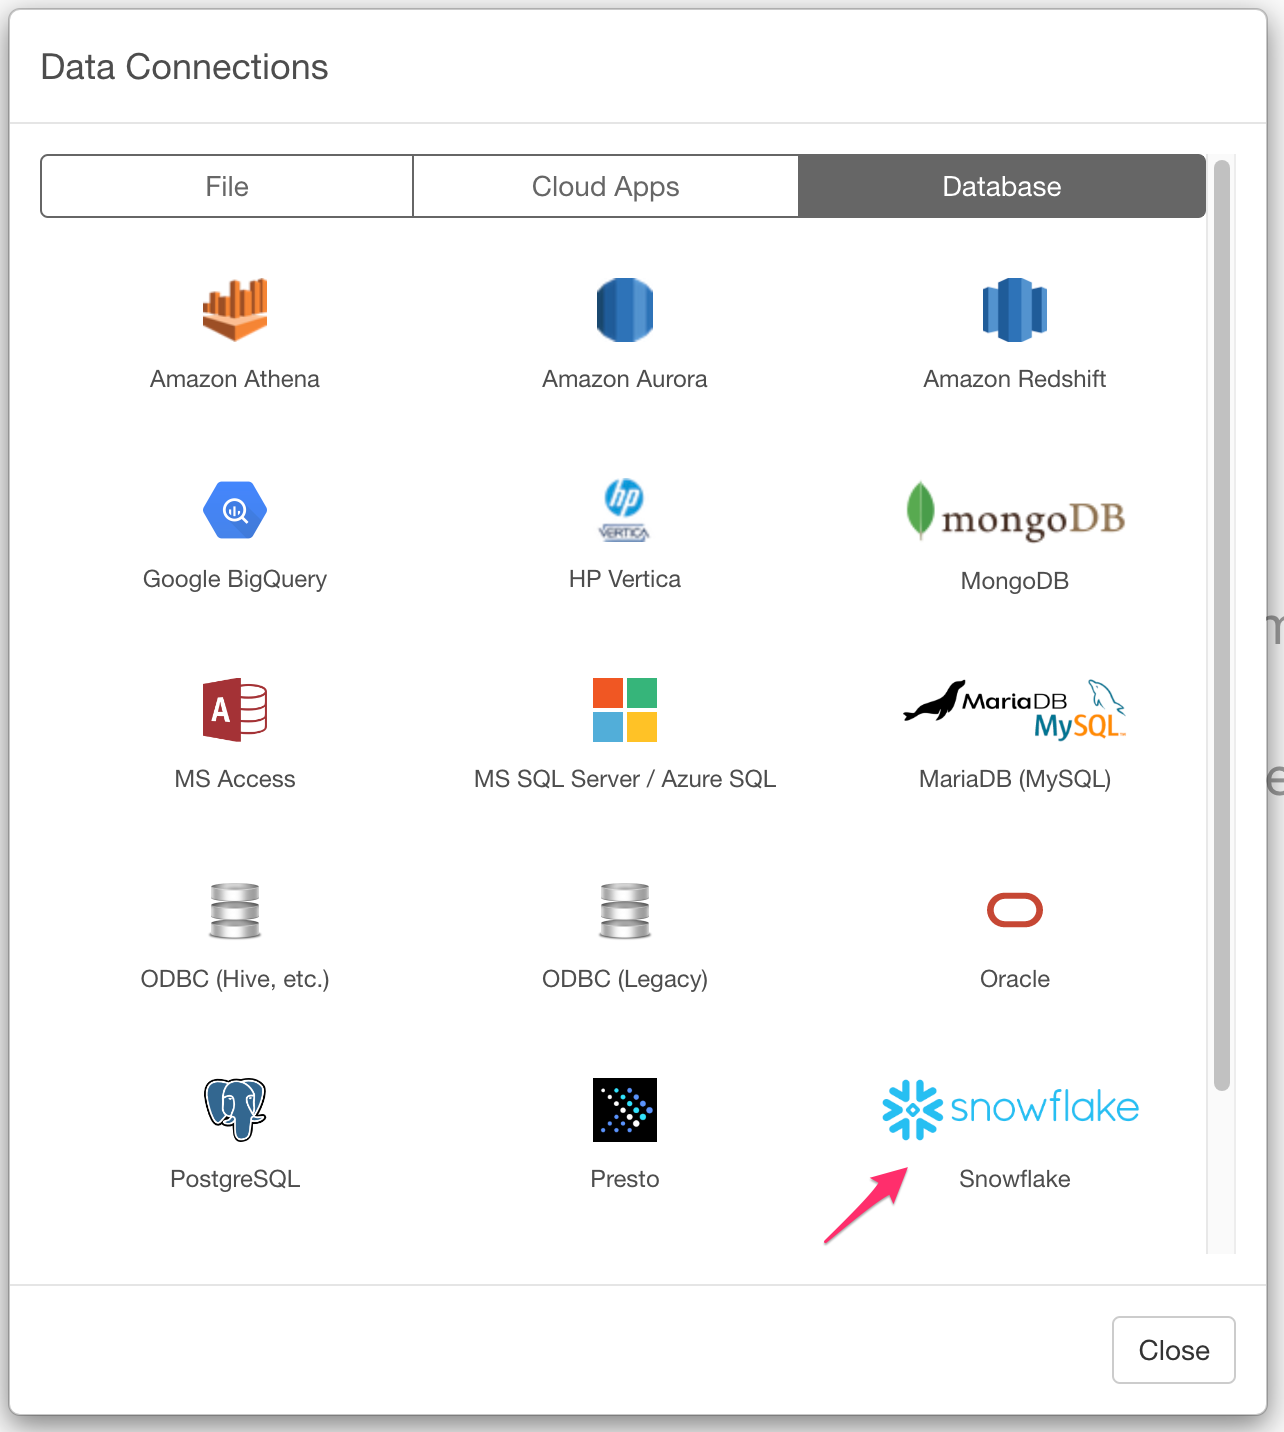
Select the Databases tab and click on Snowflake.
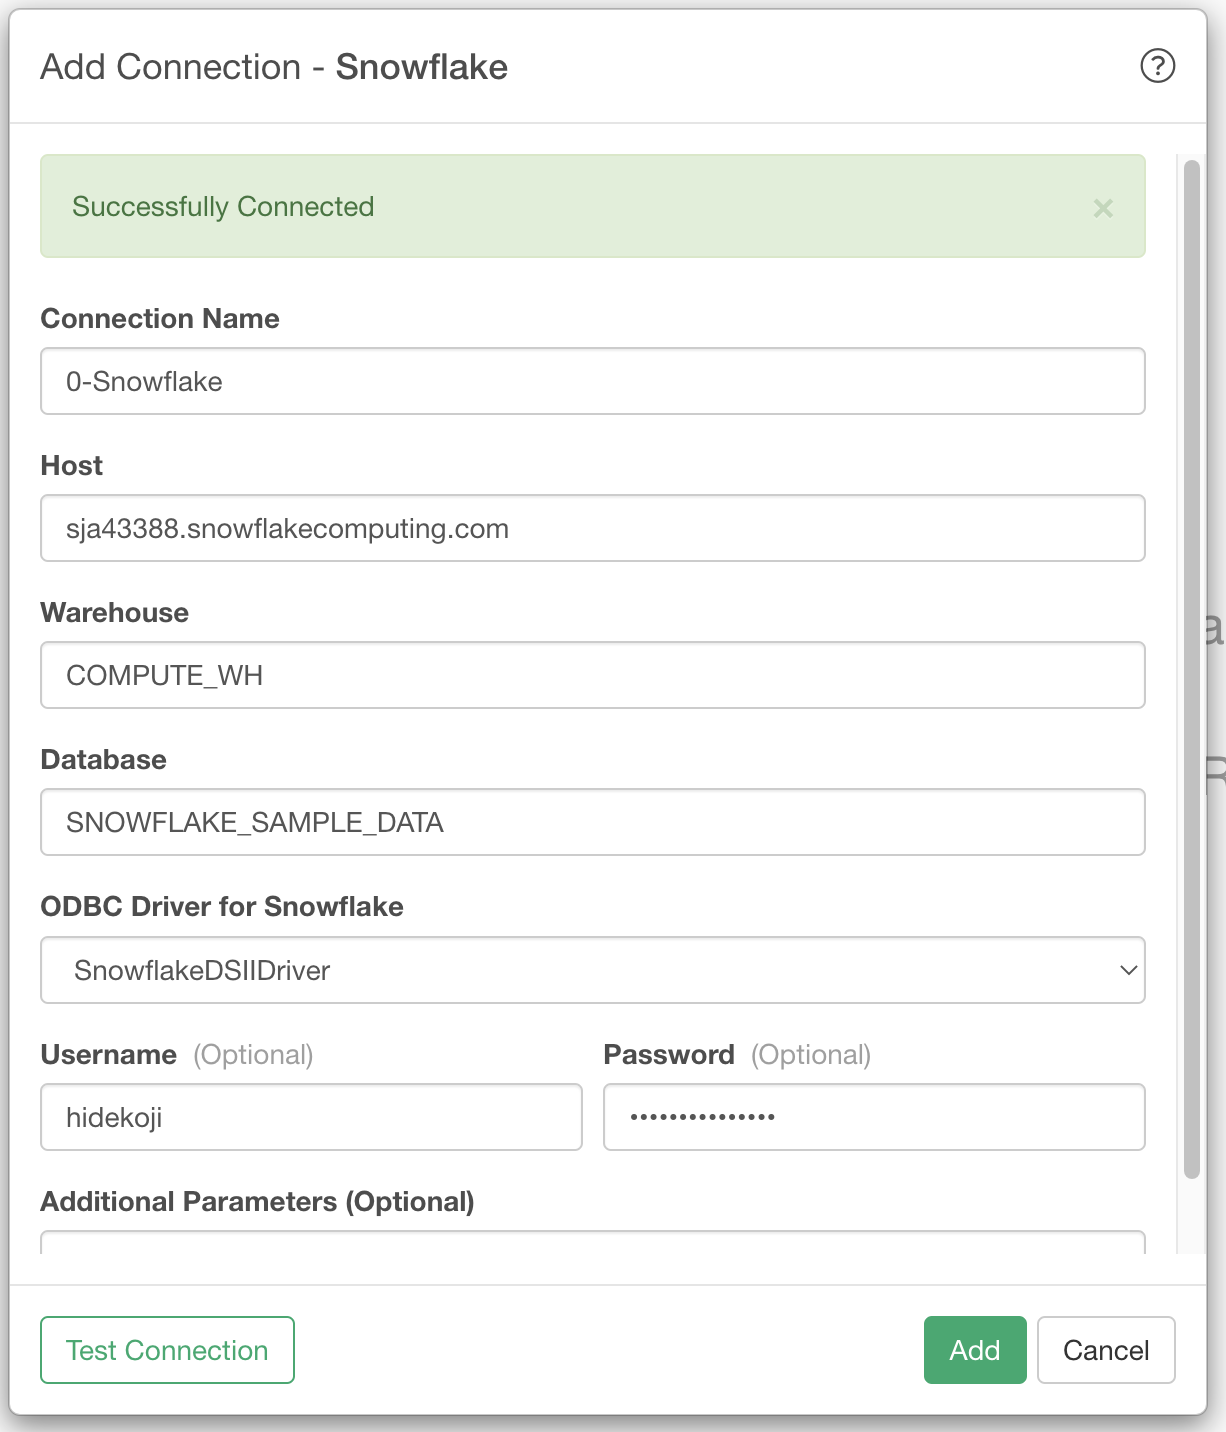
Enter the host, warehouse, database, user name, and password, and click “Test Connection” to confirm the connection. If the connection is successful, give the connection a name of your choice and click “Add” to save.
!
Importing data
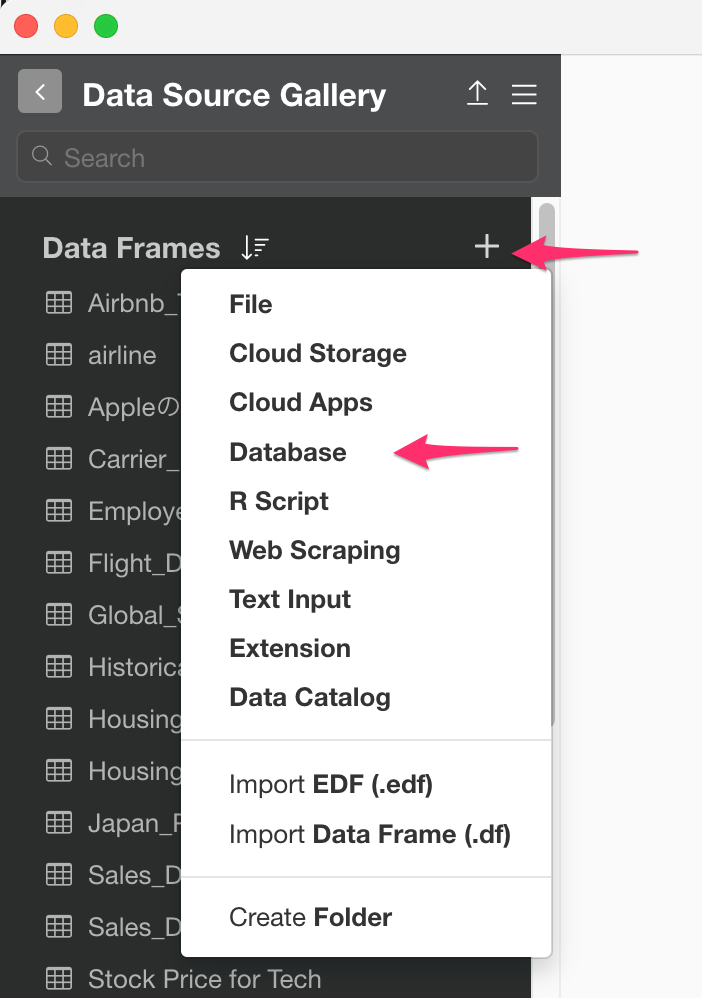
Click the plus (+) button to the right of the data frame and select Database data.
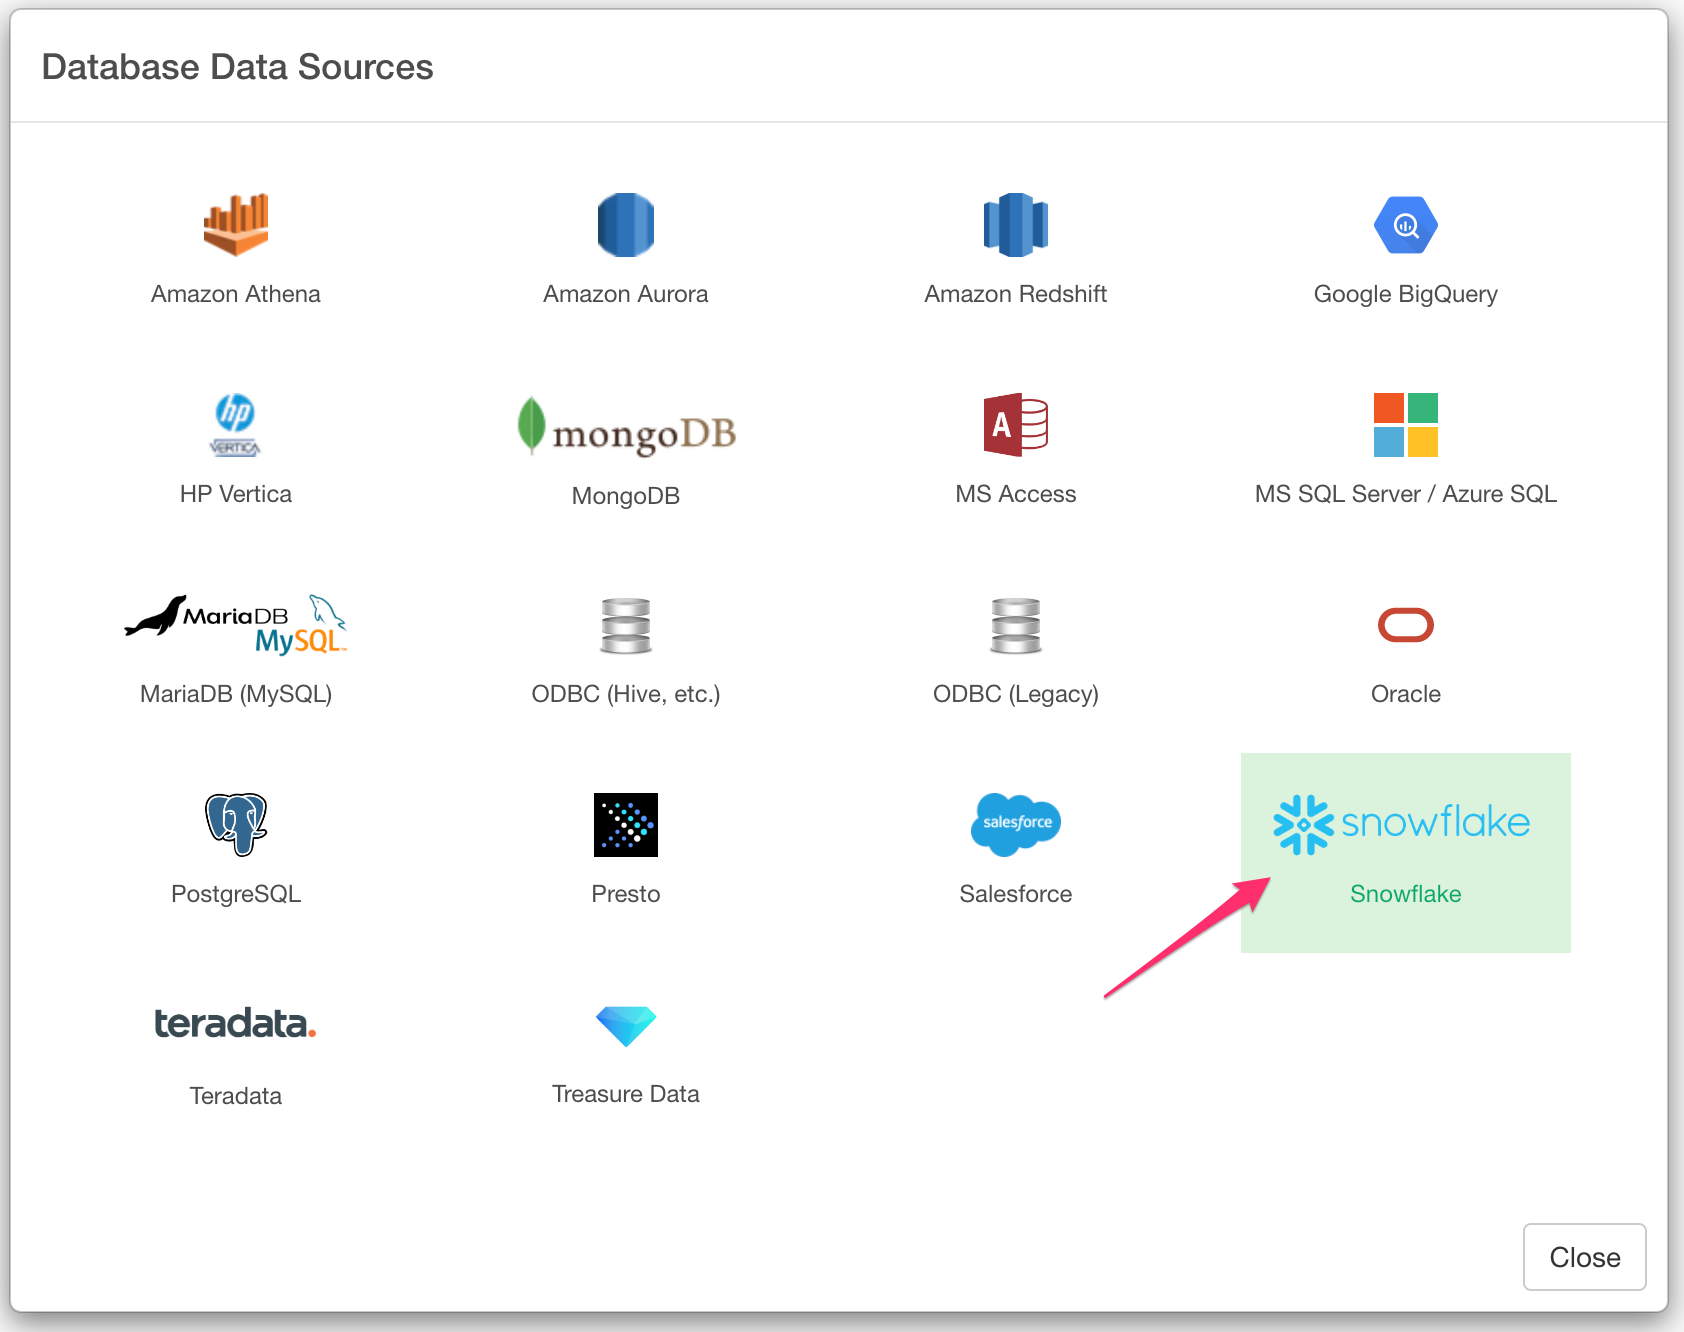
Select Snowflake.
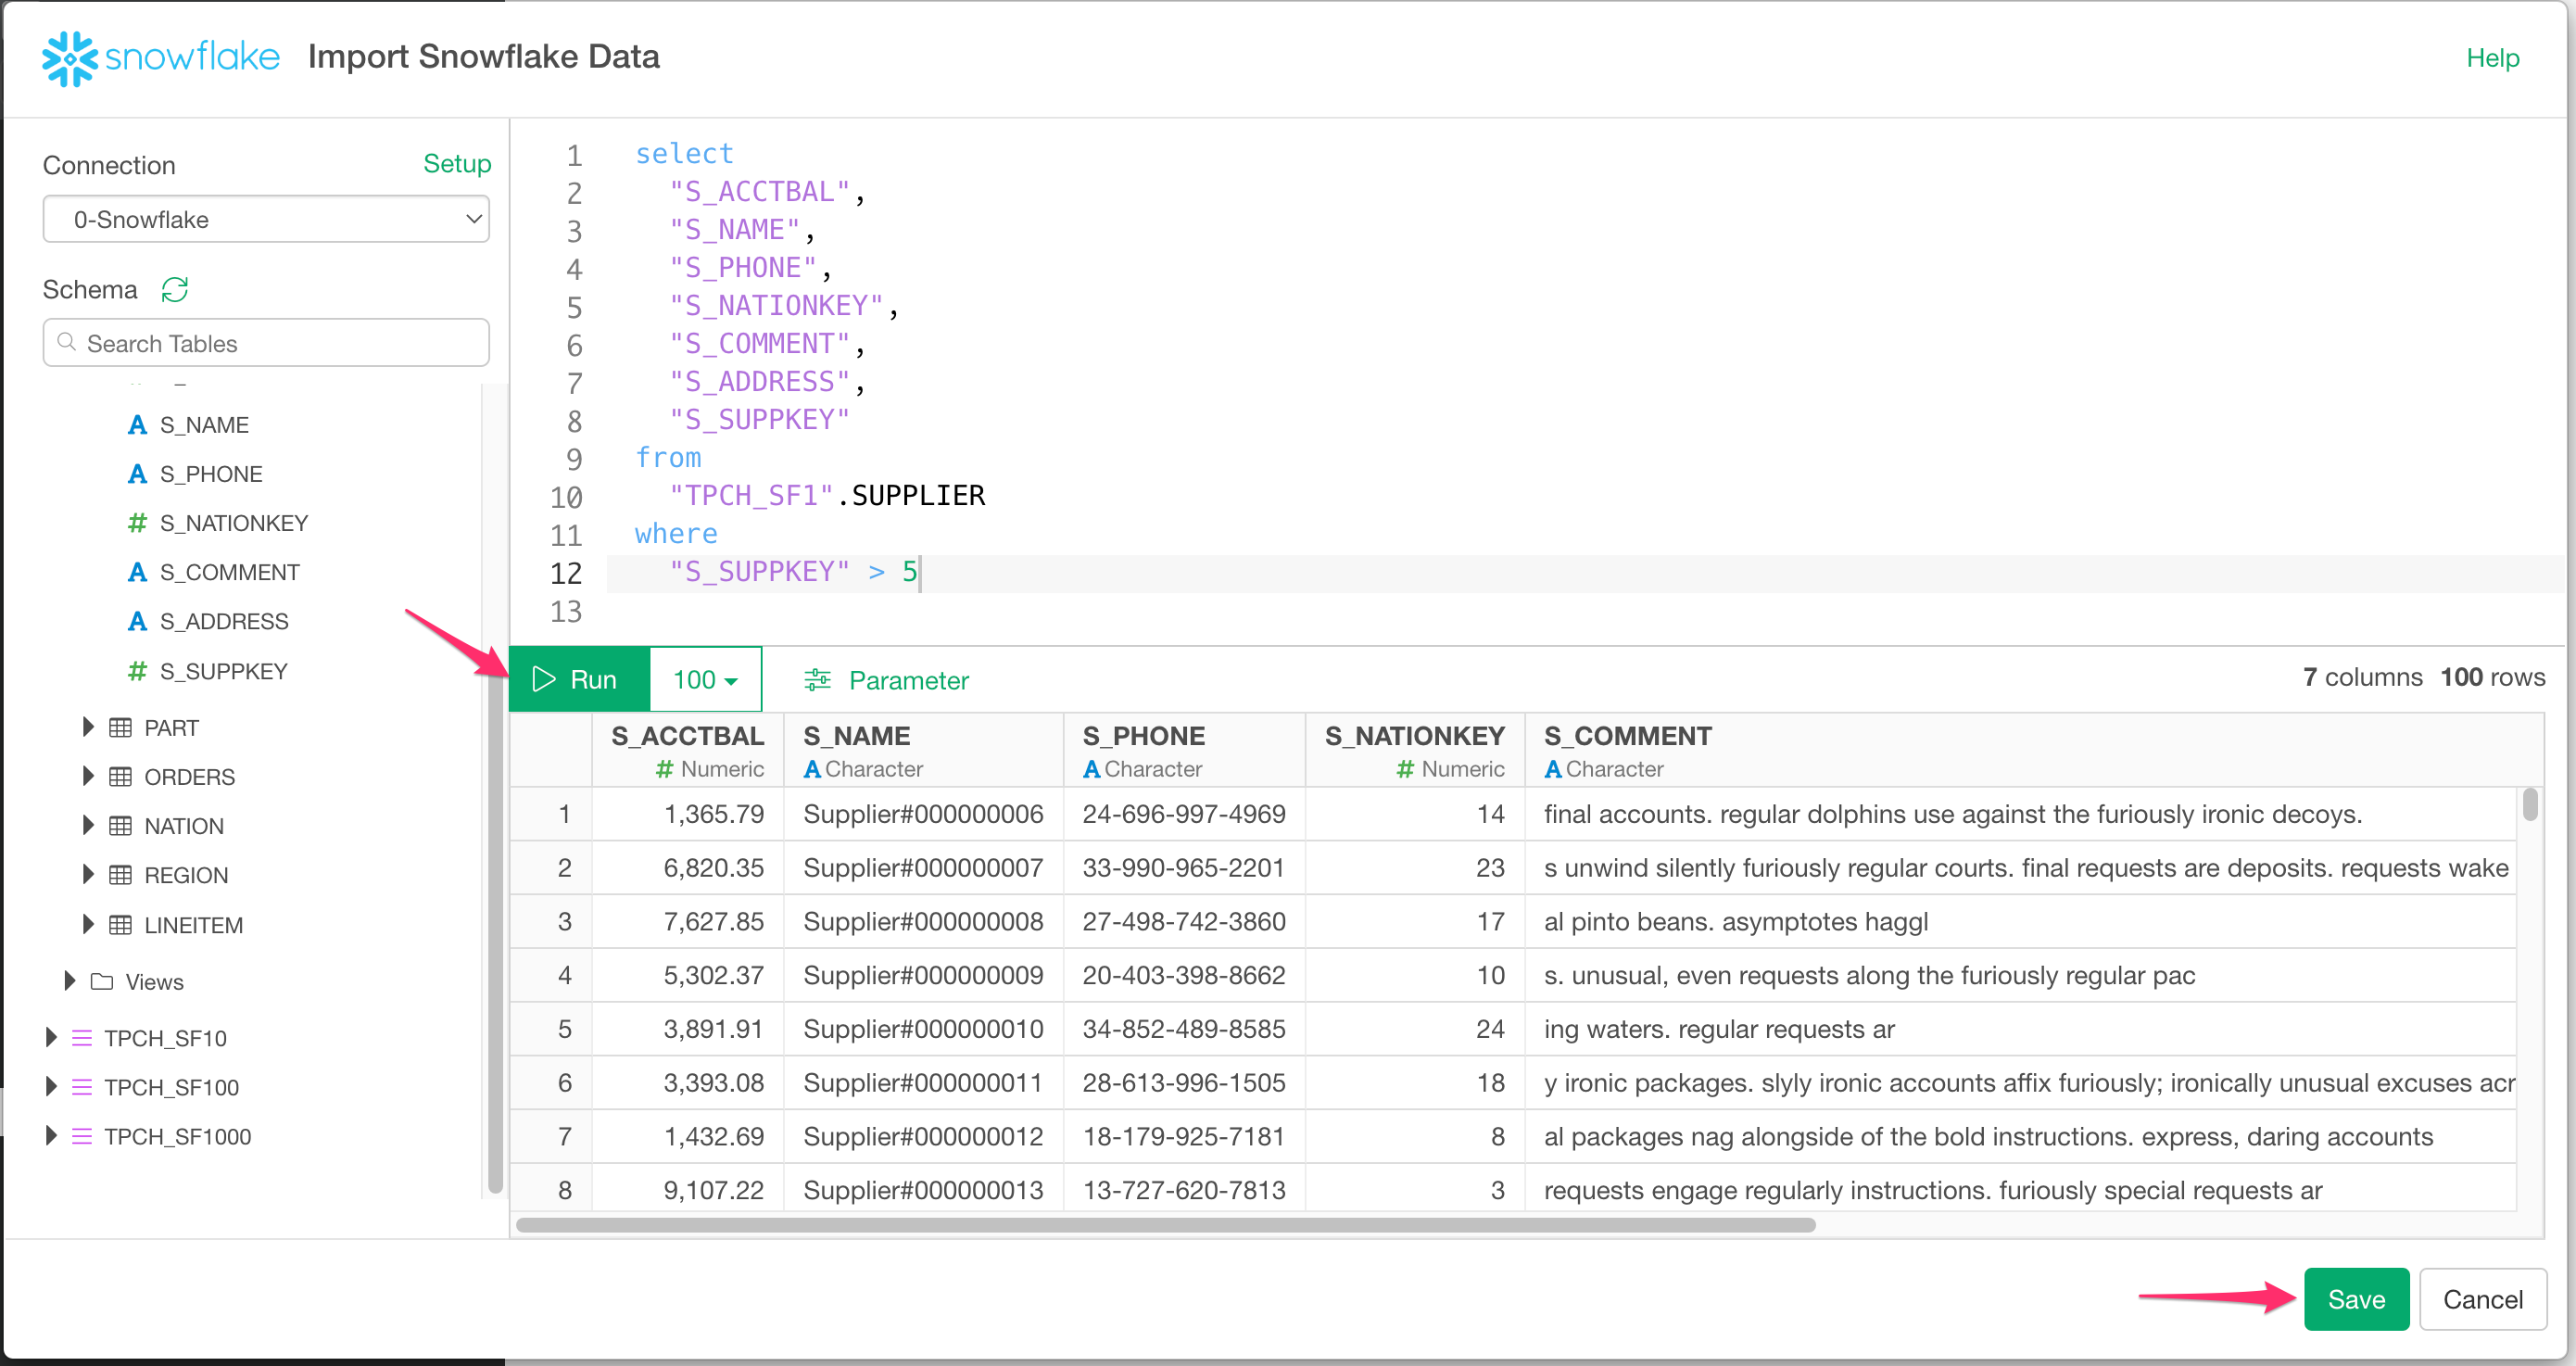
Enter the SQL query and click “Run” to see the preview results. Click “Save” to import the query results.
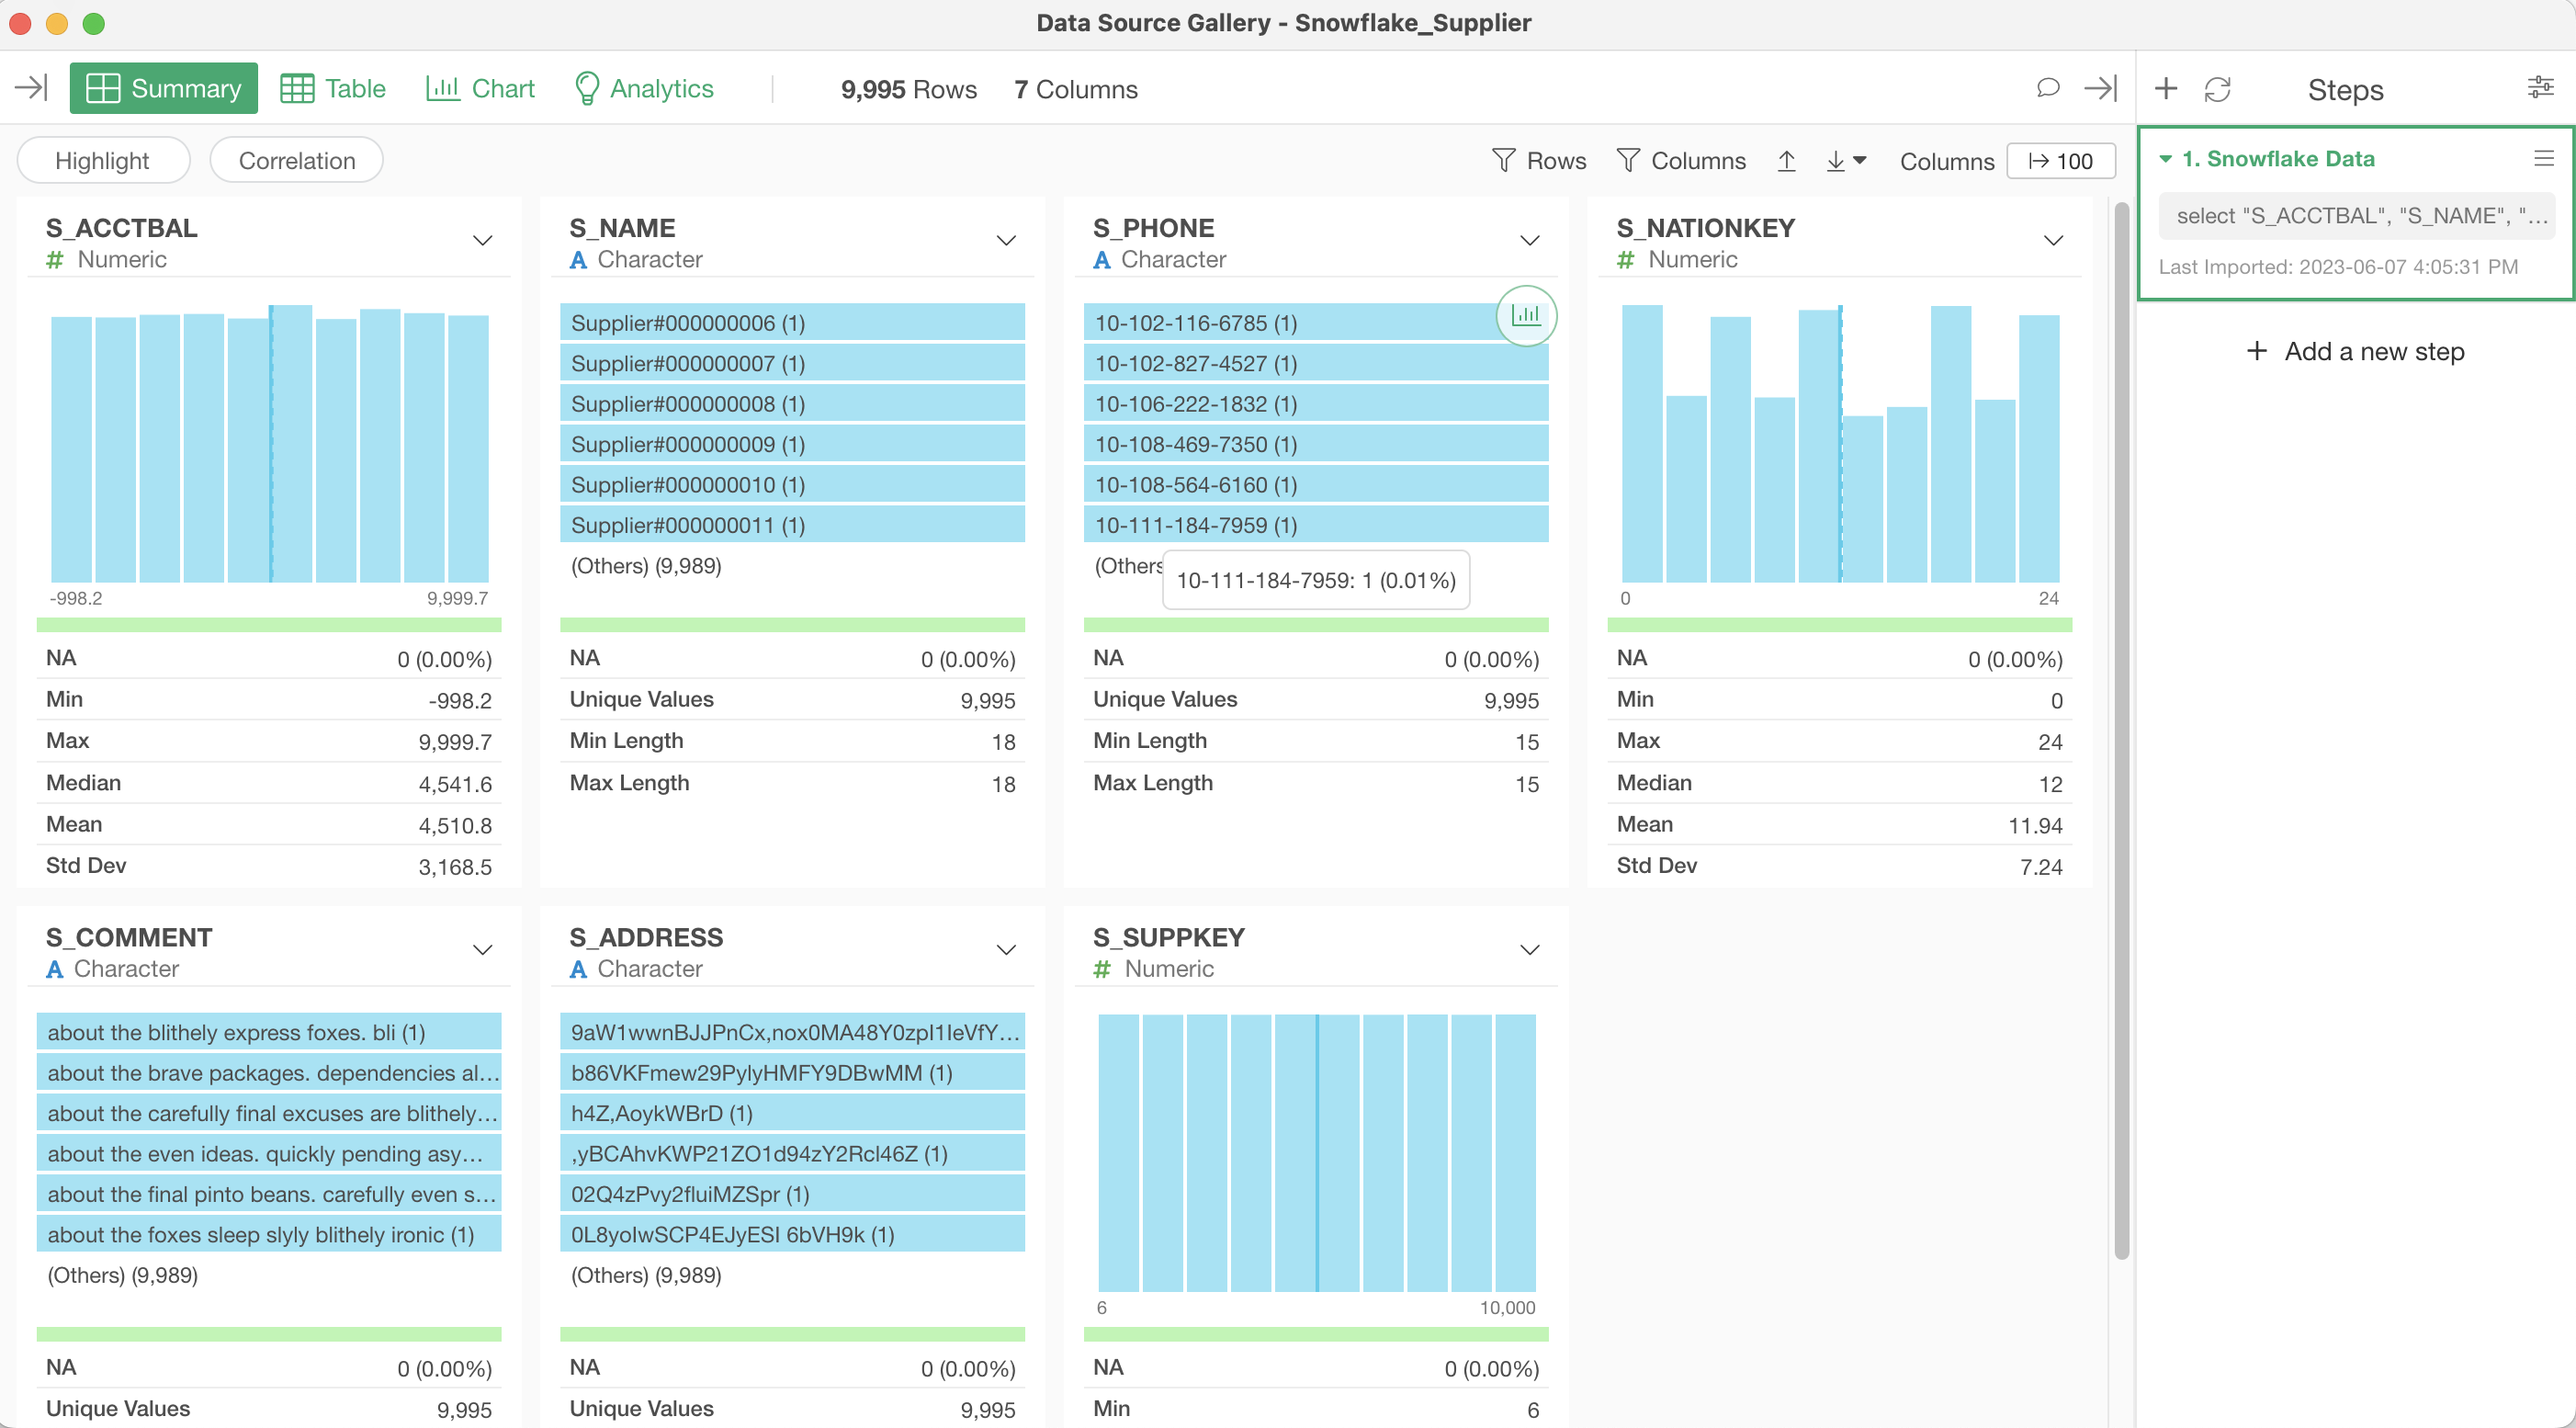
When the import is complete, the summary view will appear as follows.
Server Connection Configuration (For Organizations Using On-Premises or Hosted Servers)
This section is for users who are using Exploratory Server (on-premises or hosted) in their organization’s dedicated environment.
When content that uses Snowflake as a data source is published from Exploratory Desktop to the server, the connection information is stored on the server and used when executing schedules or manipulating parameters related to data sources.
Additionally, since Snowflake supports multi-factor authentication (MFA), when using multi-factor authentication, it becomes necessary to perform multi-factor authentication each time during schedule execution (including immediate execution) or when manipulating parameters related to data sources (e.g., authentication using DUO Mobile app or phone-based authentication).
Furthermore, when content using Snowflake as a data source is published to the server as a “team,” the connection used by the server becomes “the connection of the user who last published the content.”
Therefore, if the user who last published changes, the connection information used by the server will also change accordingly.
This means that when adopting multi-factor authentication and operating content as a team, cases may arise where the user who should perform multi-factor authentication differs each time when executing schedules or manipulating parameters related to data sources.
Therefore, users who are logged into Exploratory Server (on-premises or hosted) from Exploratory Desktop in their company’s dedicated environment will see the “Server Connection” menu displayed.
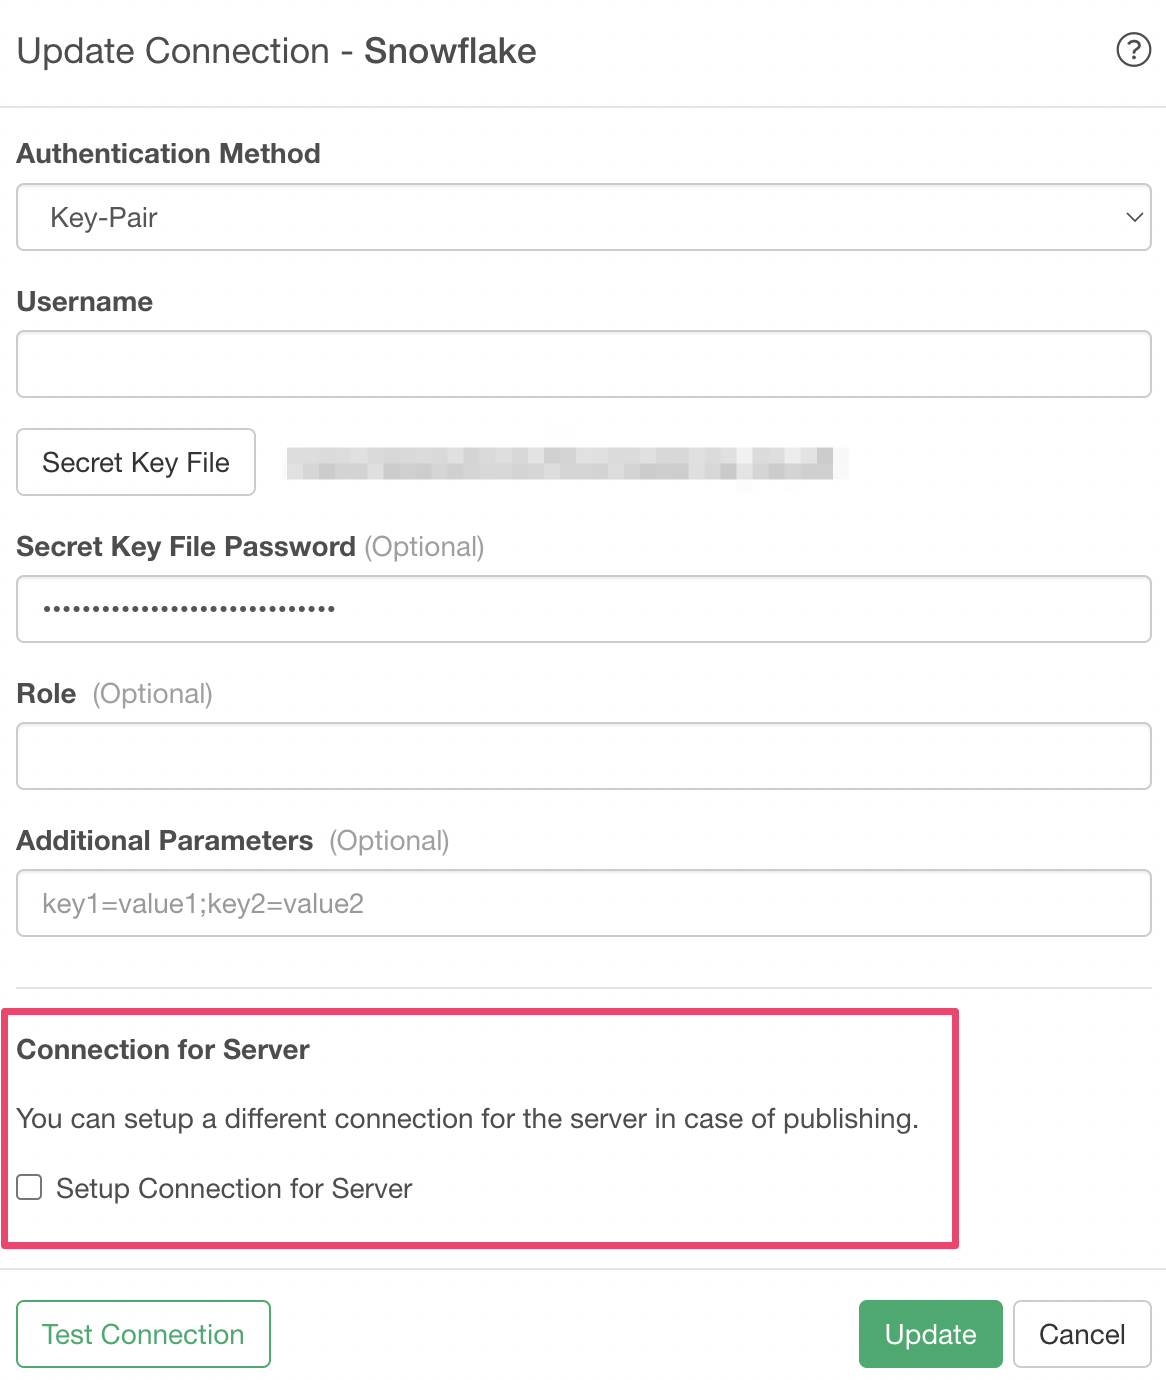
When you check “Configure server connection,” you can set up connections for executing schedules and interactive mode on the server separately from local connections.
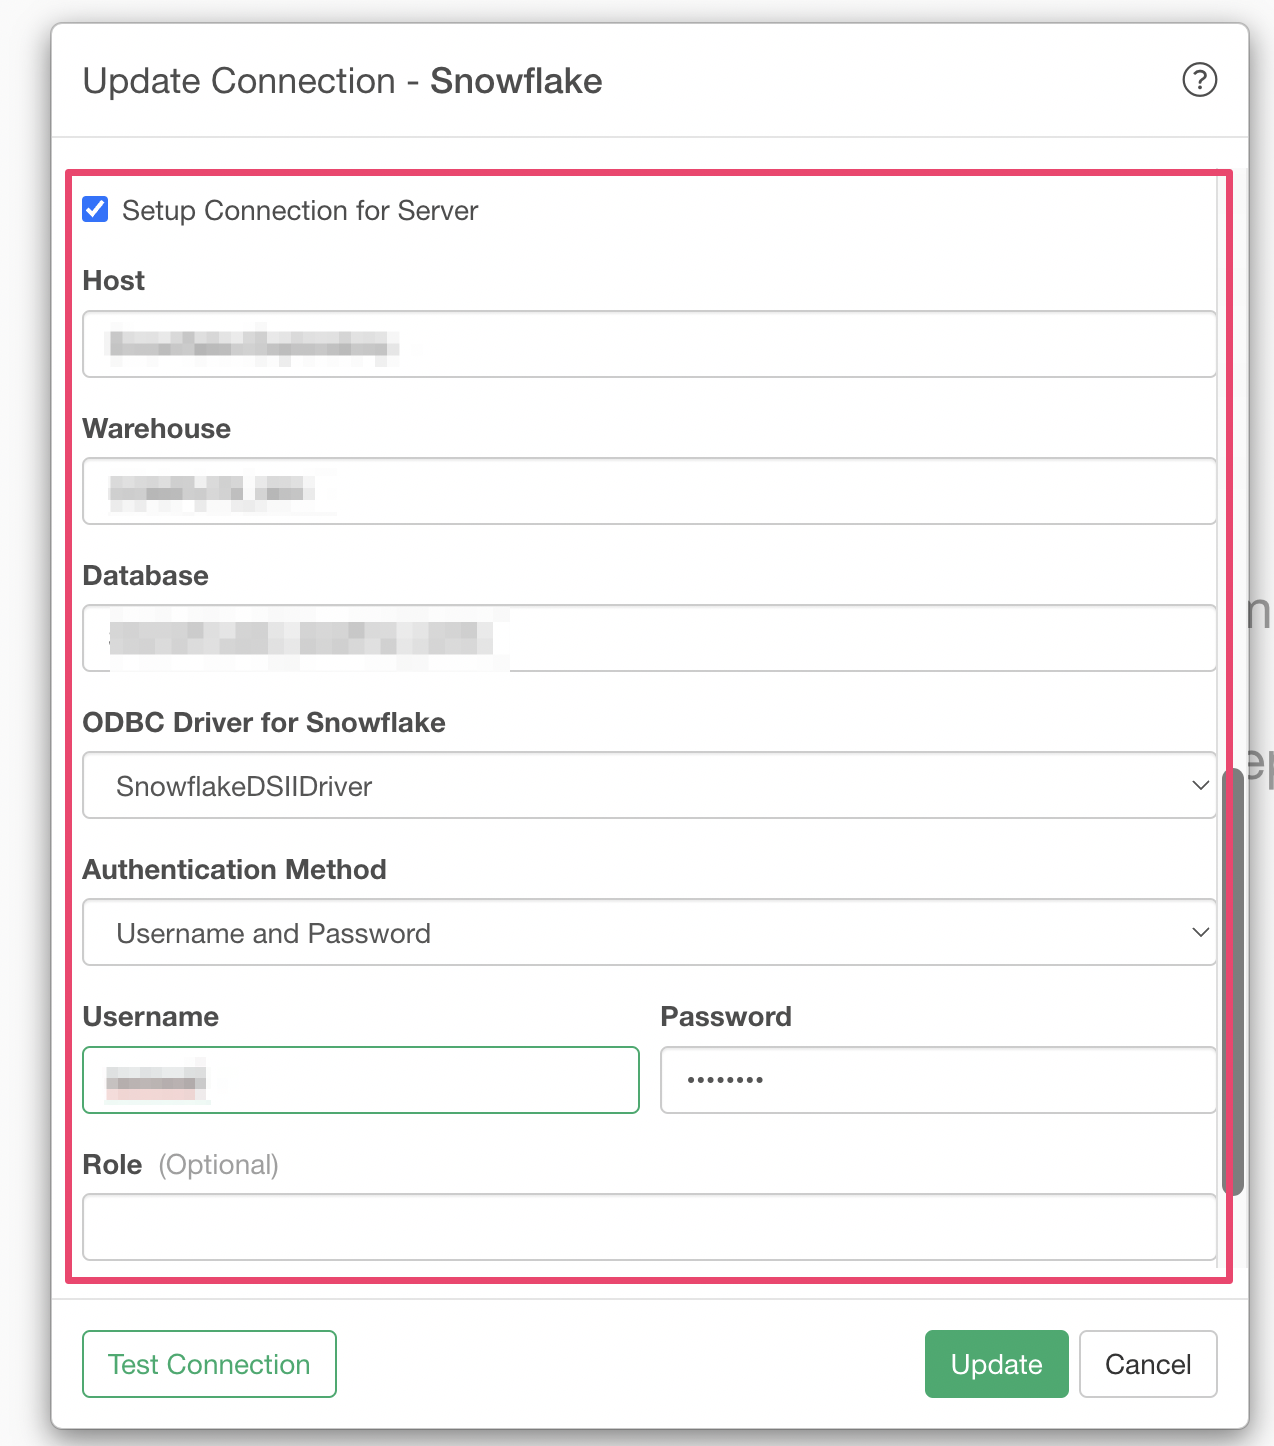
For example, by having all team members enter the connection information of a representative (account) here, regardless of who publishes content to the server, the configured representative’s connection will be used.
Such configuration makes it possible to avoid multi-factor authentication notifications being sent to various people and enables operations where authentication notifications are sent to one person.