SaaS KPI Series - Expansion & Contraction
Expansion and contraction are key metrics that reflect revenue changes driven by existing customers upgrading or downgrading their plans. These metrics are especially important for customer success and sales teams, as they directly influence net revenue growth and help offset the impact of customer churn.
These metrics should be monitored monthly and can also be used as indicators reflecting customer usage status and satisfaction.
SaaS Services with Multiple Pricing Plans
Like Dropbox, many SaaS companies offer multiple pricing plans based on the services they provide.
Expansion
To simplify the discussion, imagine a SaaS service with two monthly fee plans:
- Standard Plan ($100 per month)
- Premium Plan ($200 per month)
If two customers upgrade from the Standard Plan to the Premium Plan between January and February, the MRR (Monthly Recurring Revenue) for March will increase by $200.
This revenue increase due to upgrades is called Expansion, and when aggregated monthly, it’s called Expansion MRR.
Contraction
On the other hand, while some customers upgrade, others downgrade their plans.
If one customer downgrades from the Premium Plan to the Standard Plan between January and February, the MRR for March will decrease by $100.
This results in a reduction in the following month’s revenue compared to what was originally expected.
This revenue decrease due to downgrades is called Contraction, and when aggregated monthly, it’s called Contraction MRR.
How to Calculate Expansion and Contraction
Now, let’s look at how to calculate expansion and contraction using actual data.
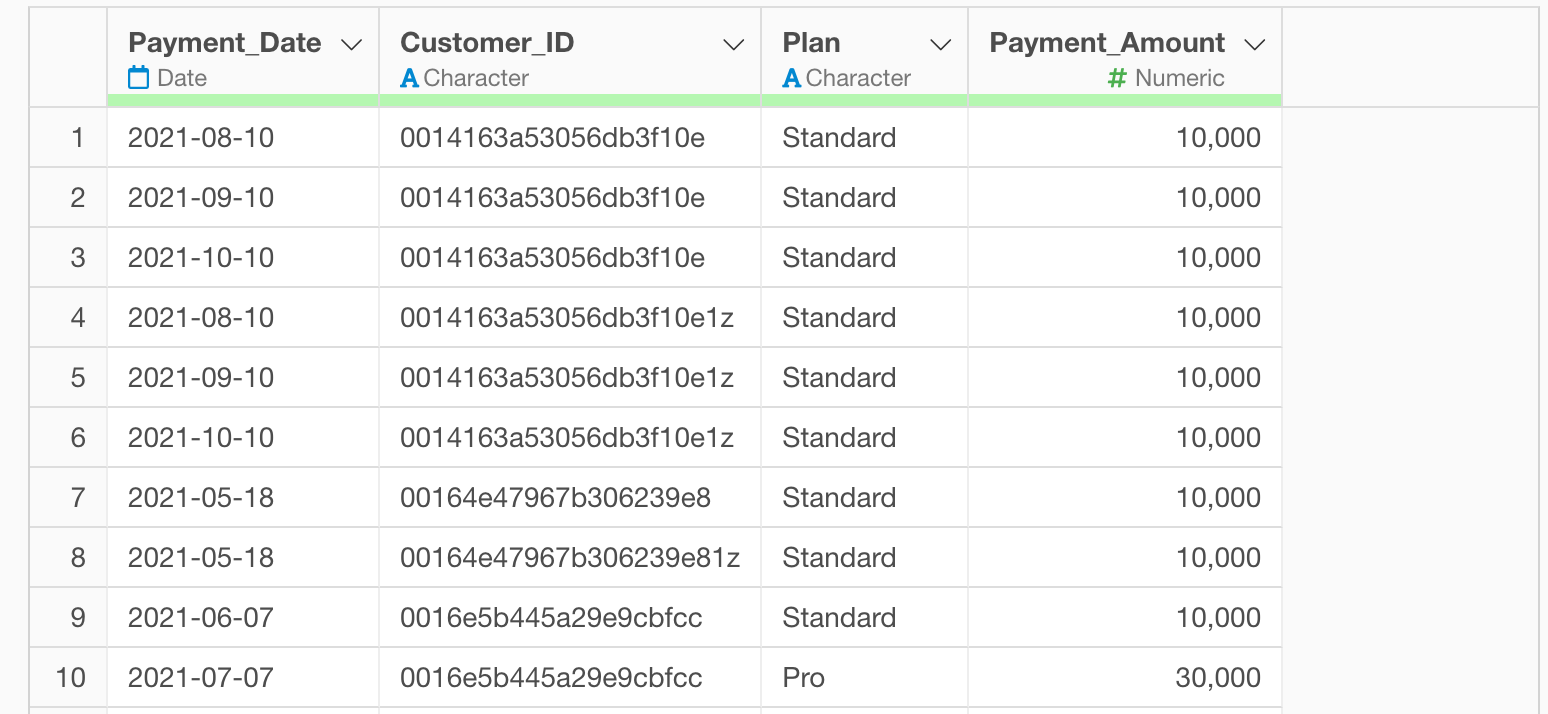
In this example, we’ll use payment data from a subscription business where each row represents one payment transaction, including Customer_ID, Payment_Date, Payment _Amount, and other information. (You can download the data from this page)
In Exploratory, there are two methods for creating metrics:
- AI Prompt: Creating metrics using natural language processing
- UI Menu: Creating metrics by processing data through menus accessible from the UI
This note will introduce both methods.
“AI Prompt” is only available for users with paid licenses such as Business Plan or Personal Plan, or users who are currently trialing these plans.
Also, AI Prompt is only available when your device is connected to the internet.
If you are not using the above plans or are using a device not connected to the internet, please proceed to the “Calculate Expansion and Contraction with UI” section.
Calculate Expansion and Contraction with AI Prompt
This section introduces how to create metrics using AI Prompt. (For details on AI Prompt, please see here.)
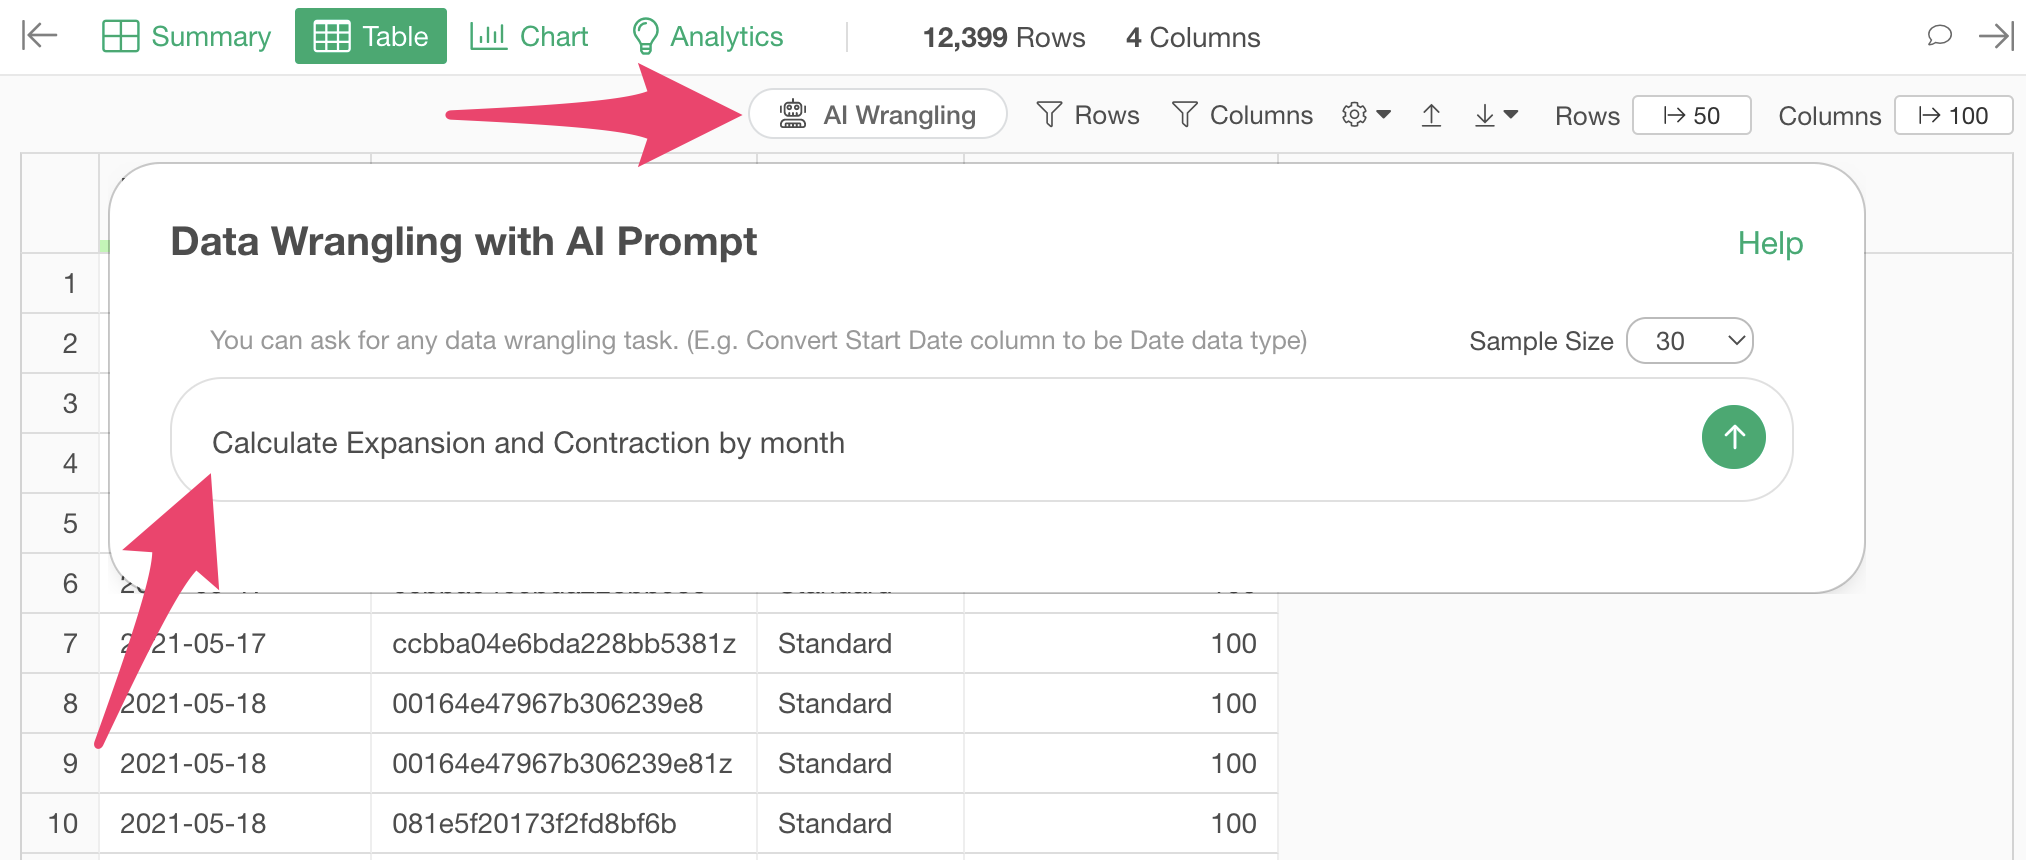
Click the “AI Wrangling” button. When the AI Prompt dialog appears, enter a prompt like the one below and run it:
Calculate Expansion and Contraction by month
Code to calculate expansion and contraction will be generated. Check the results and click the “Run as Step” button.
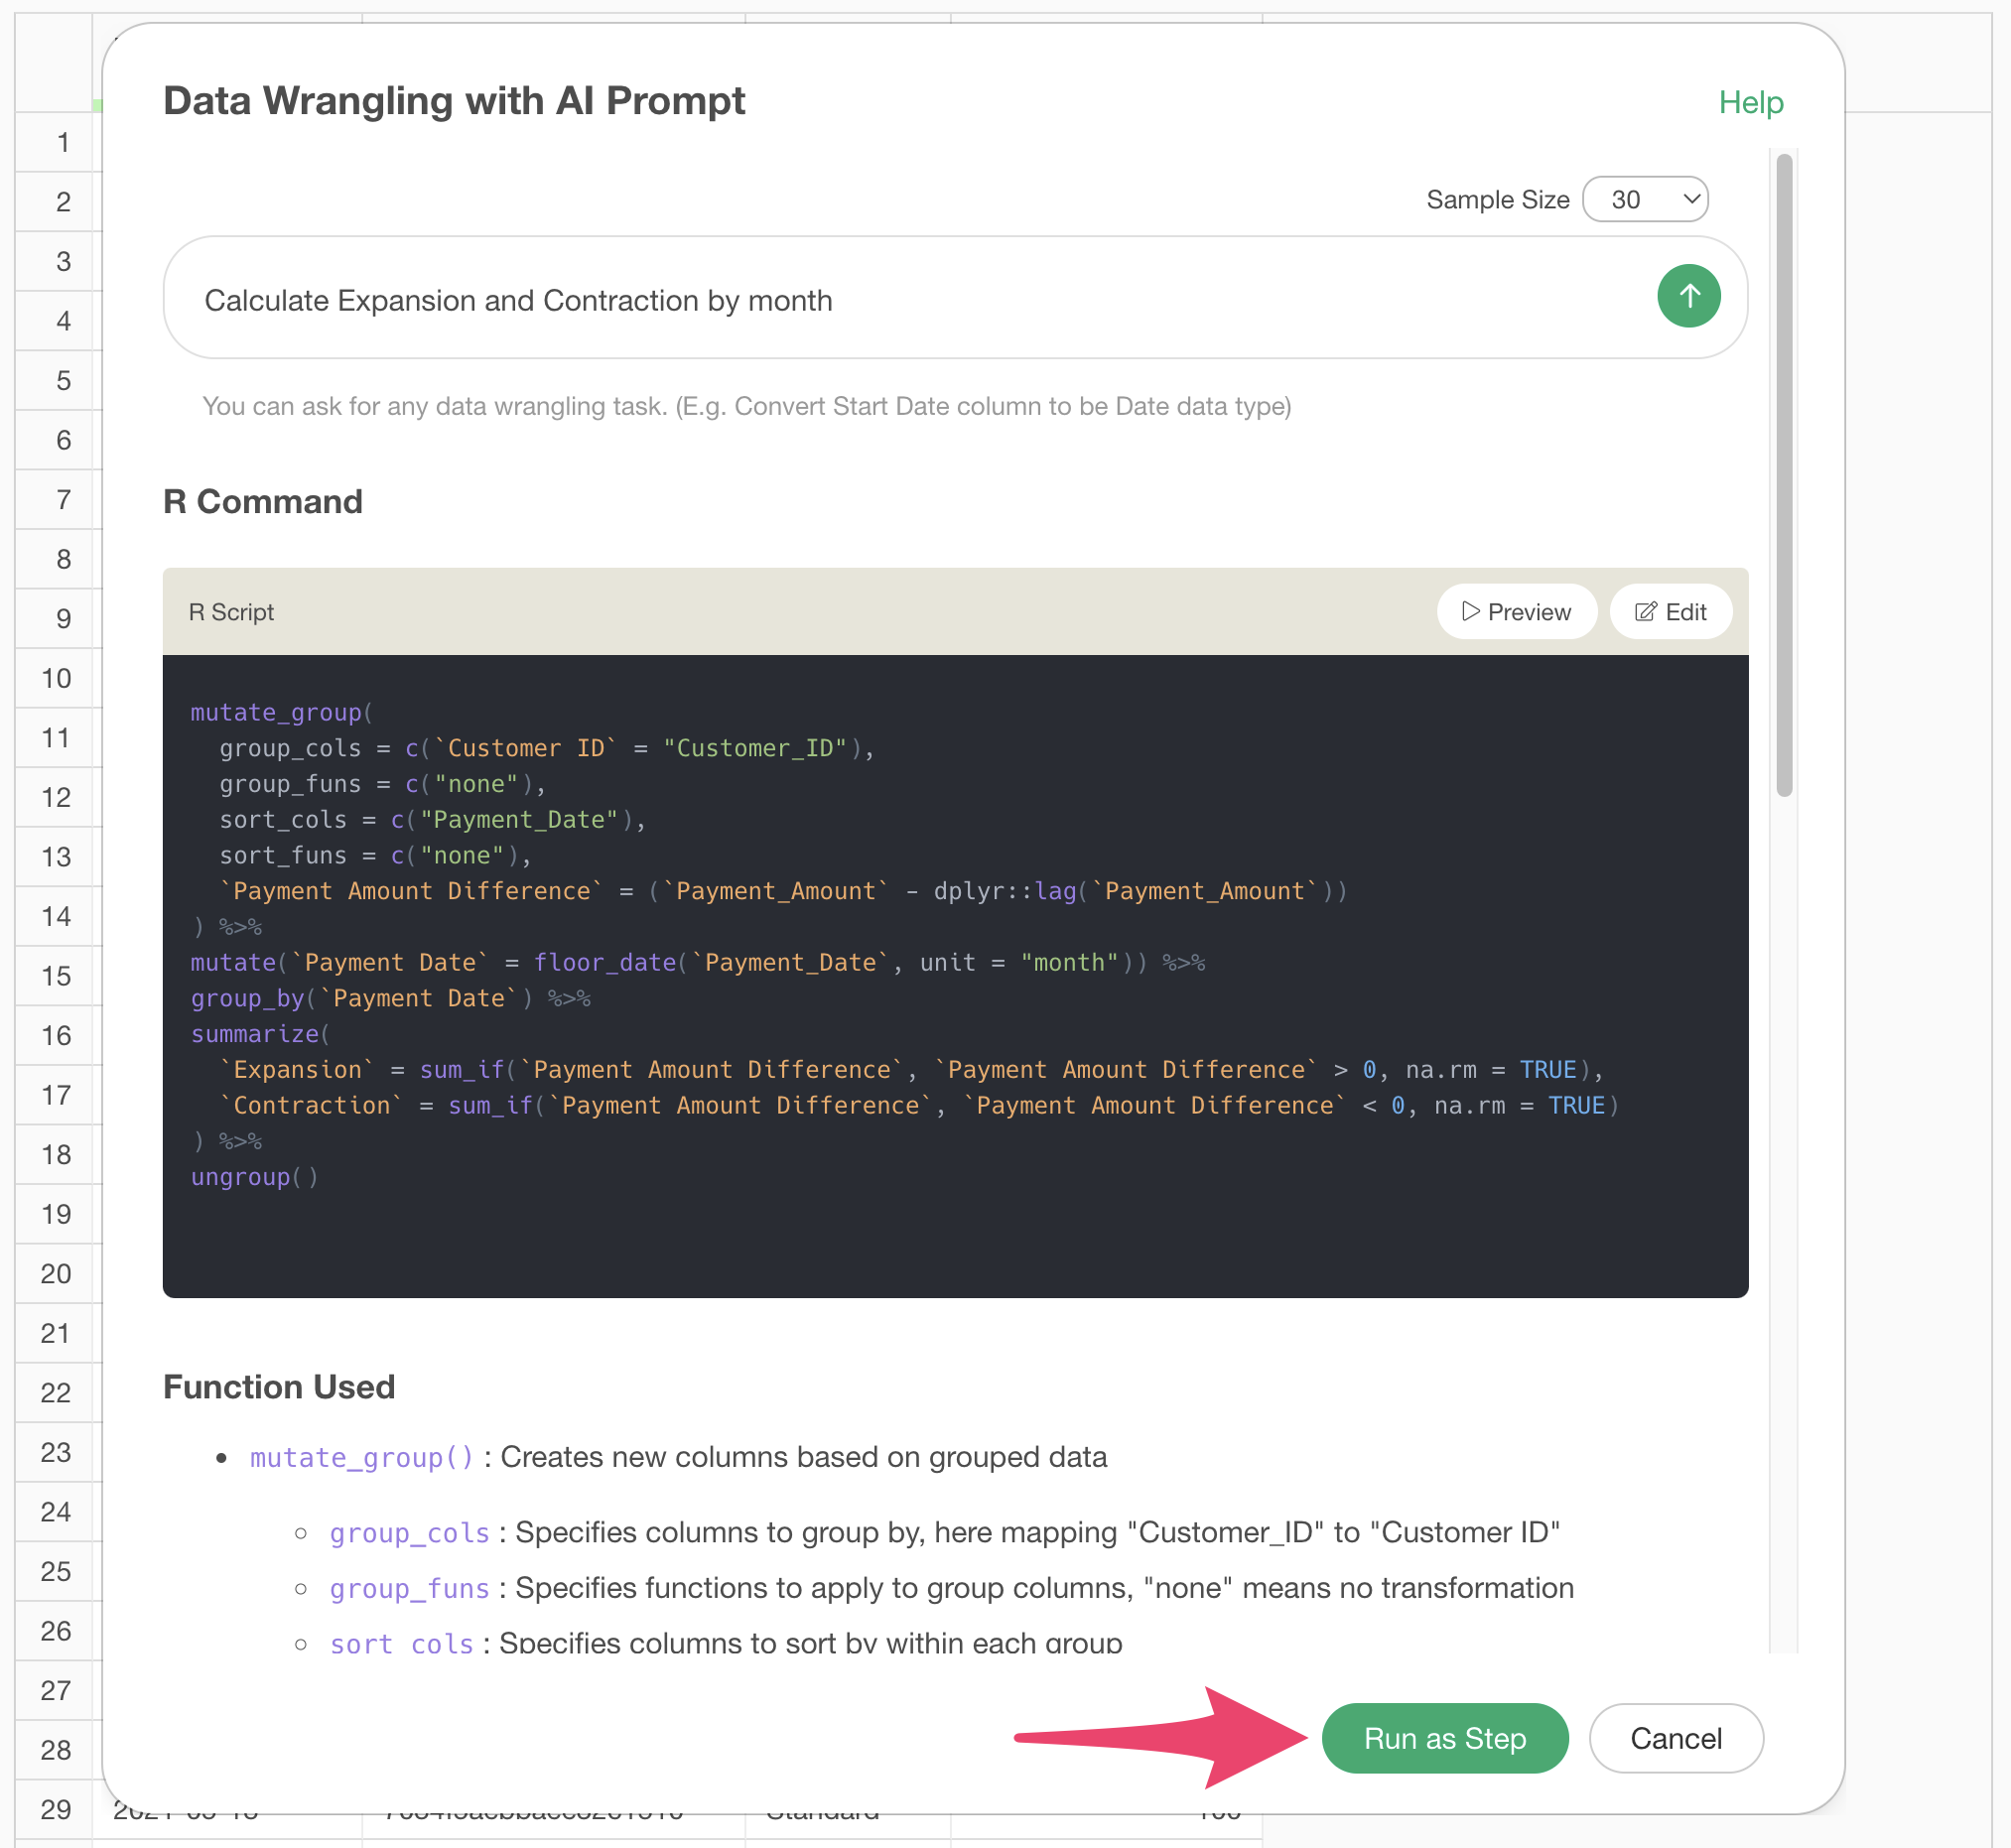
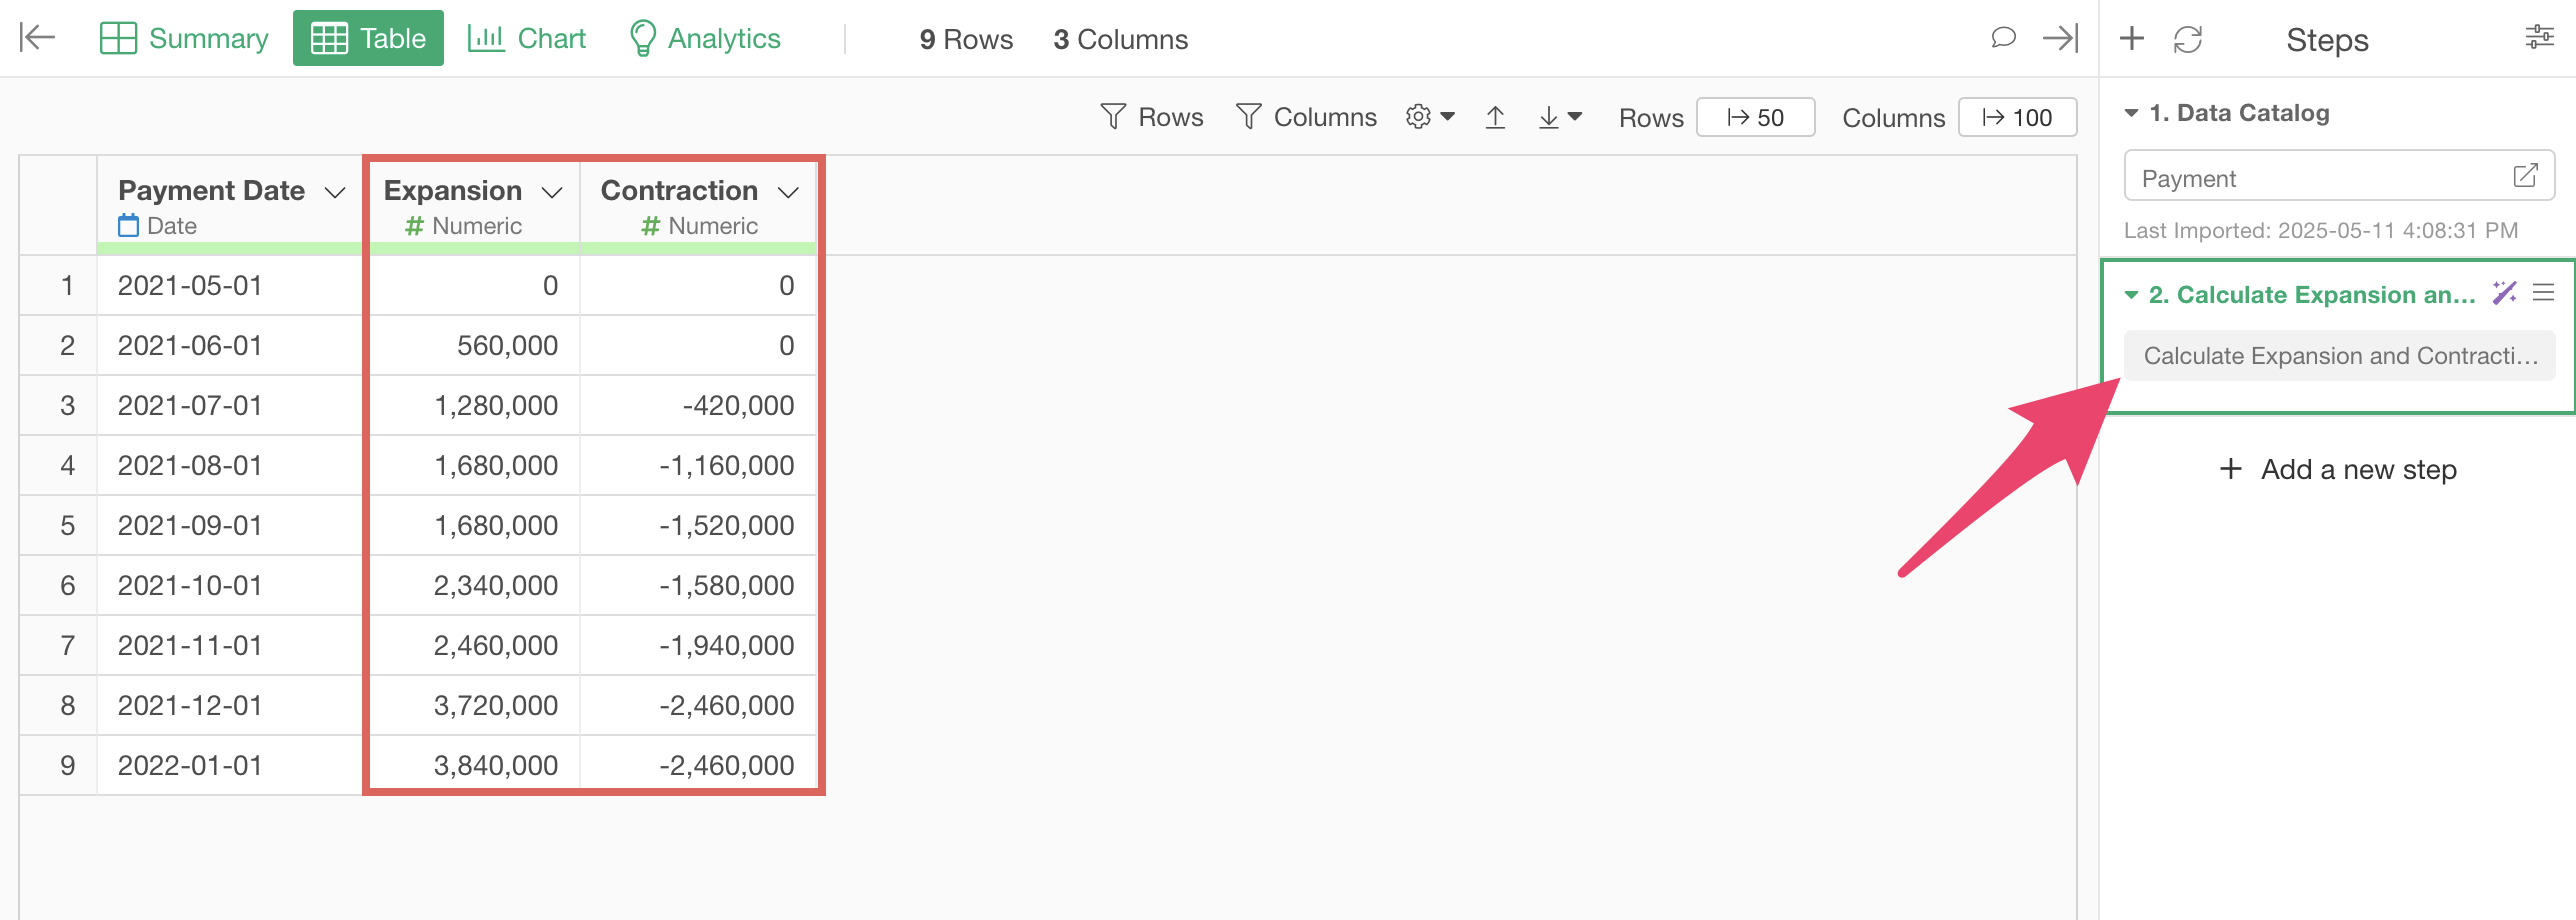
The step is added, and expansion and contraction have been calculated.
Calculate Expansion and Contraction with UI
Now let’s look at how to calculate expansion and contraction using the UI.
When using payment data like this, expansion and contraction are calculated in the following steps:
- Calculate changes in payment amounts for each customer
- Aggregate “increased payment amounts” as expansion and “decreased payment amounts” as contraction
1. Calculate changes in payment amounts for each customer
As mentioned earlier, expansion is the increased revenue from the previous month (or year) due to plan upgrades, and contraction is the decreased revenue due to plan downgrades.
Therefore, we can calculate the difference in payment amounts for each customer from the previous payment, treating increases (greater than 0) as expansion and decreases (less than 0) as contraction.
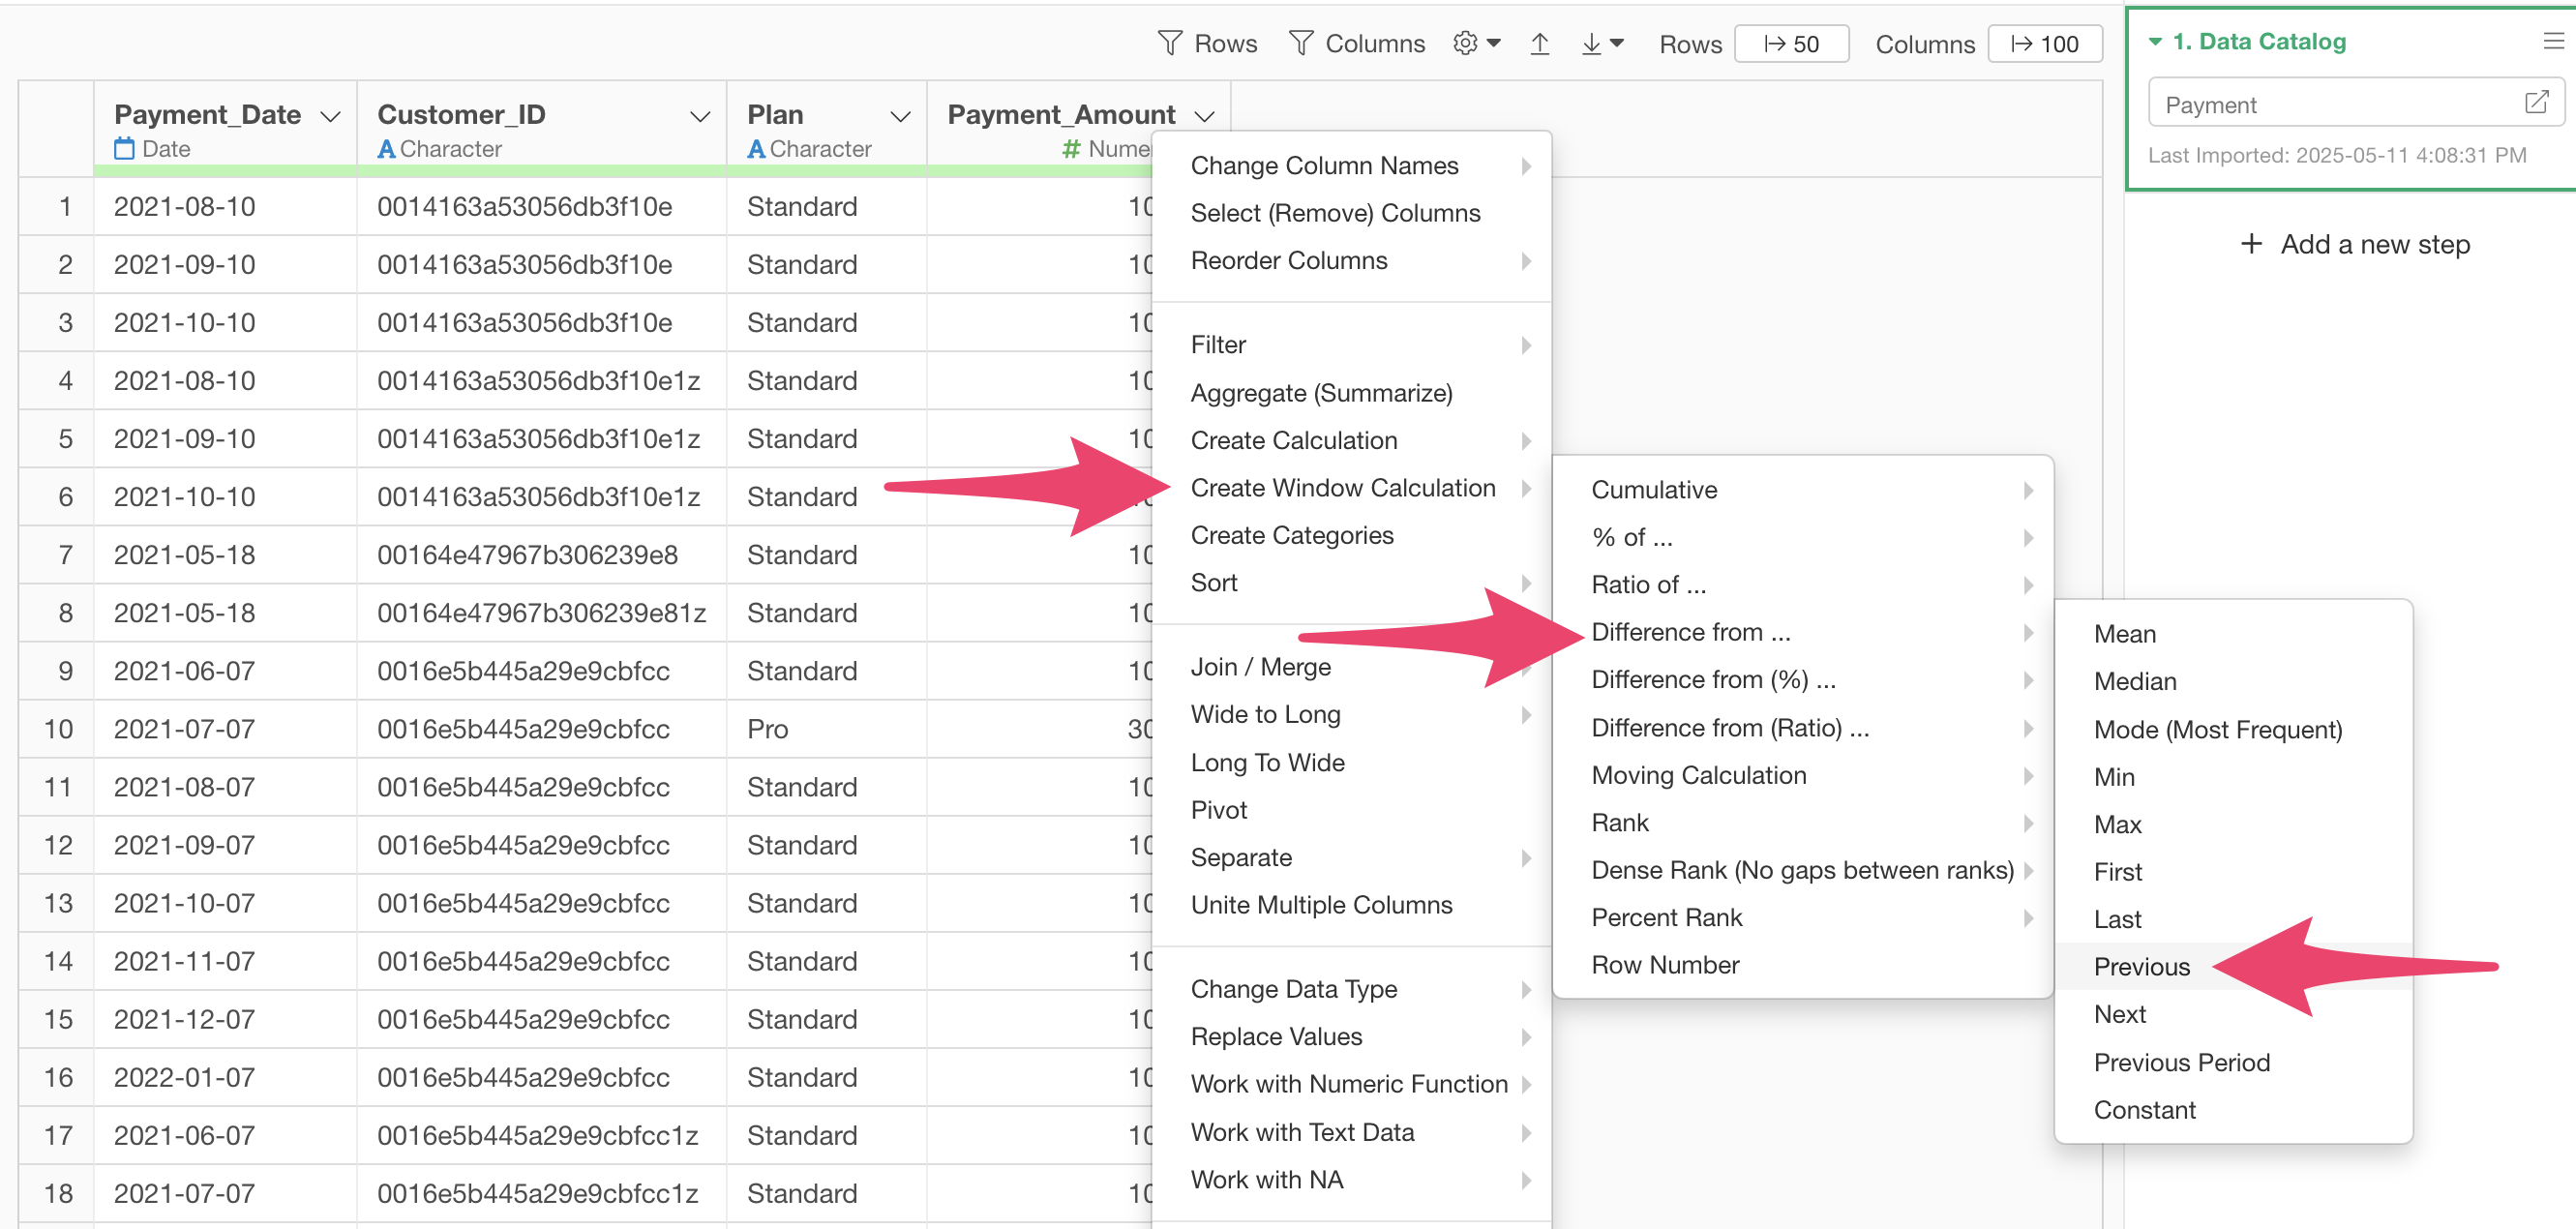
To calculate the difference in payment amounts from the previous payment for each customer, select “Create Window Calculation”, “Difference from…”, “Previous” from the “Payment_Amount” column header menu.
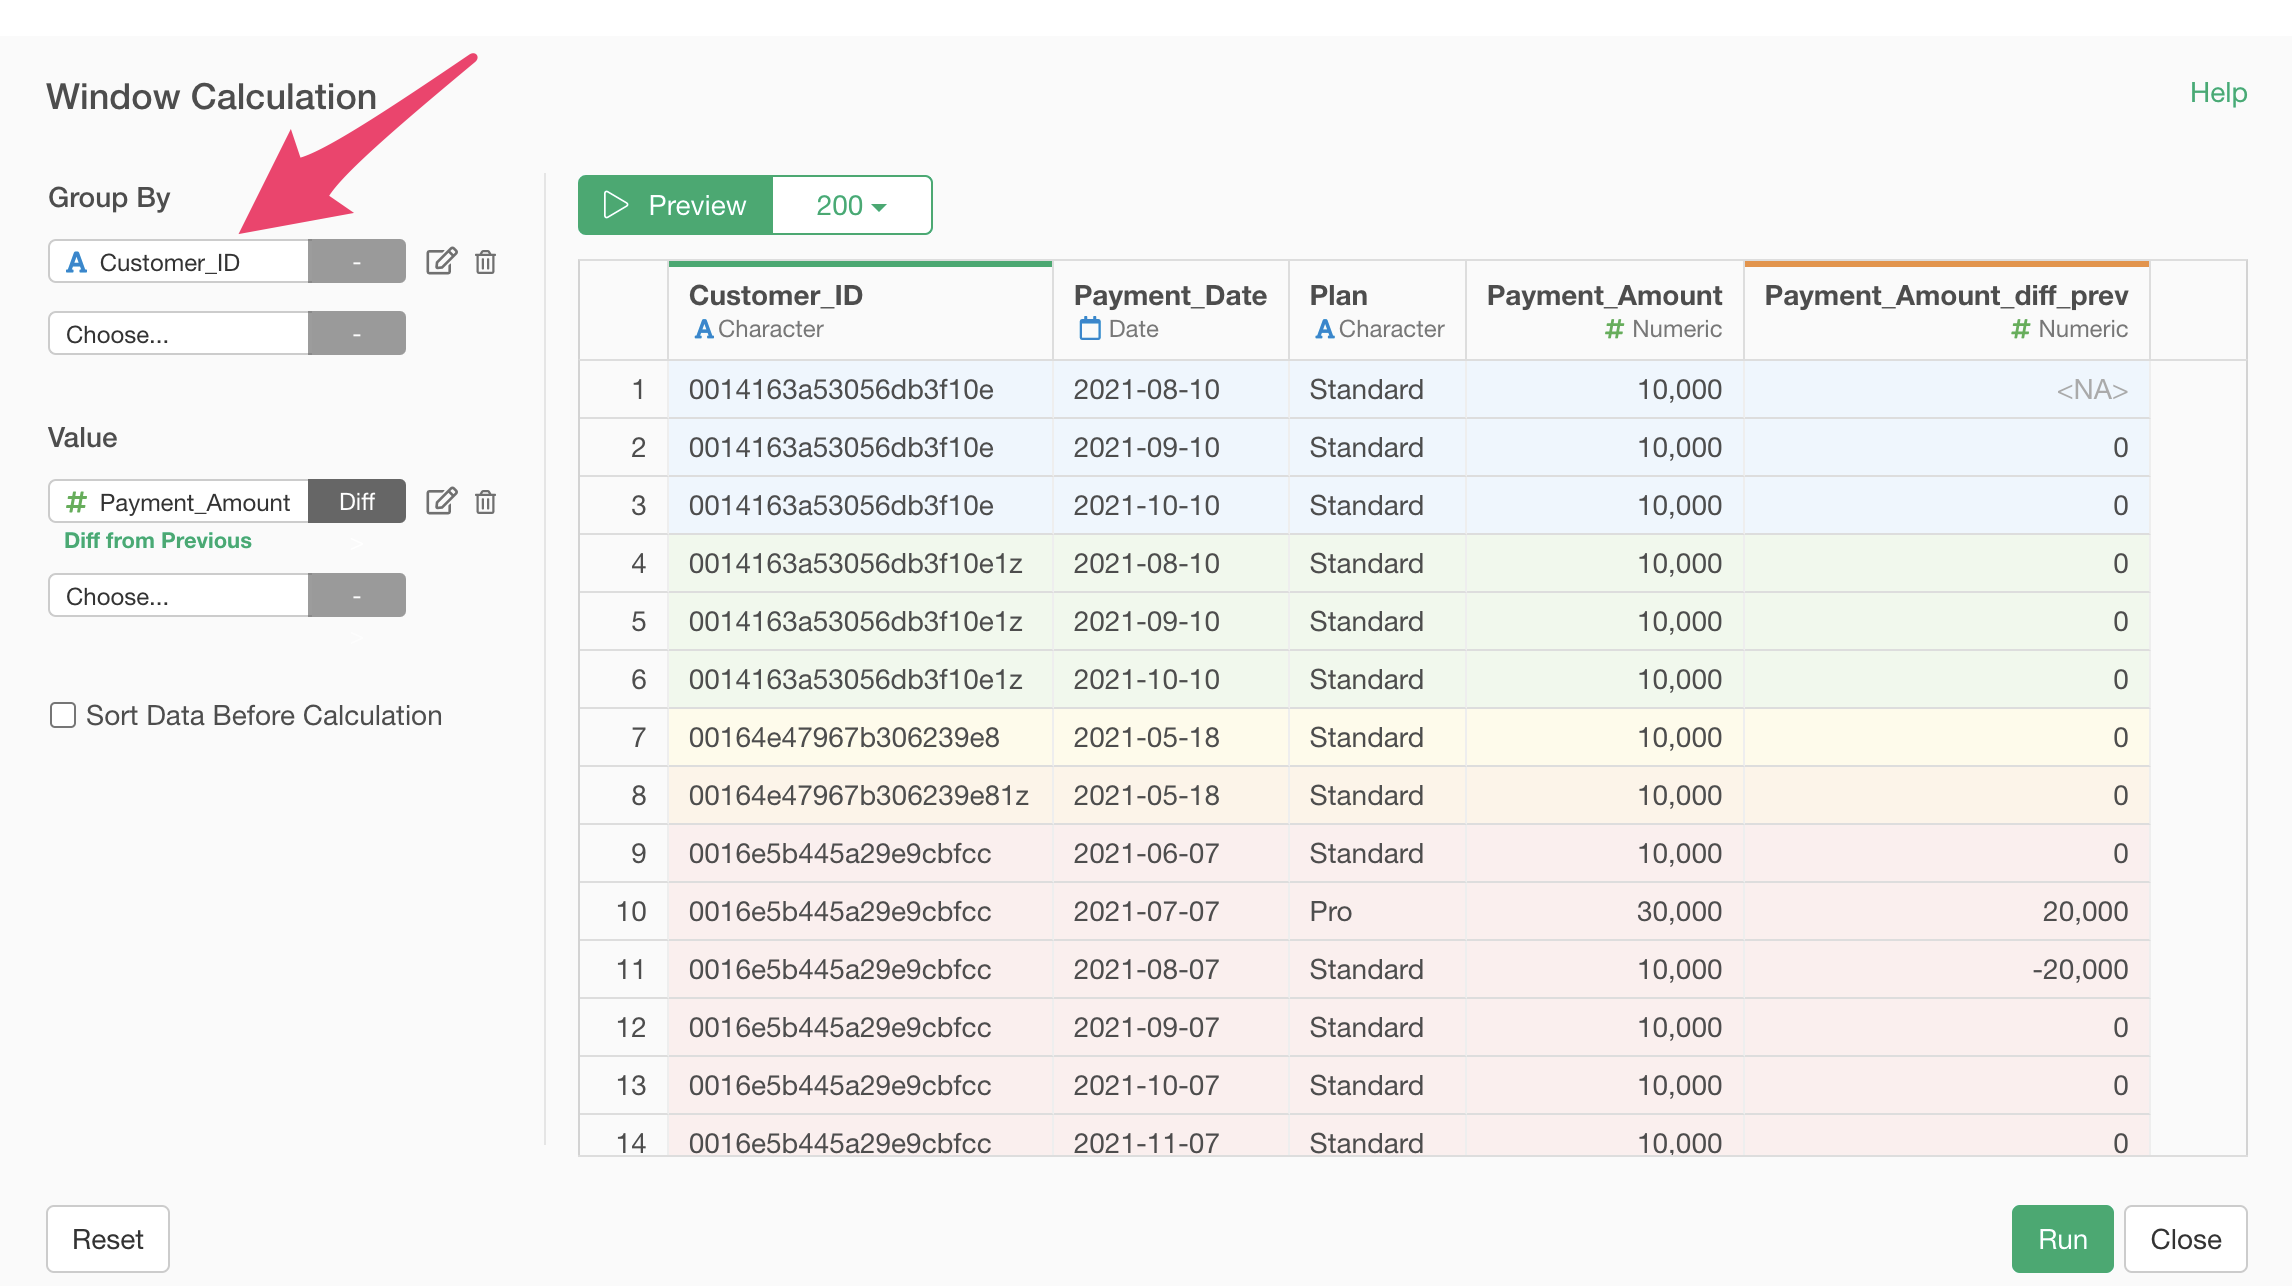
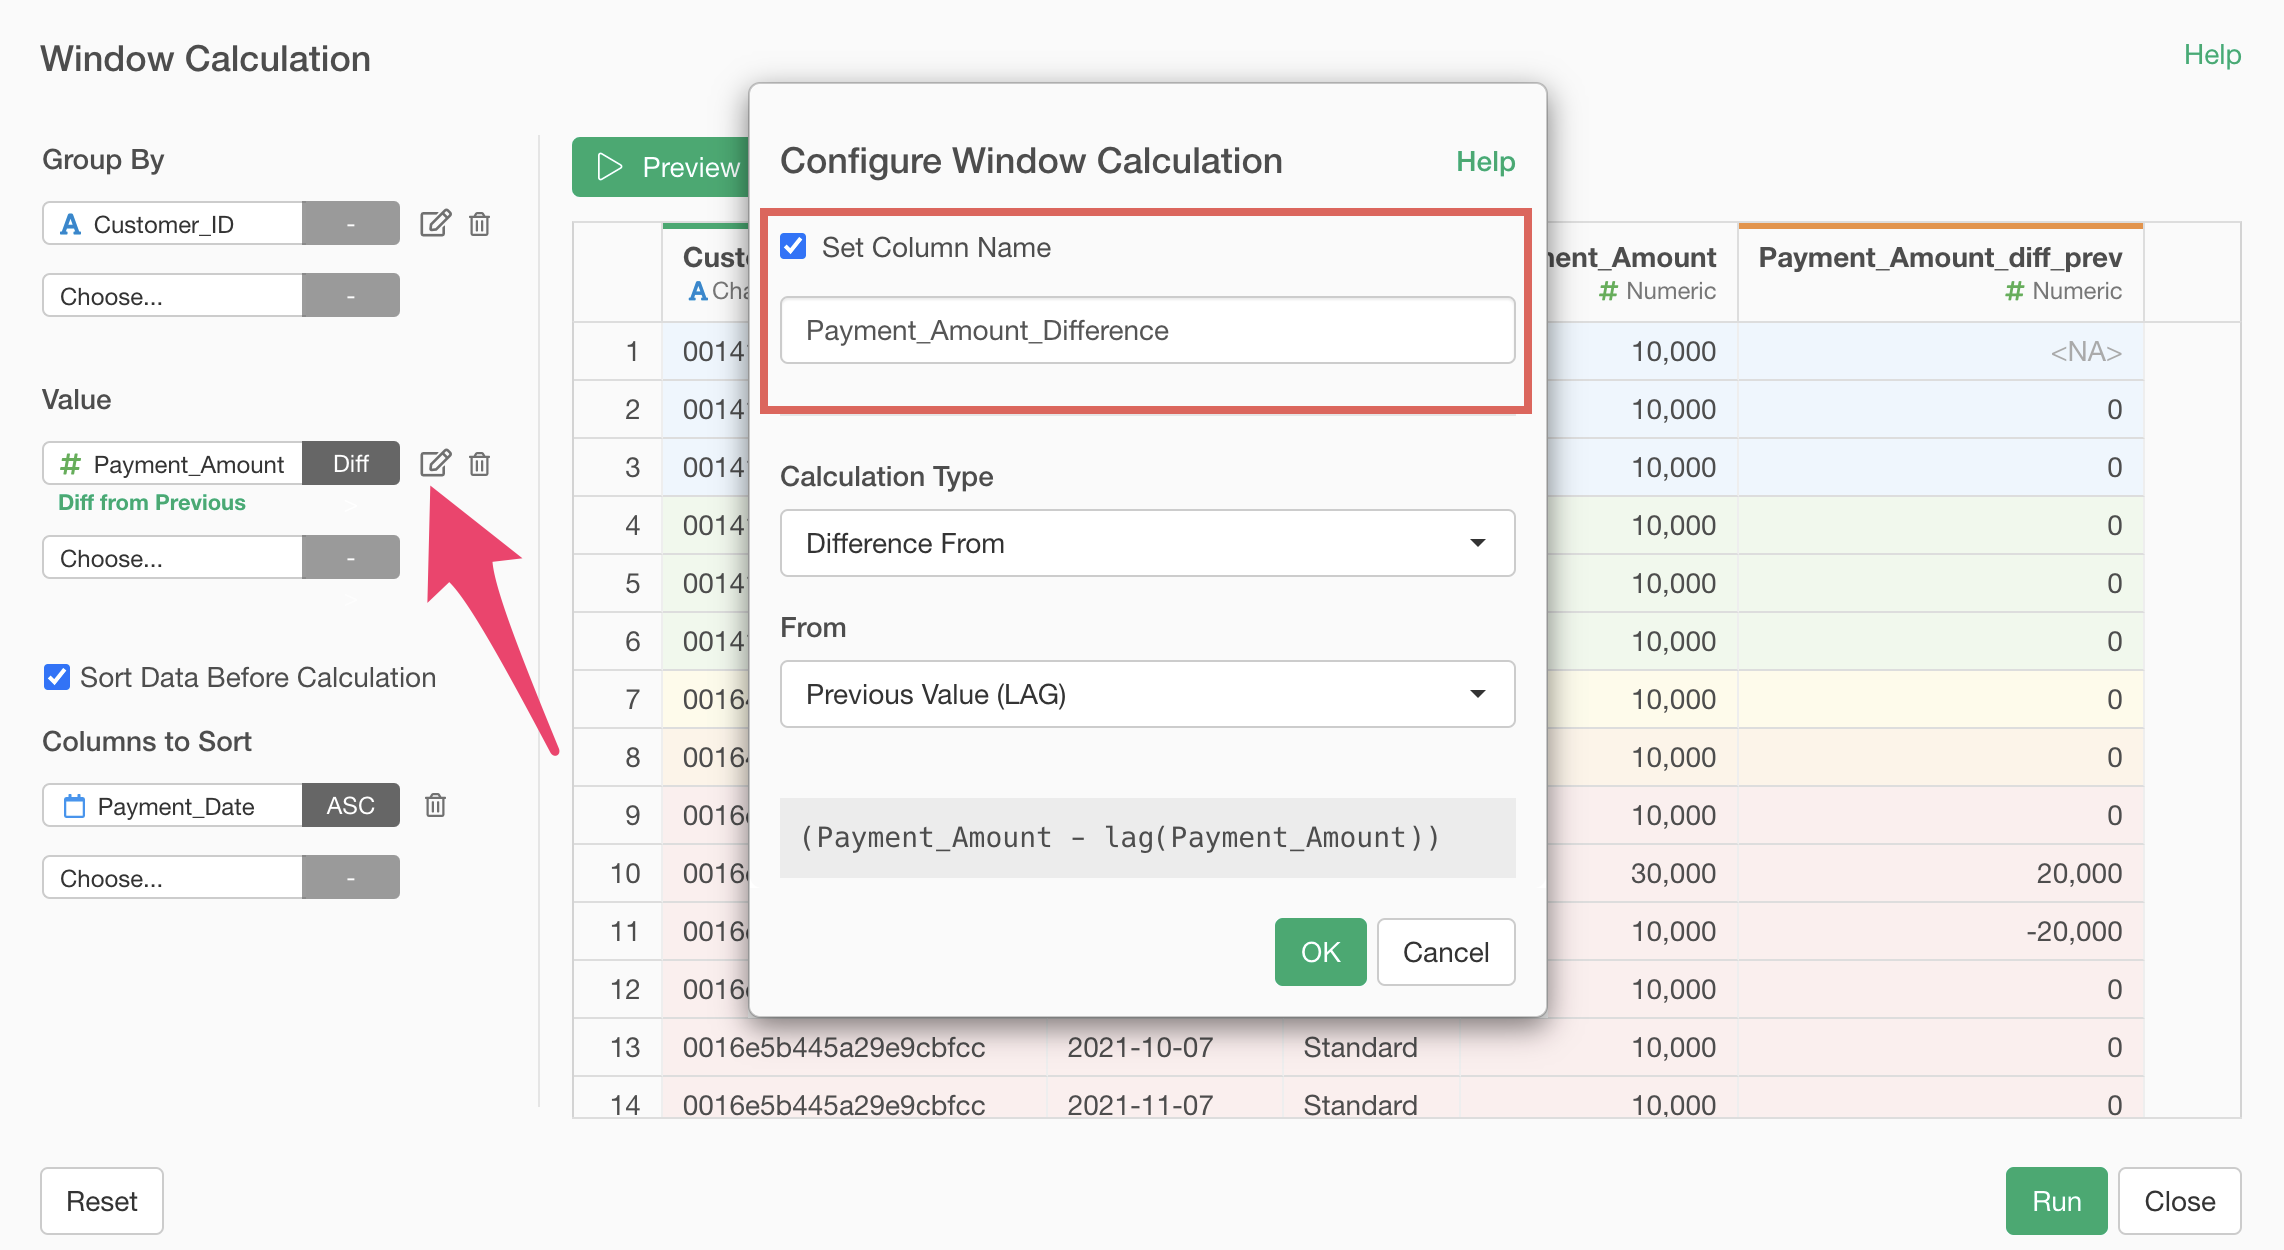
When the window calculation dialog opens, select “Customer_ID” for the group to calculate differences by customer, and click preview.
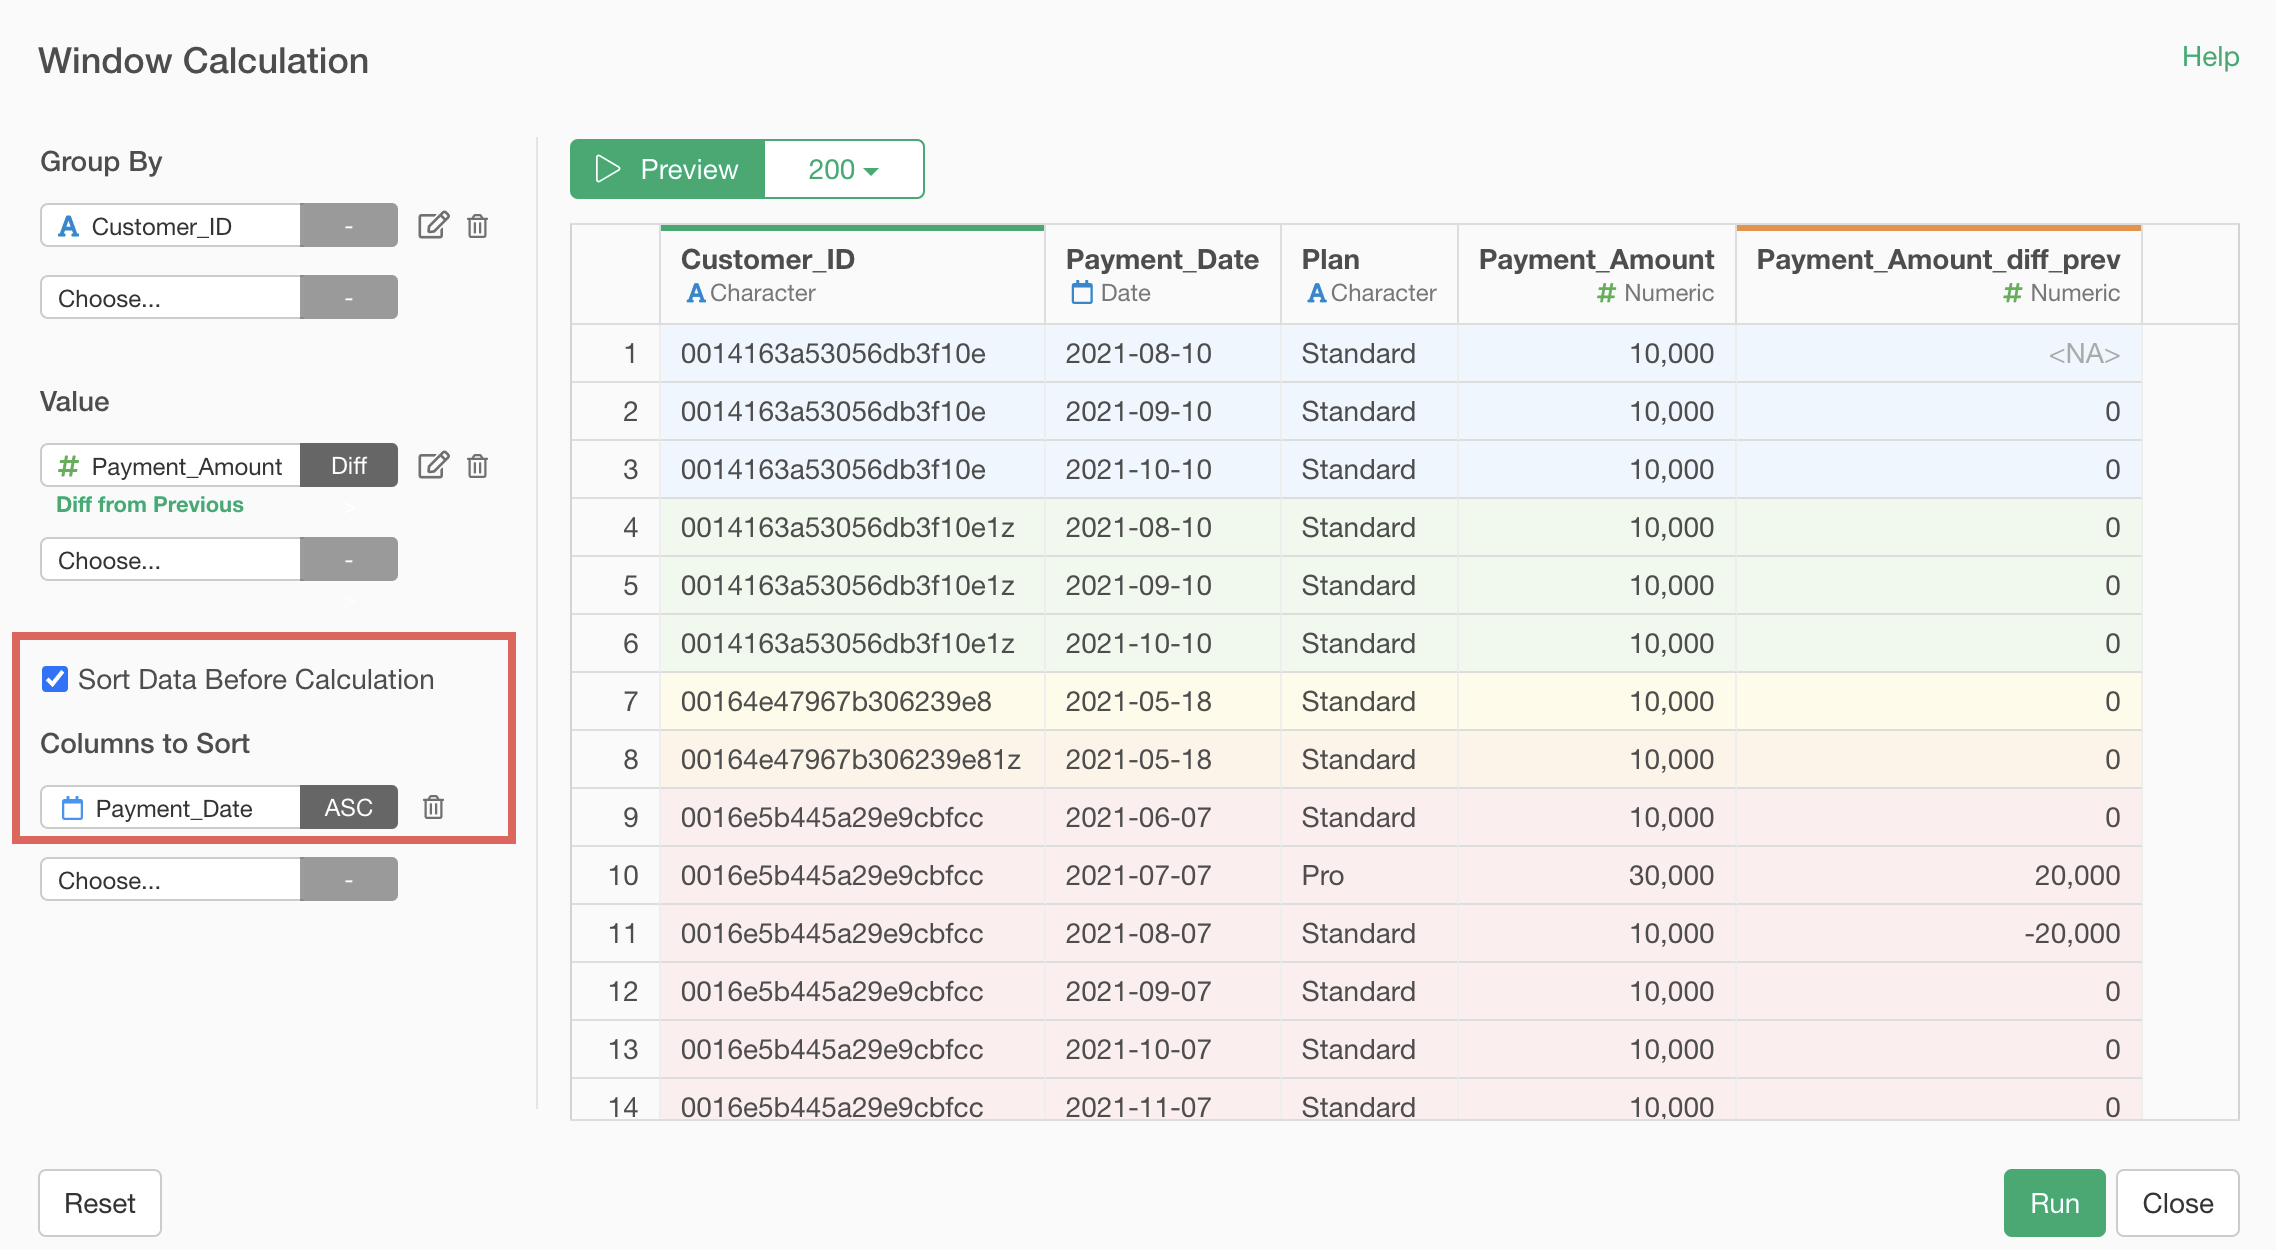
Since the data needs to be in date order to calculate the difference from the previous payment amount correctly, check “Sort Data Before Calculation”, select “Payment_Date” for the column to sort by, and select ascending order for the sort.
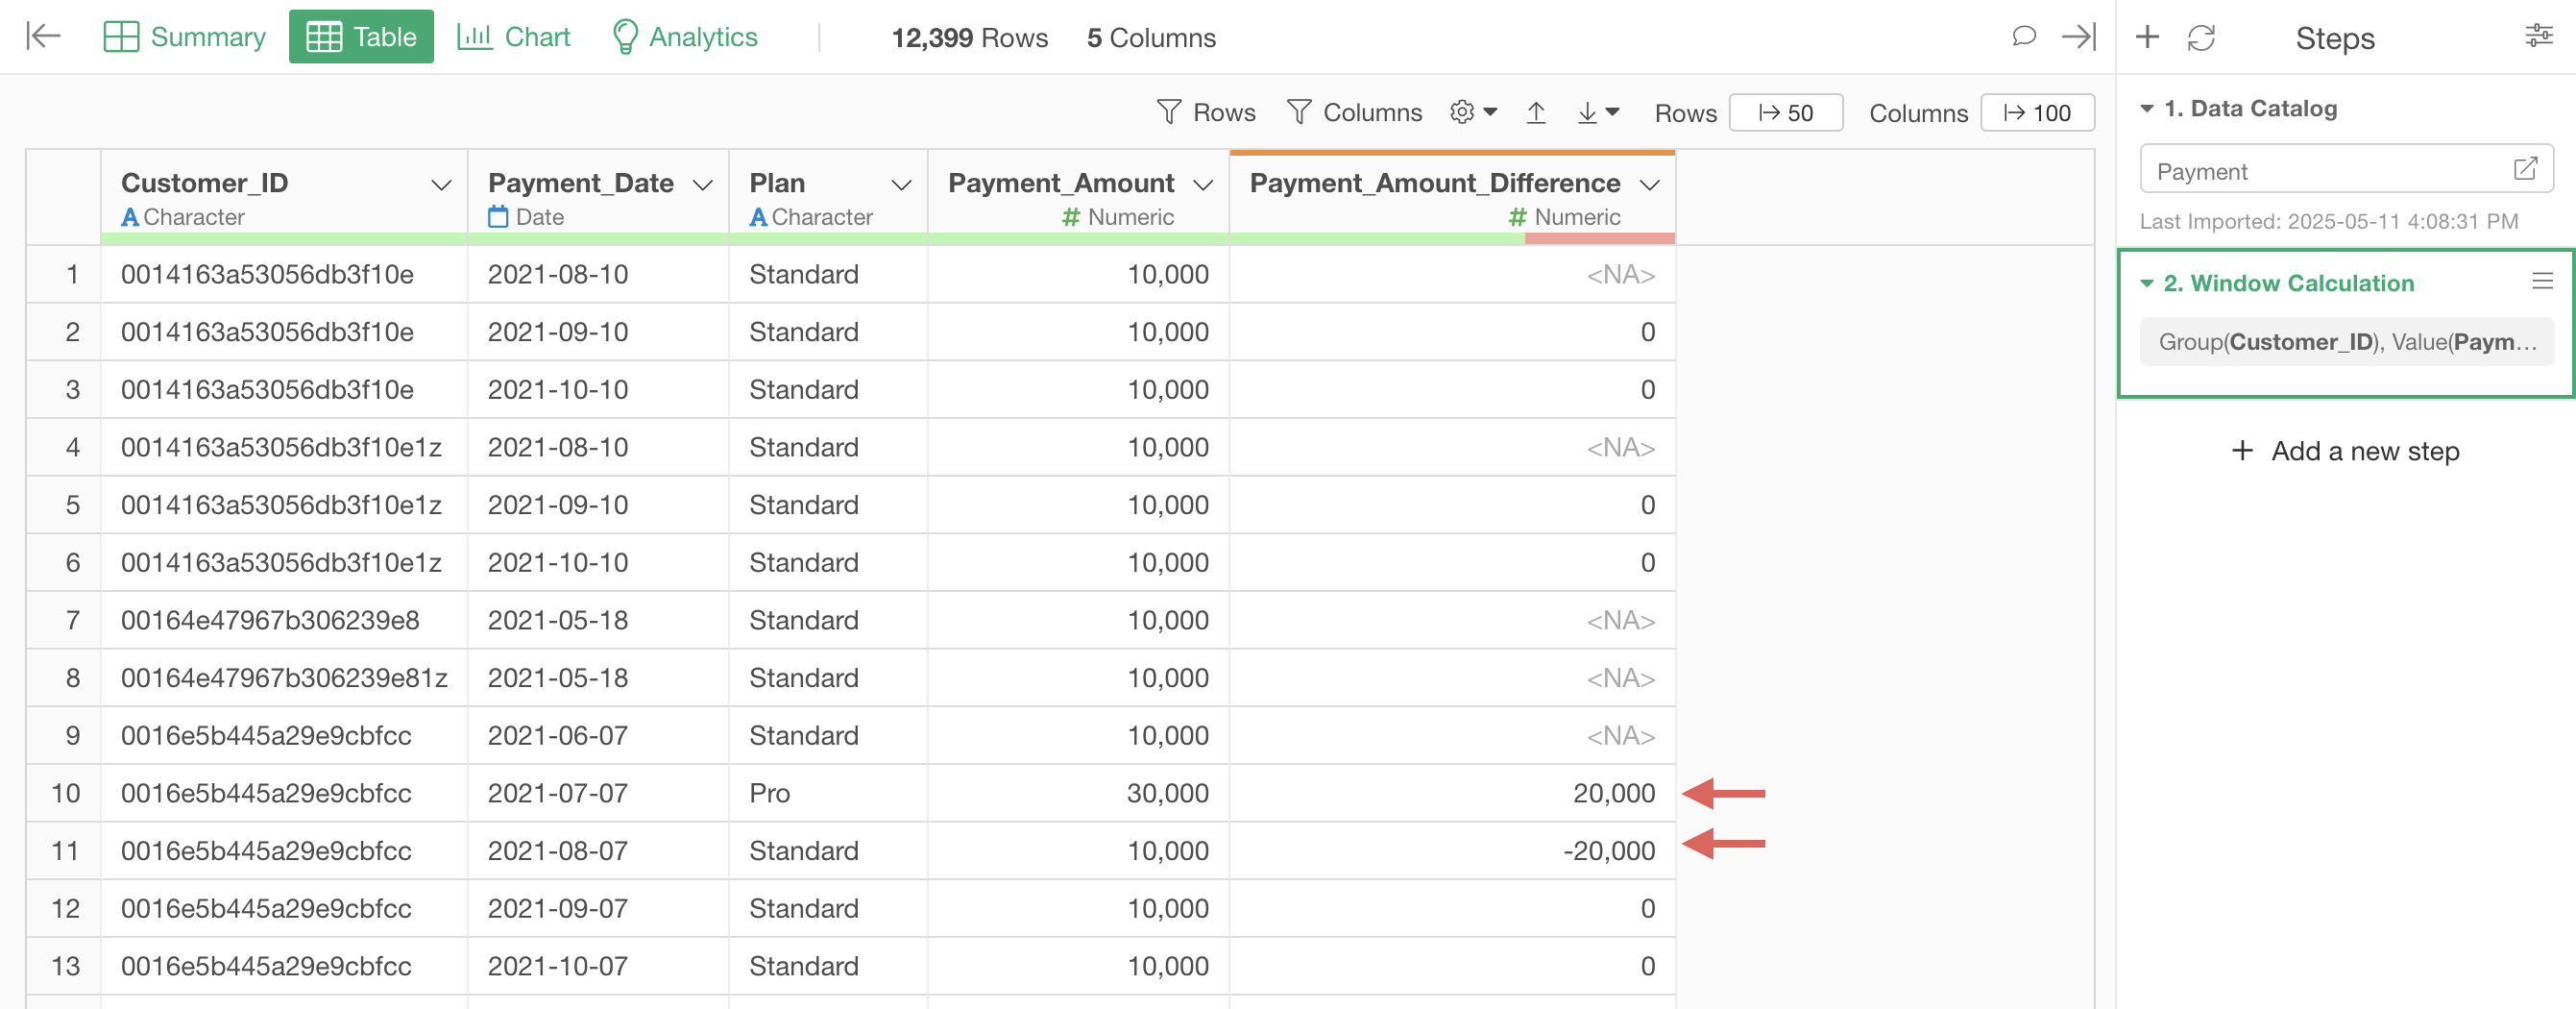
Finally, edit the column name to “Payment_Amount_Difference” and press the “Run” button.
Now we’ve calculated the “Payment_Amount_Difference” for each user. Values greater than 0 represent “Expansion”, and values less than 0 represent “Contraction”.
2. Aggregate “increased payment amounts” as expansion and “decreased payment amounts” as contraction
Next, we’ll create new columns for “Expansion” and “Contraction”, where the “Expansion” column will contain the value when “Payment_Amount_Difference” is greater than 0, and the “Contraction” column will contain the value when “Payment_Amount_Difference” is less than 0.
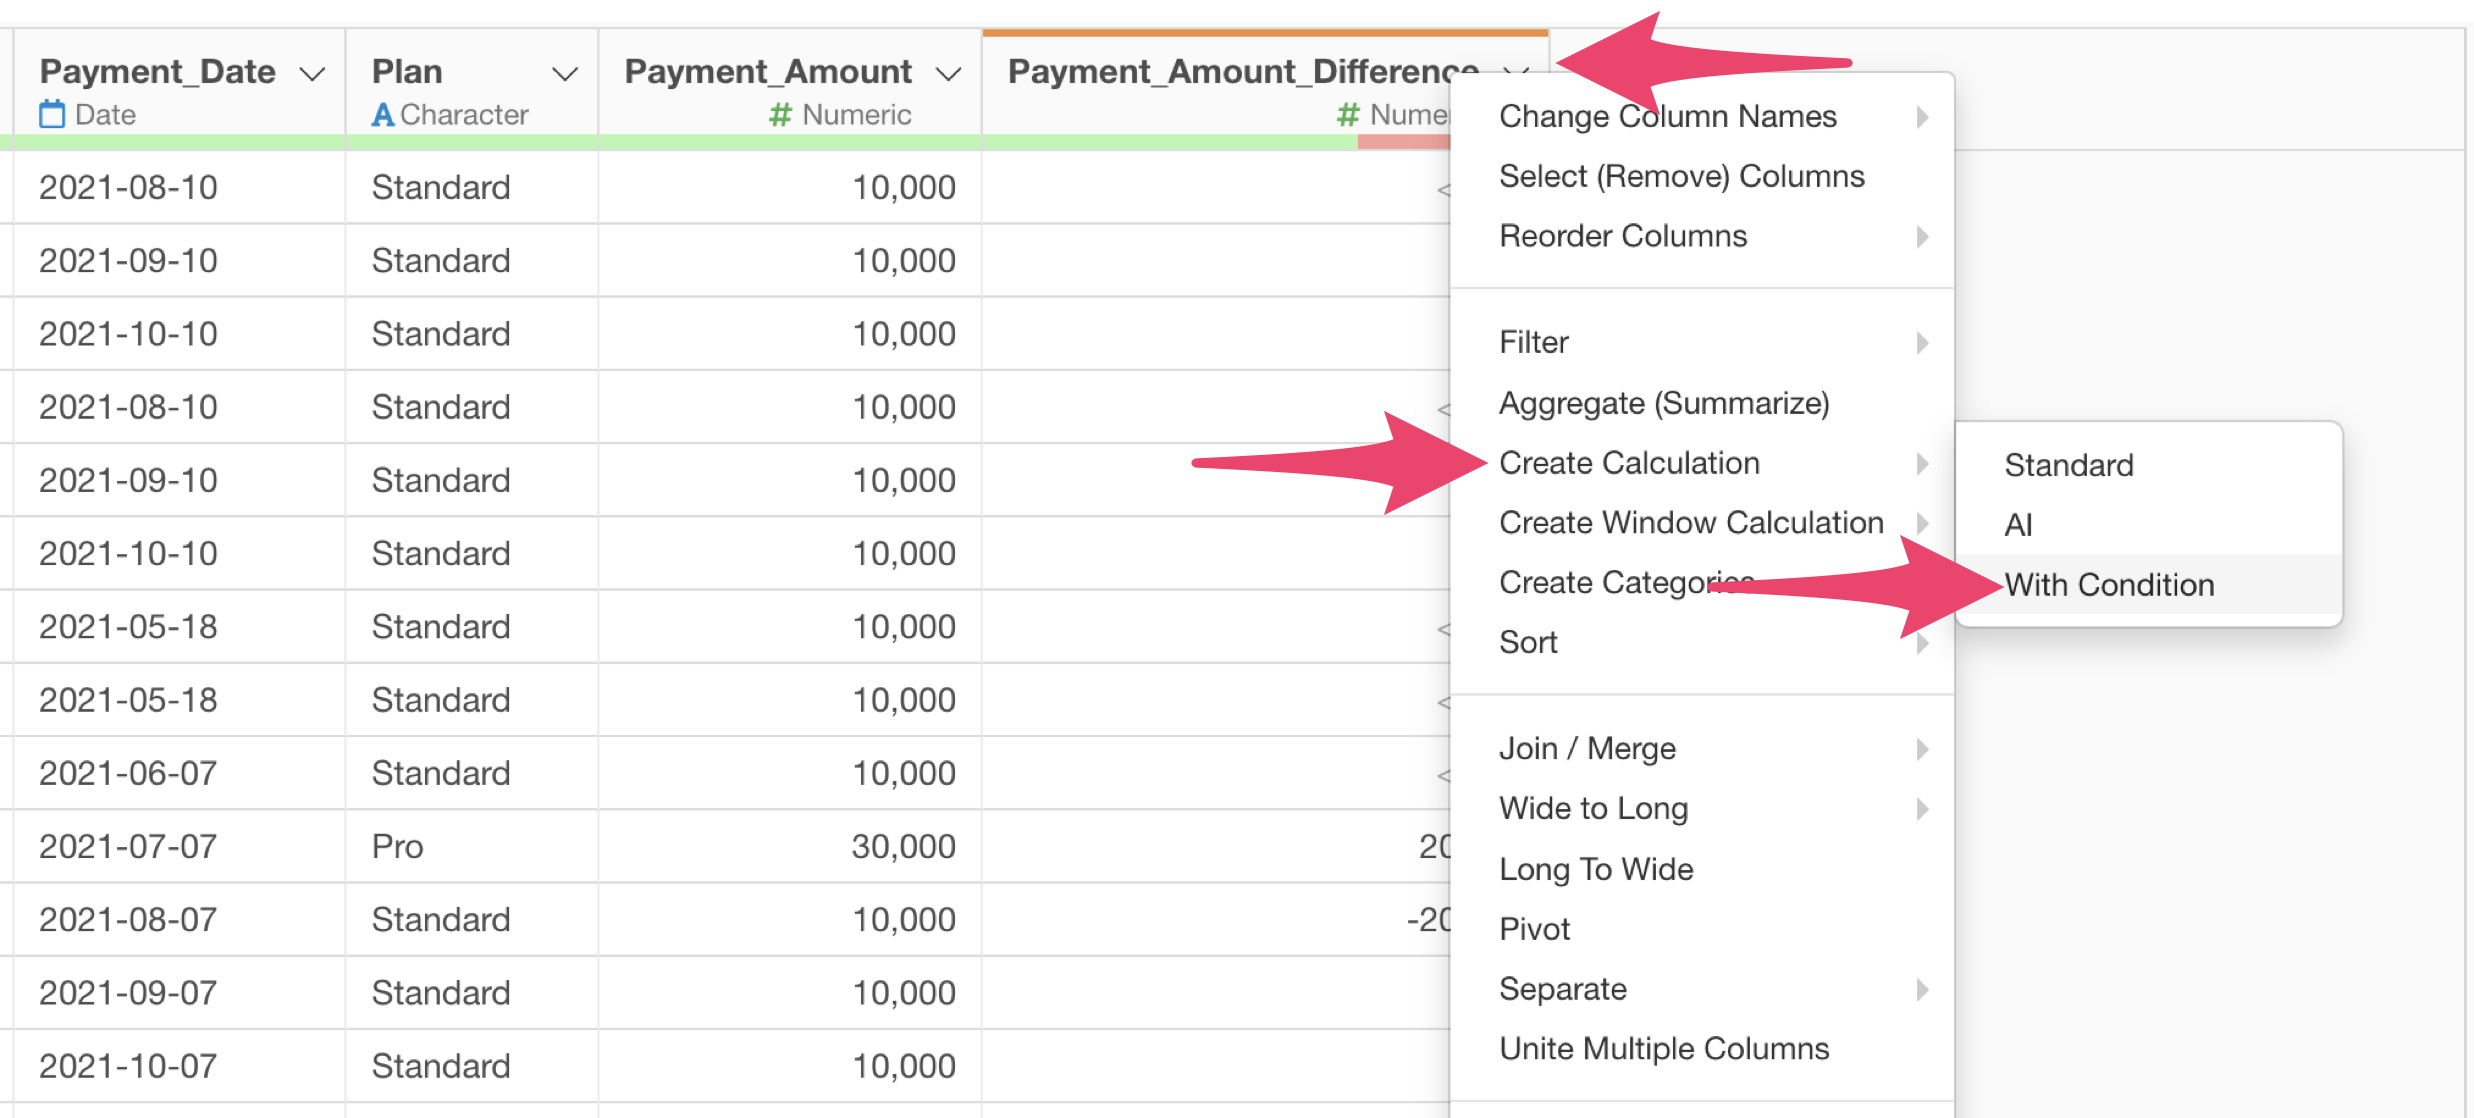
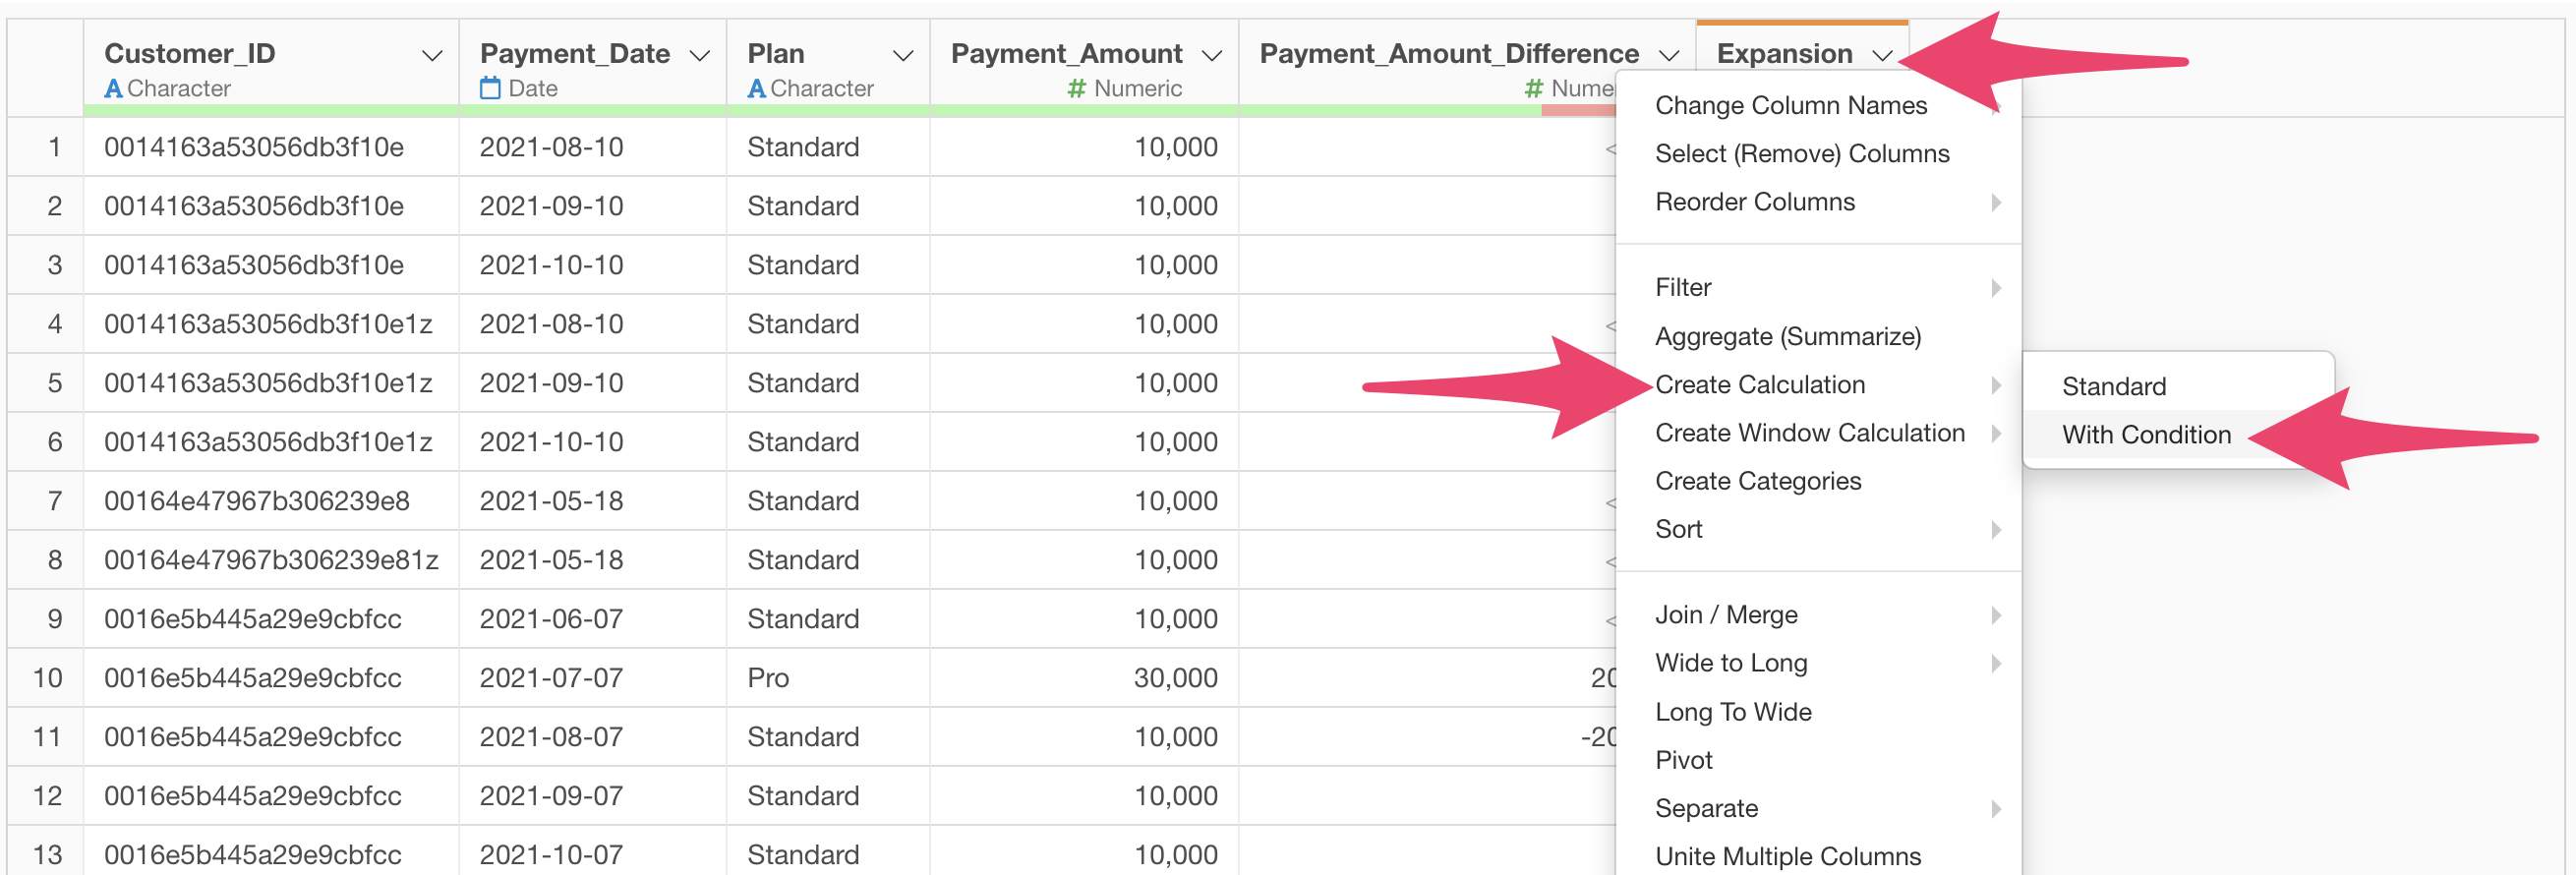
From the “Payment_Amount_Difference” column header menu, select “Create Calculation”, “with Condition”.
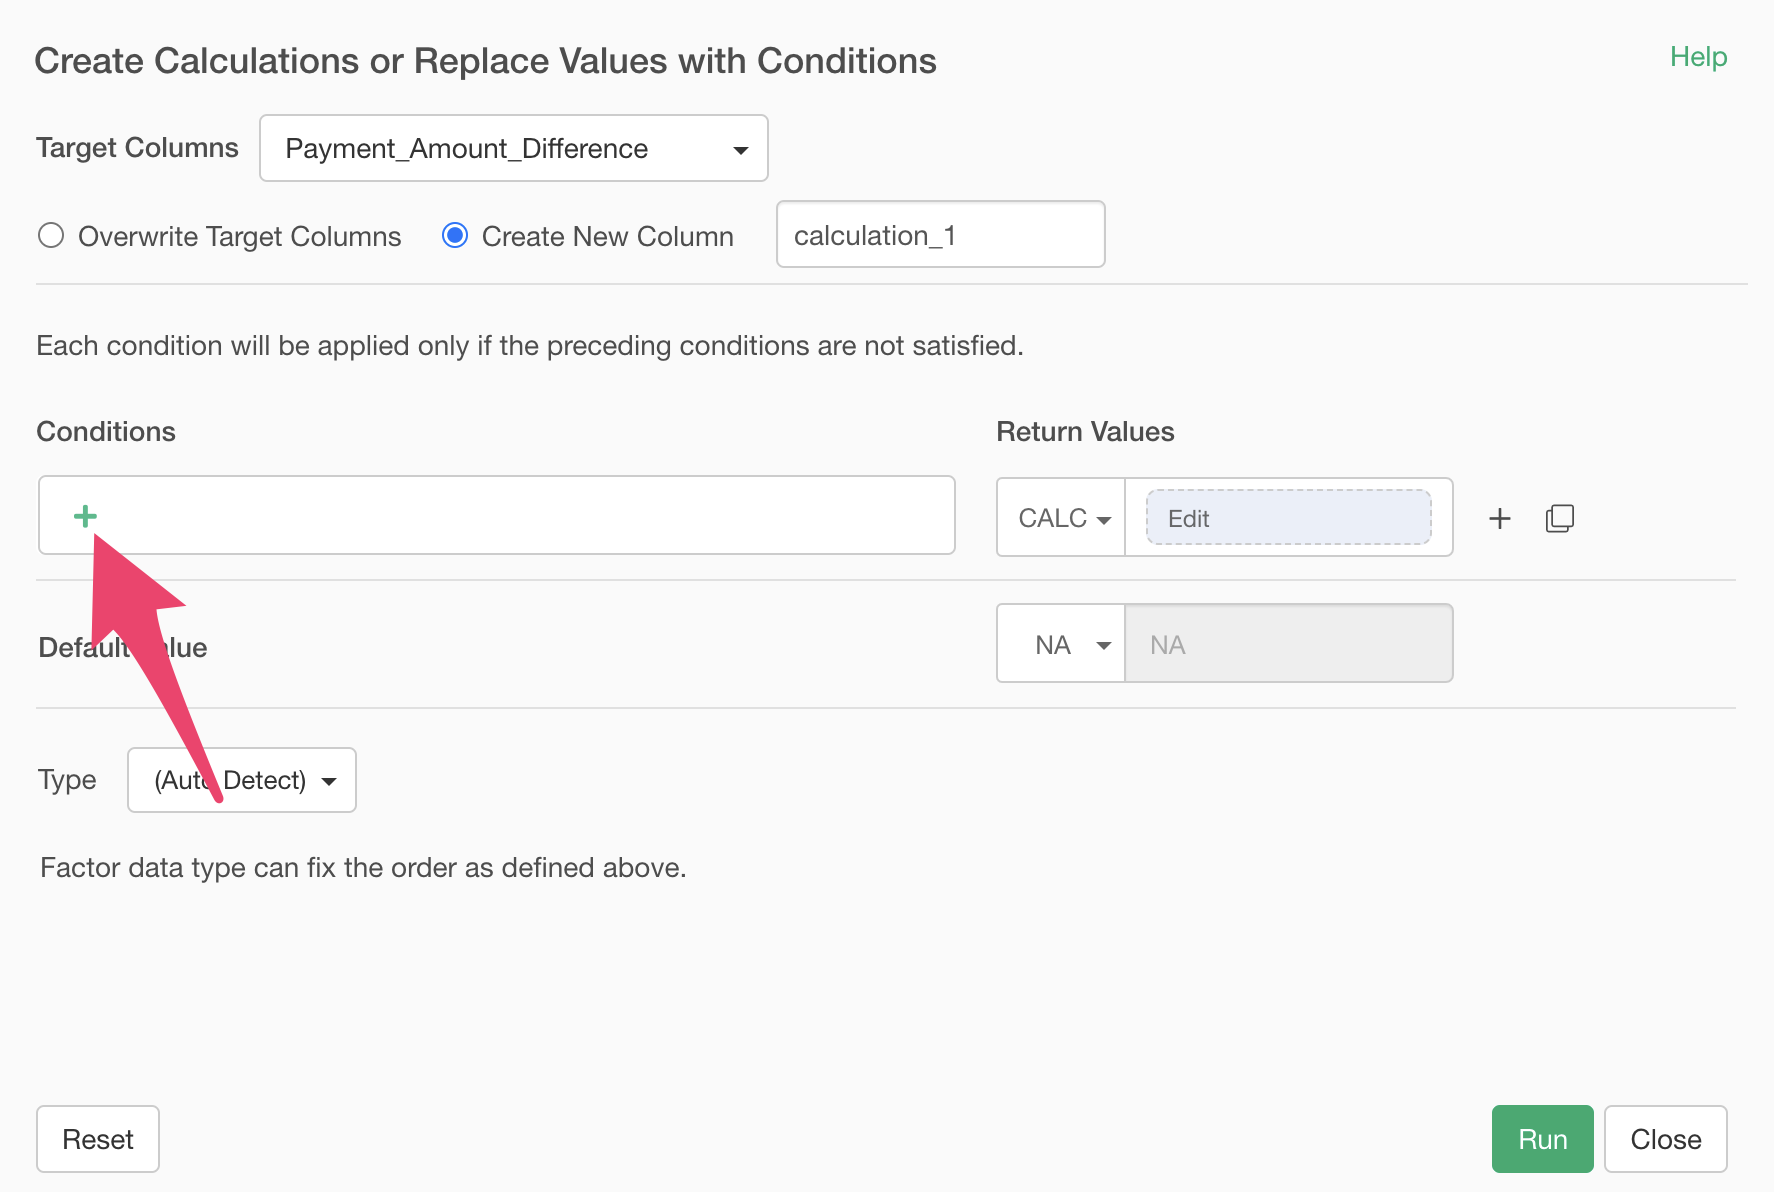
When the “Create Calculations or Replace Values with Conditions” dialog appears, add a condition.
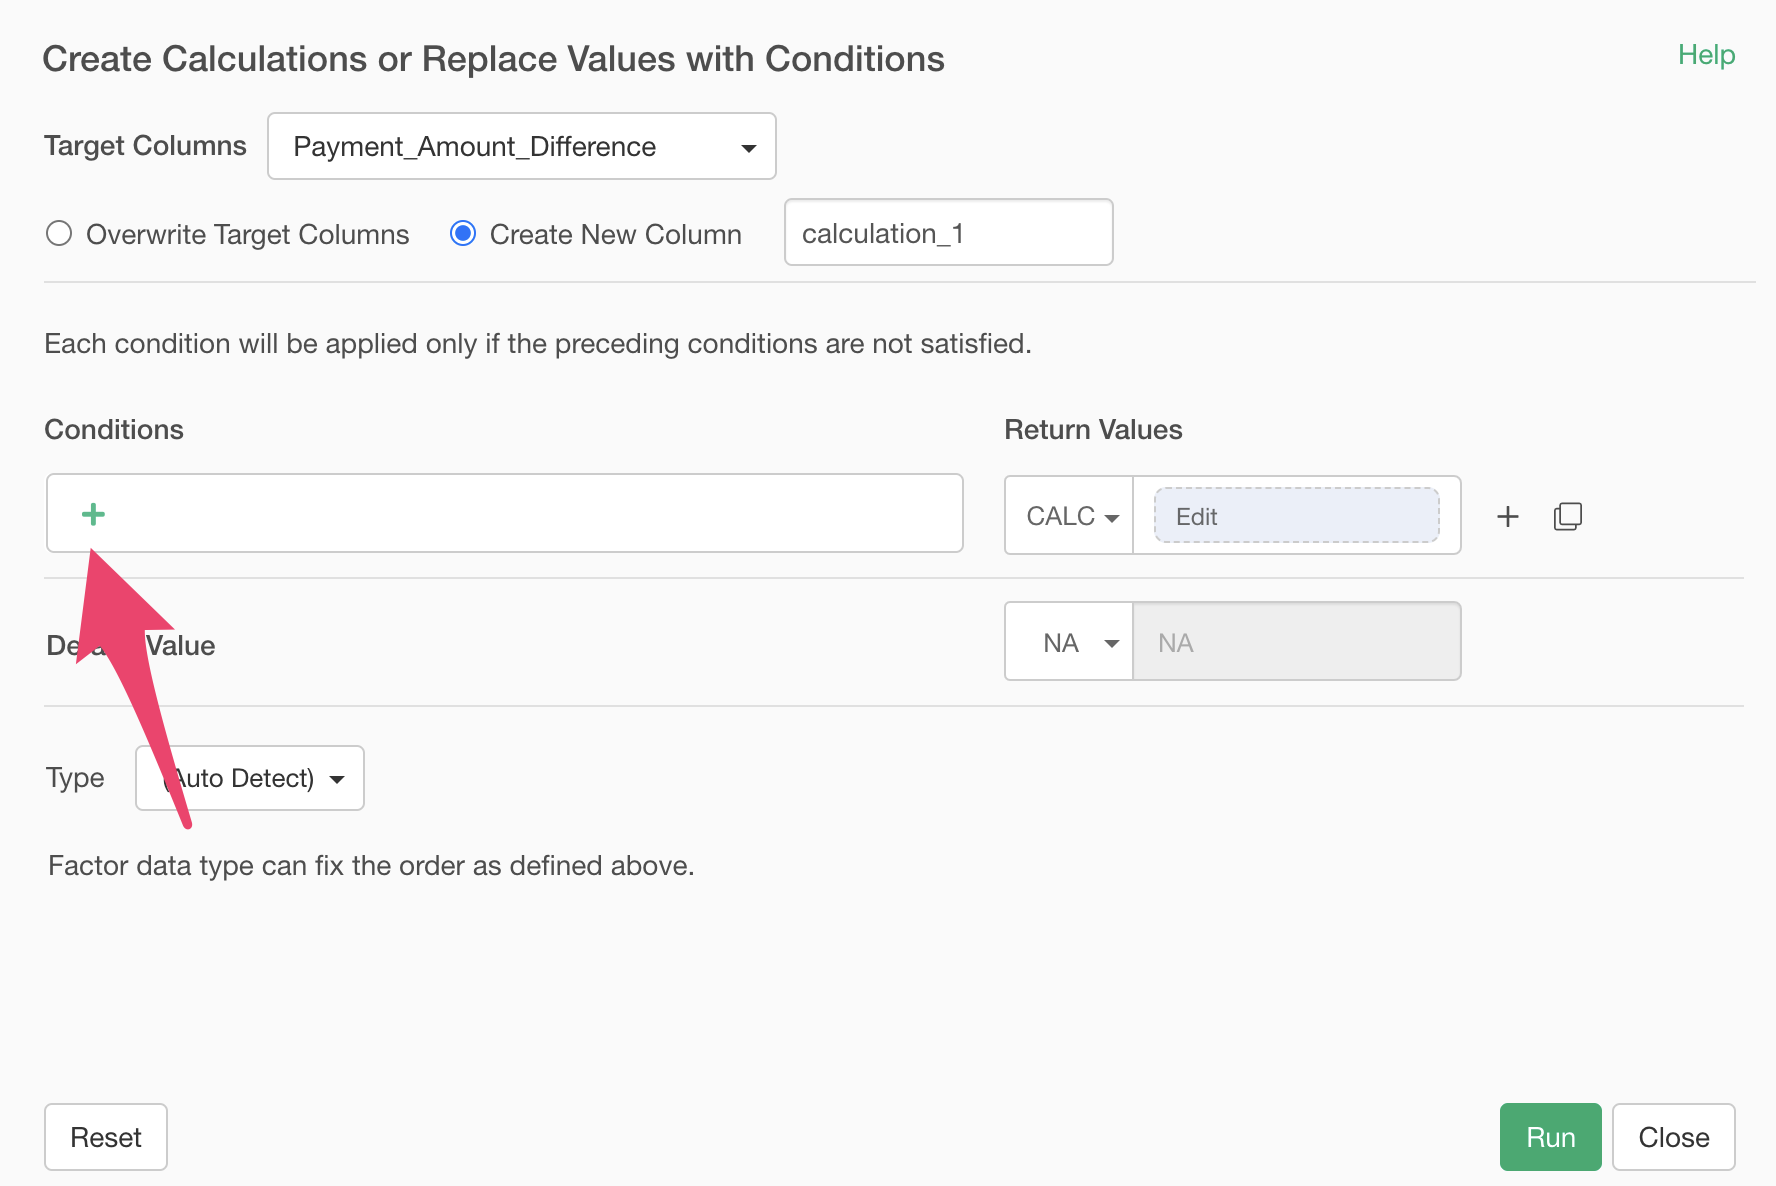
In the condition setting dialog, select “Payment_Amount_Difference” for the column, “Greater Than” for the operator, and “0” for the value, then click OK.

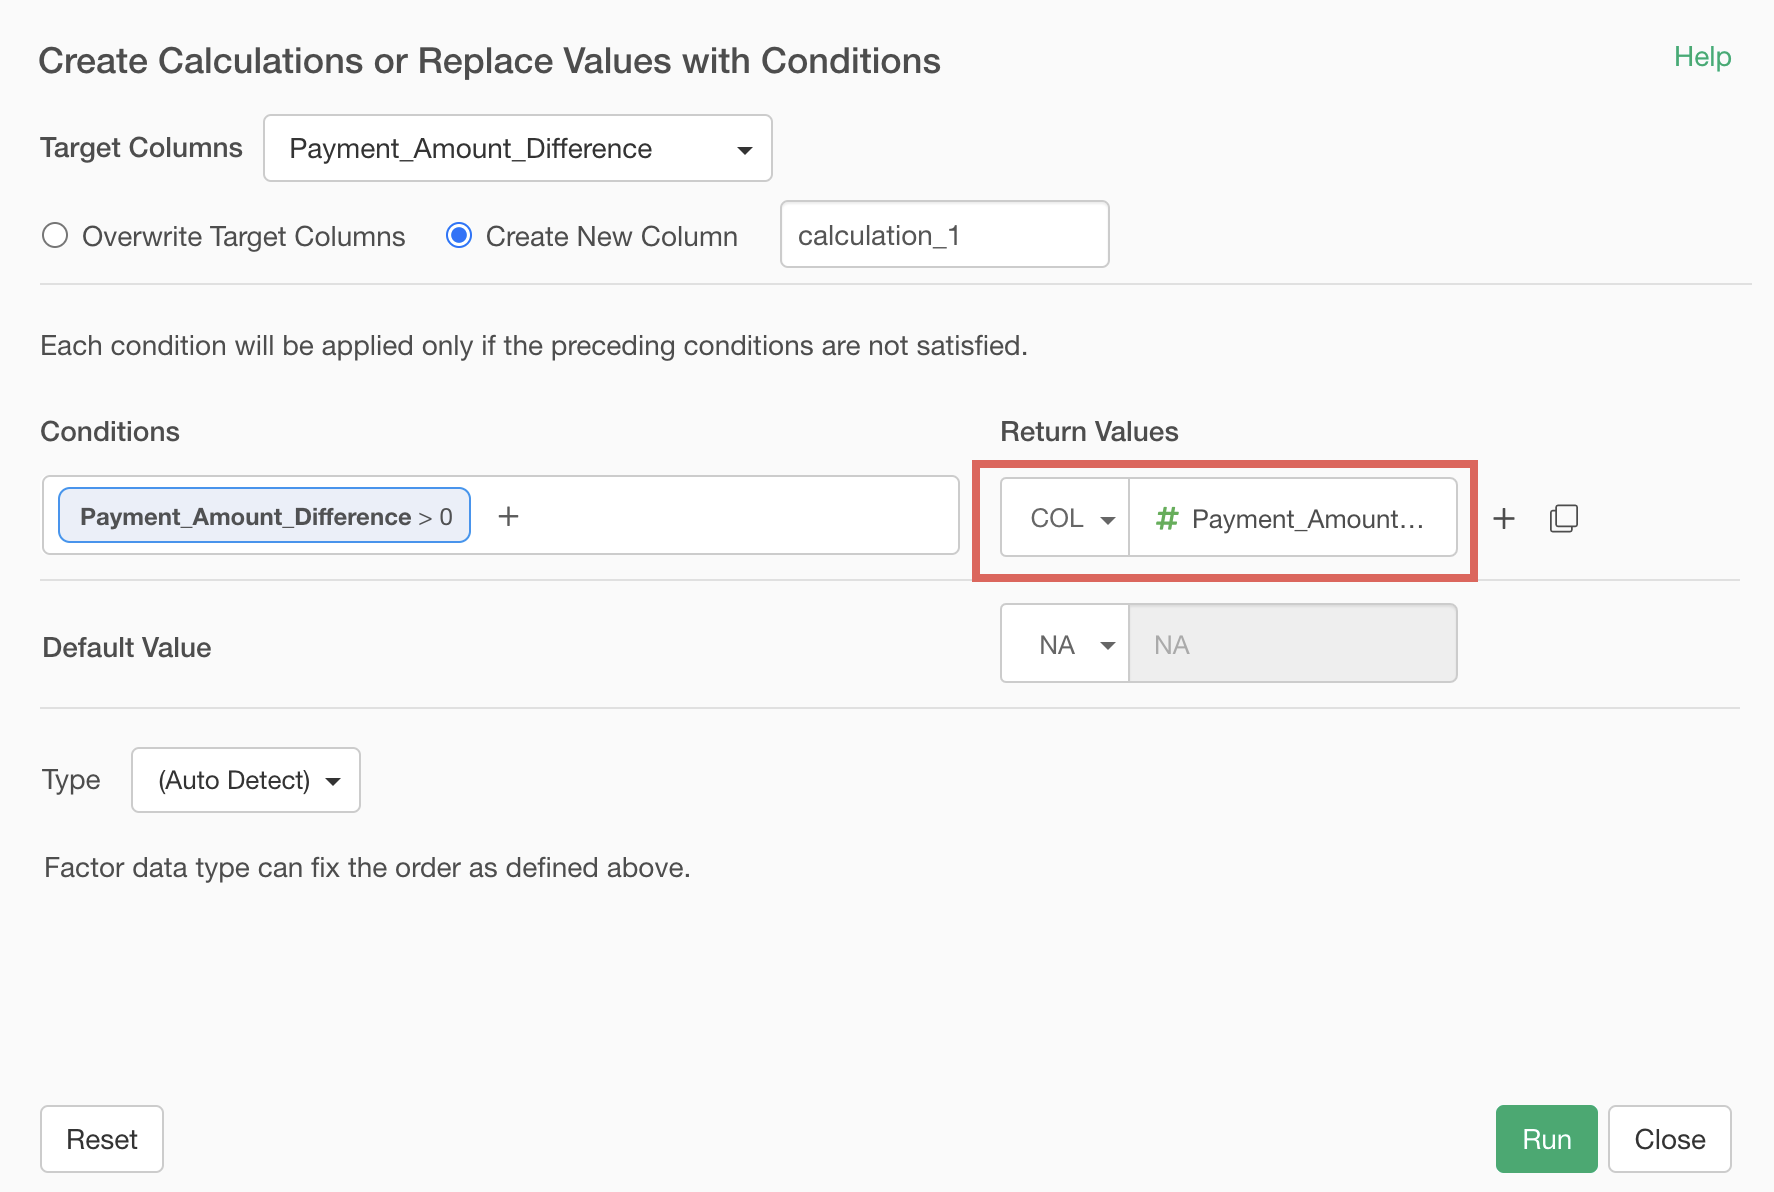
Next, specify “Column” for the new value and select “Payment_Amount_Difference” for the column.
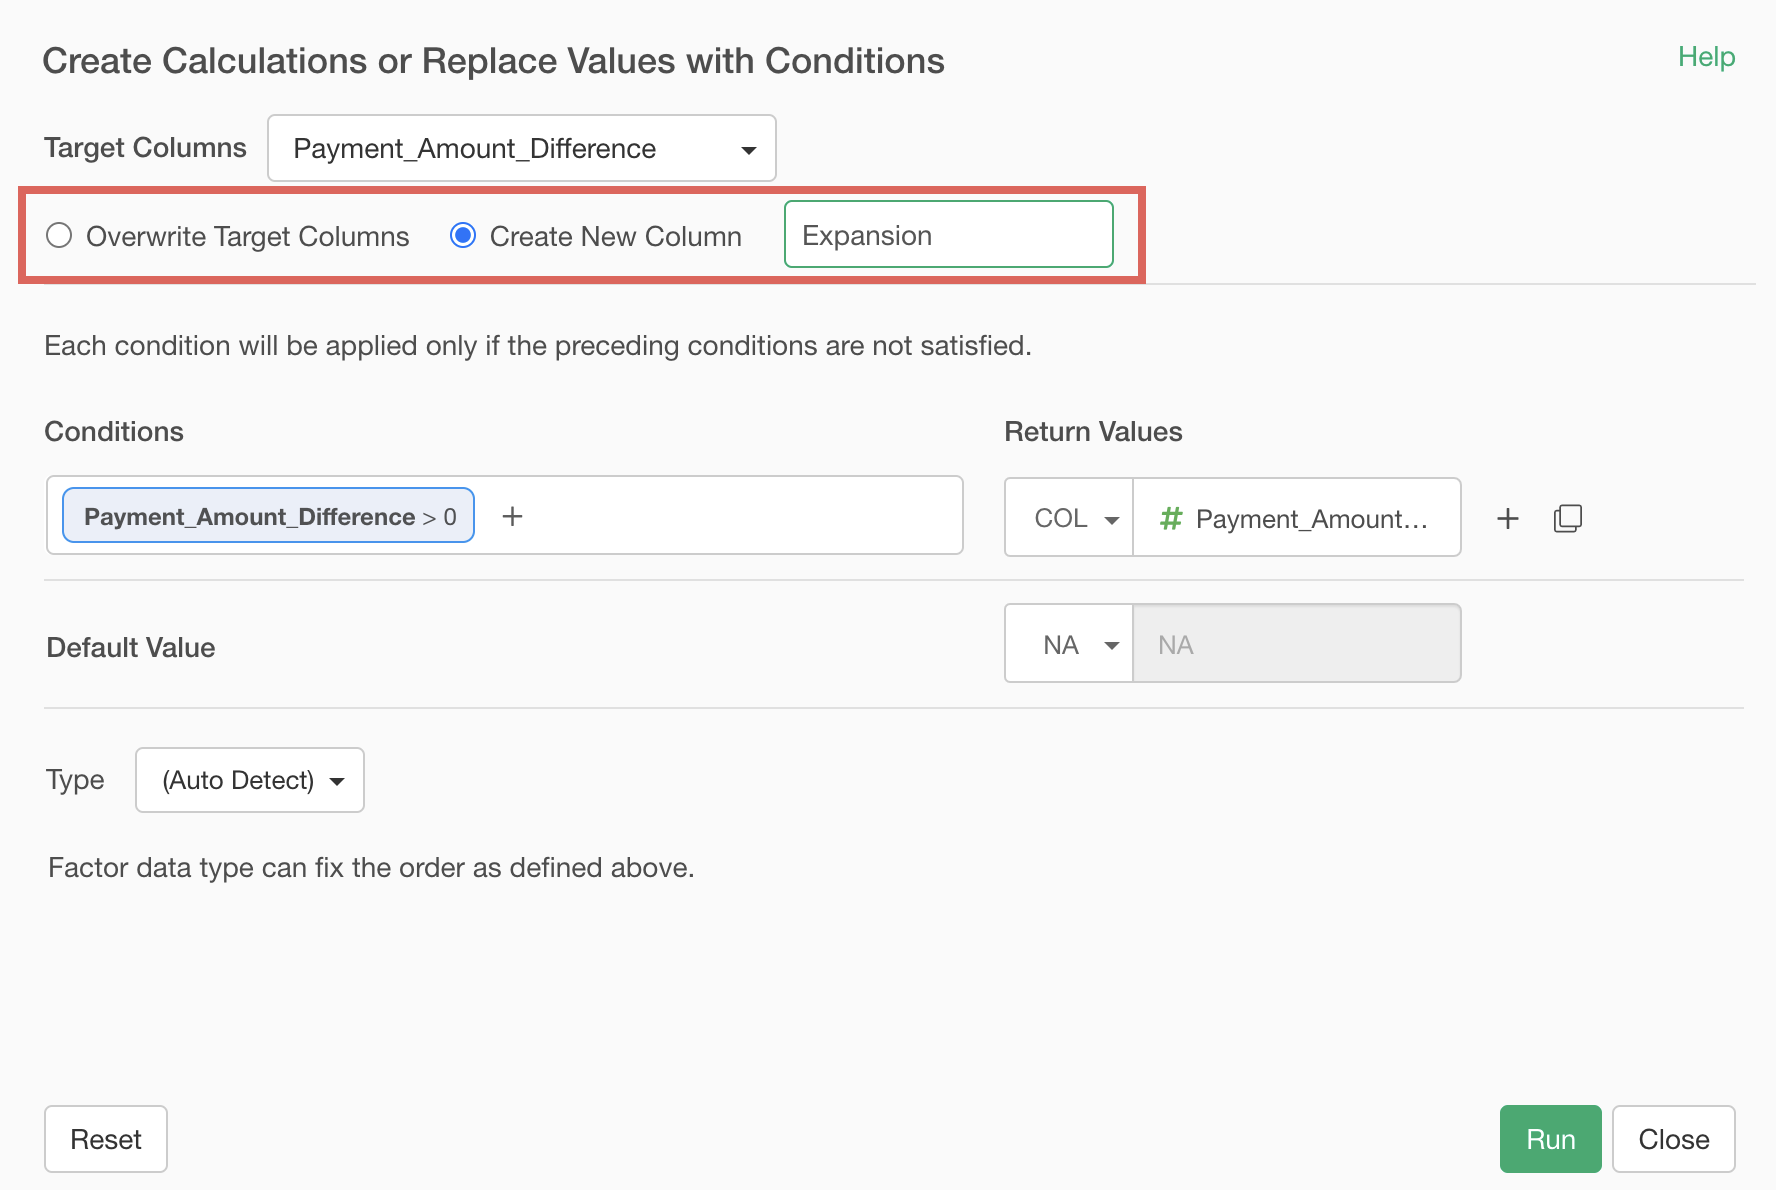
Finally, confirm that “Create New column” is checked, set the column name to “Expansion”, and click the “Run” button.
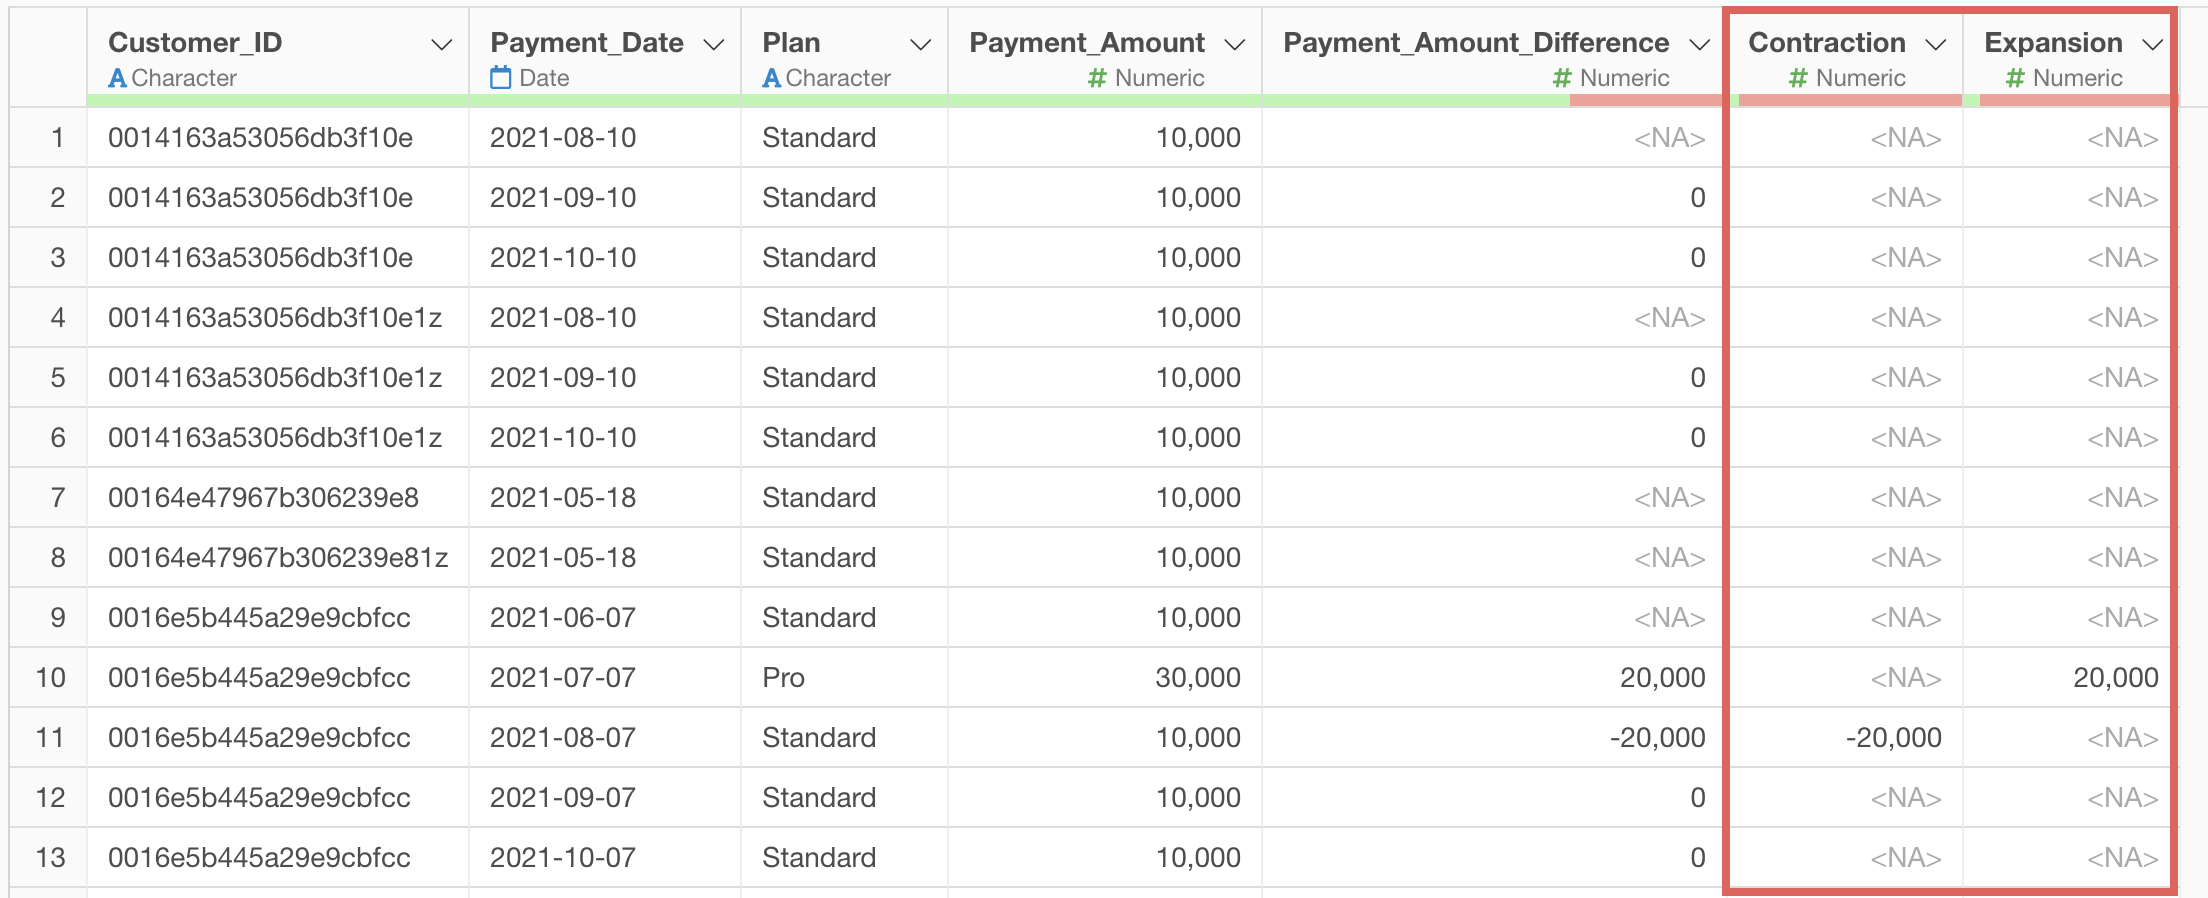
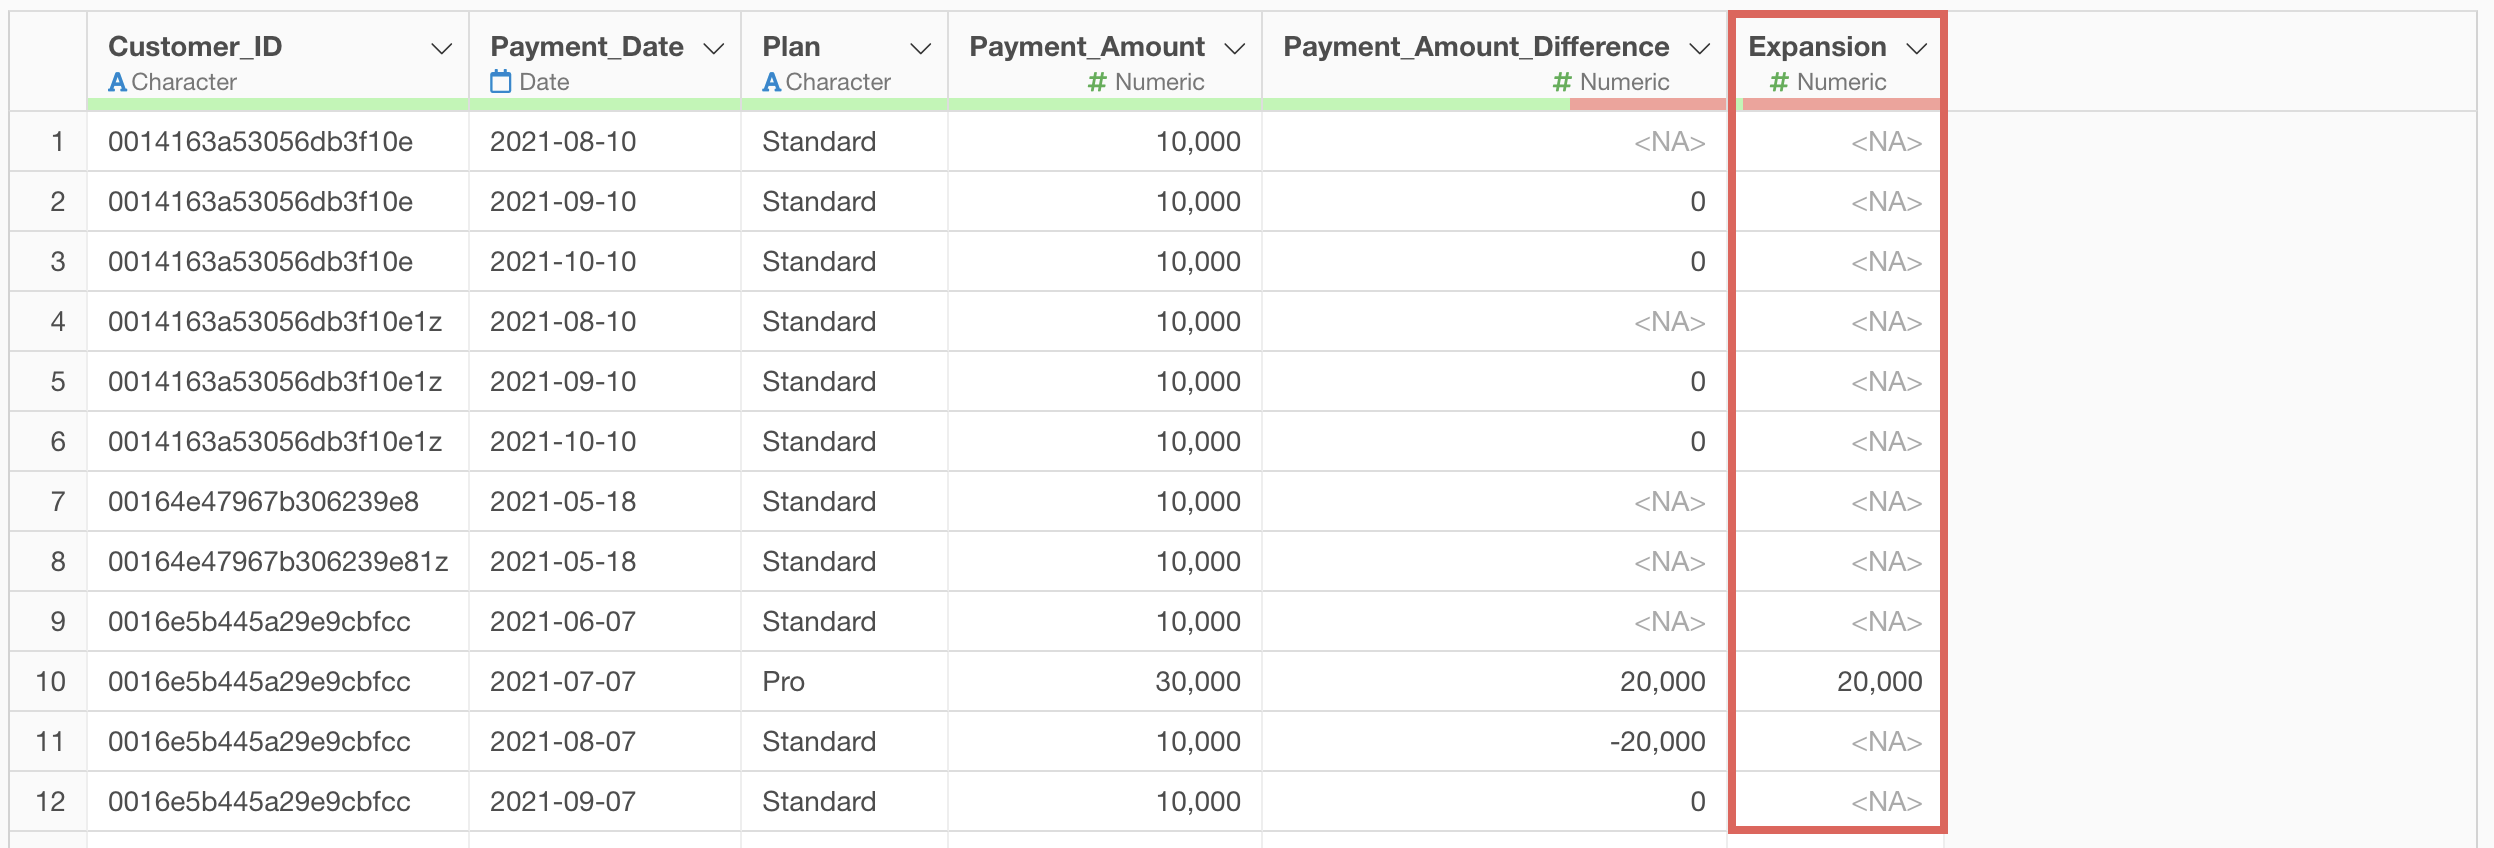
Now we’ve added the Expansion column.
Similarly, let’s add the Contraction column.
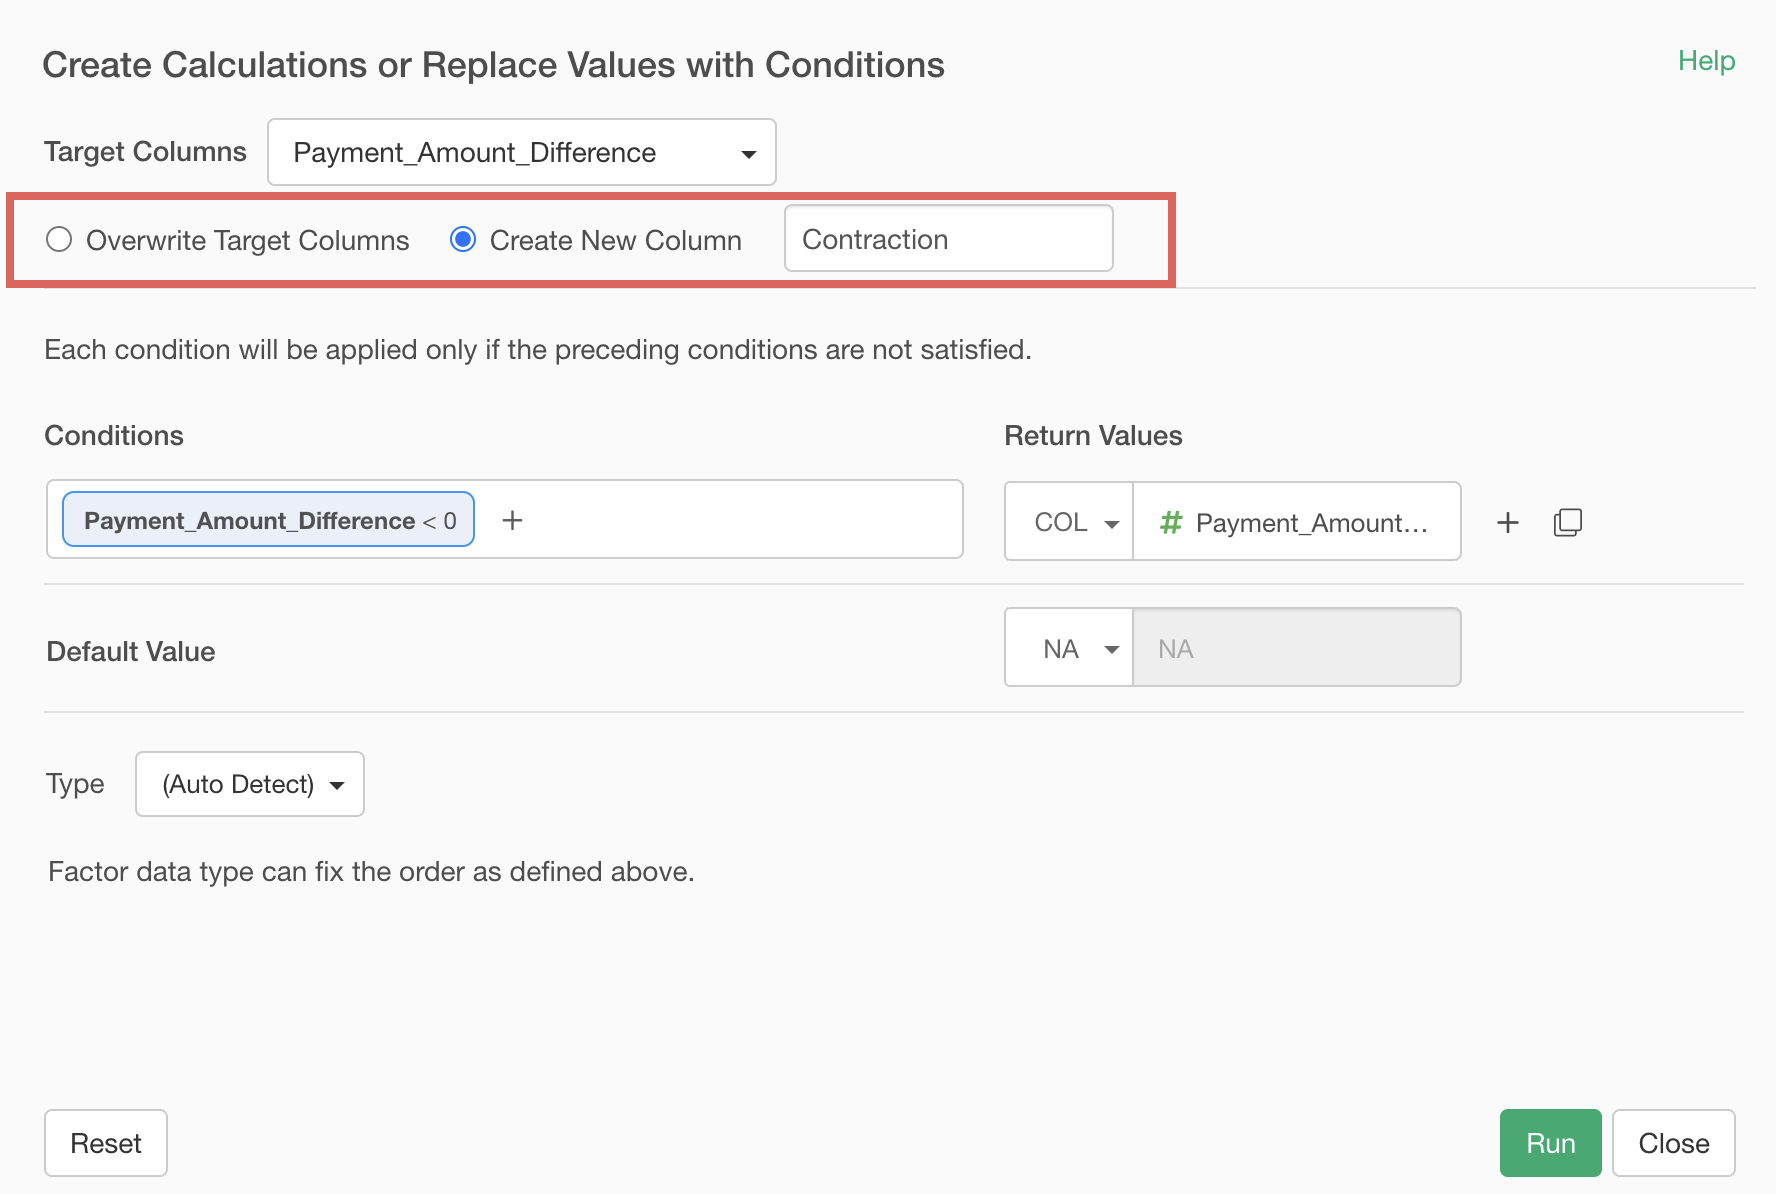
From the “Payment_Amount_Difference” column header menu, select “Create Calculation”, “With Condition”.
When the “Create Calculations or Replace Values with Conditions” dialog appears, add a condition.
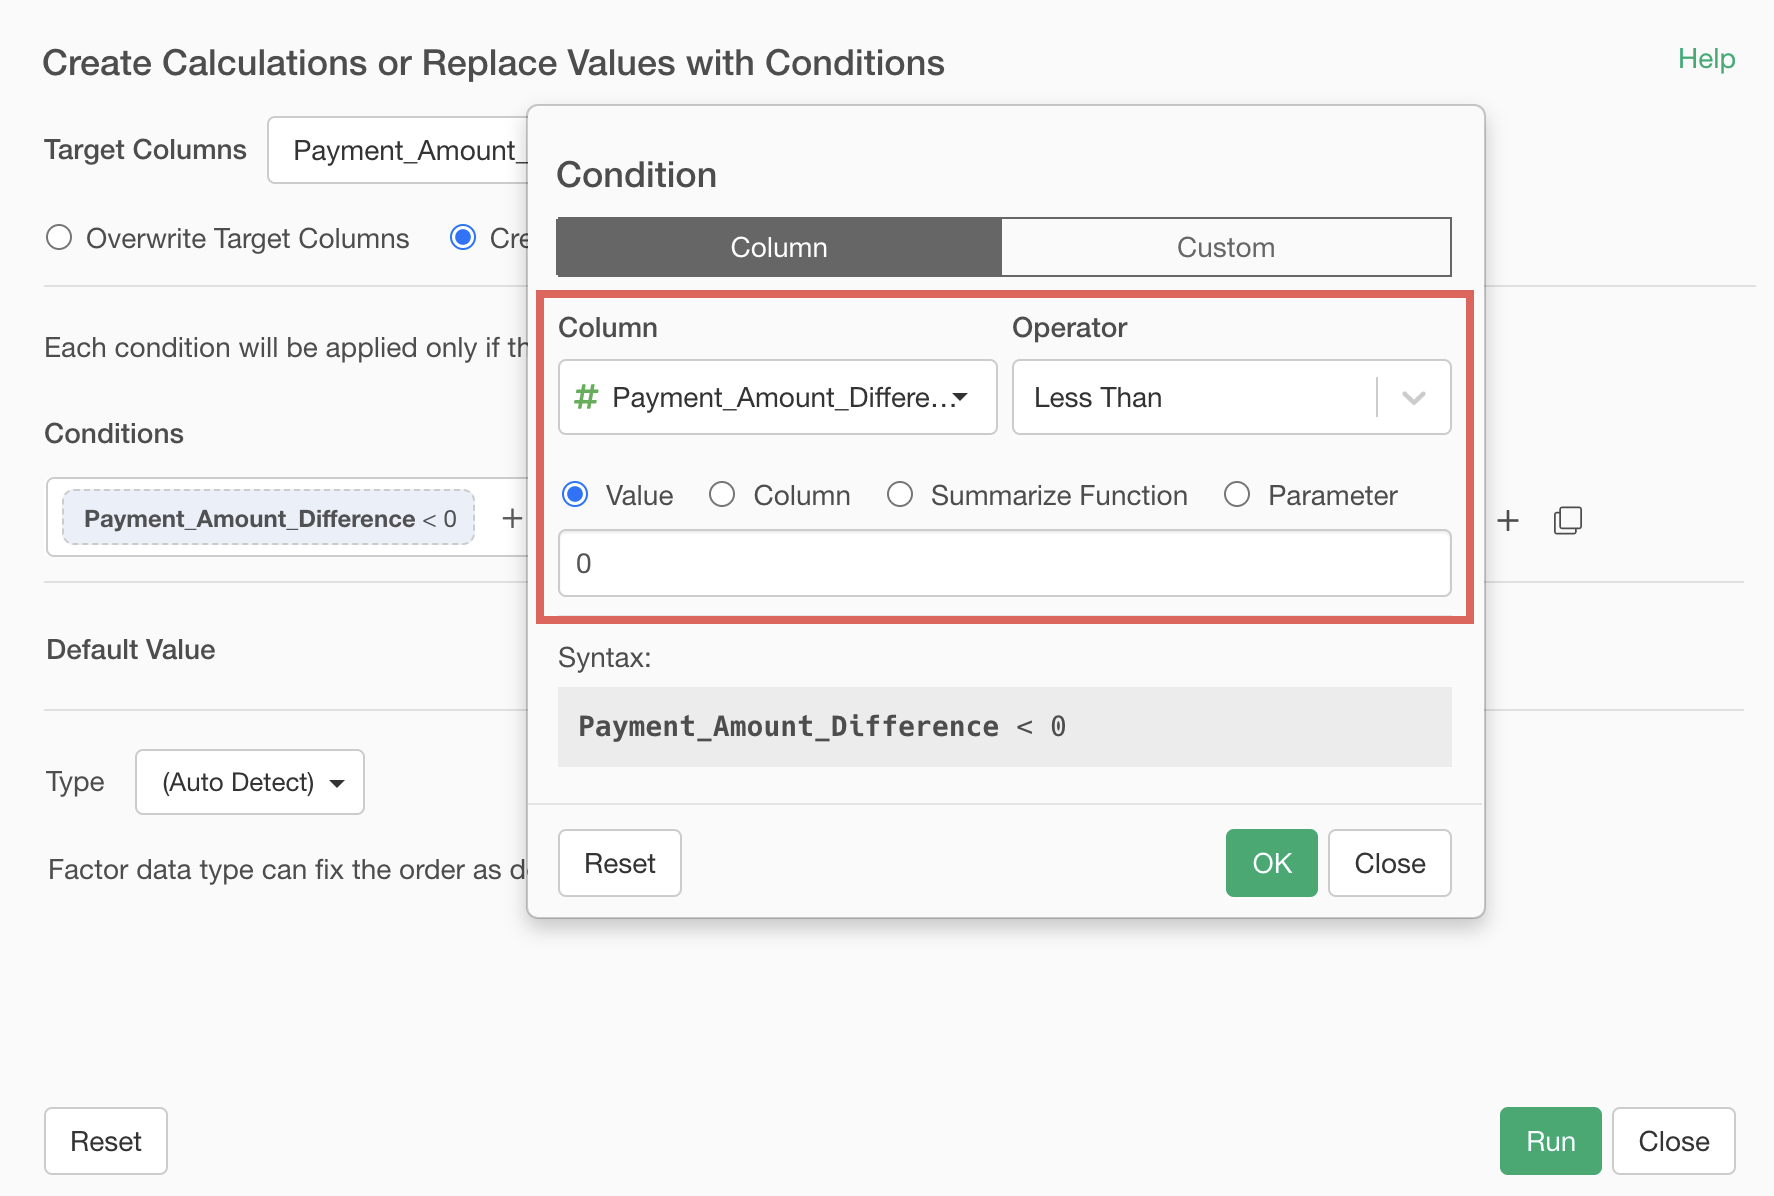
In the condition setting dialog, select “Payment_Amount_Difference” for the column, “Less than” for the operator, and “0” for the value, then click OK.
Next, specify “Column” for the new value and select “Payment_Amount_Difference” for the column.
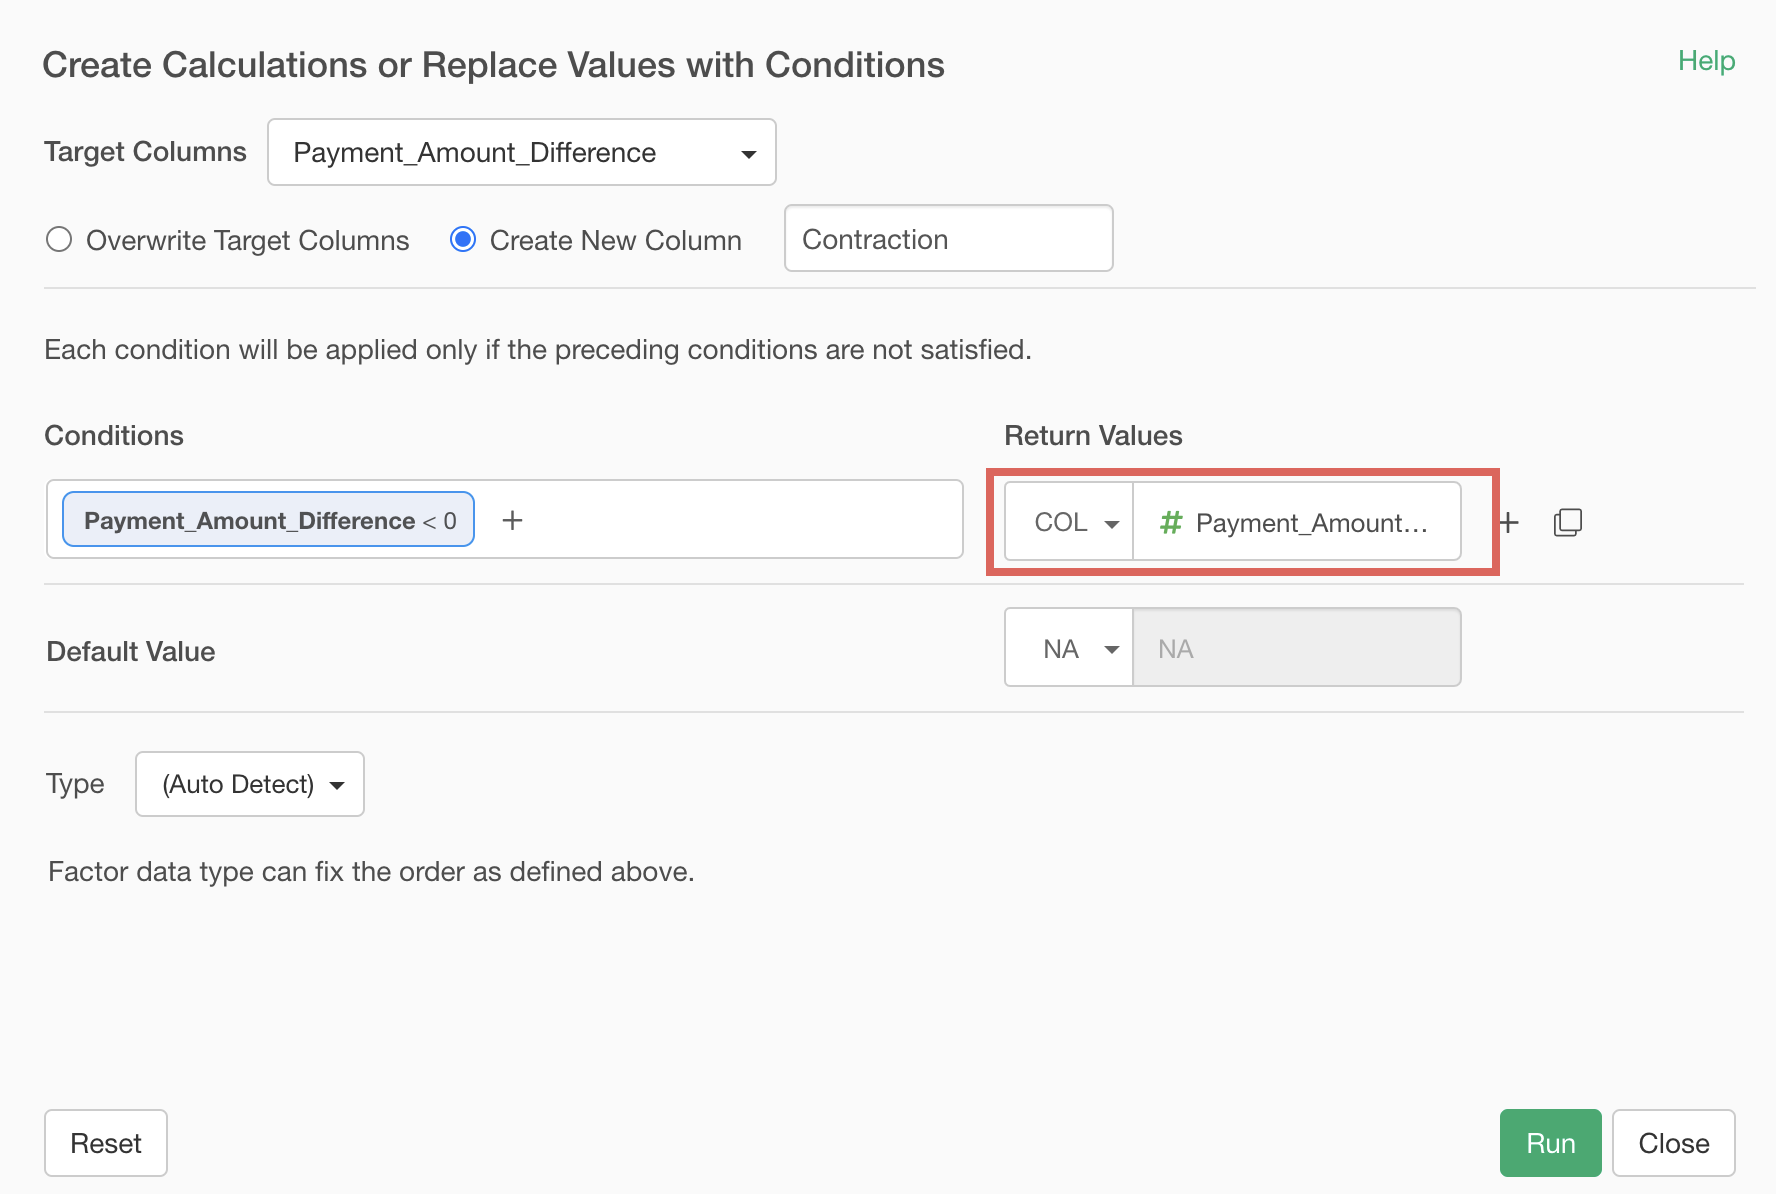
Finally, confirm that “Create New column” is checked, set the column name to “Contraction”, and click the “Run” button.
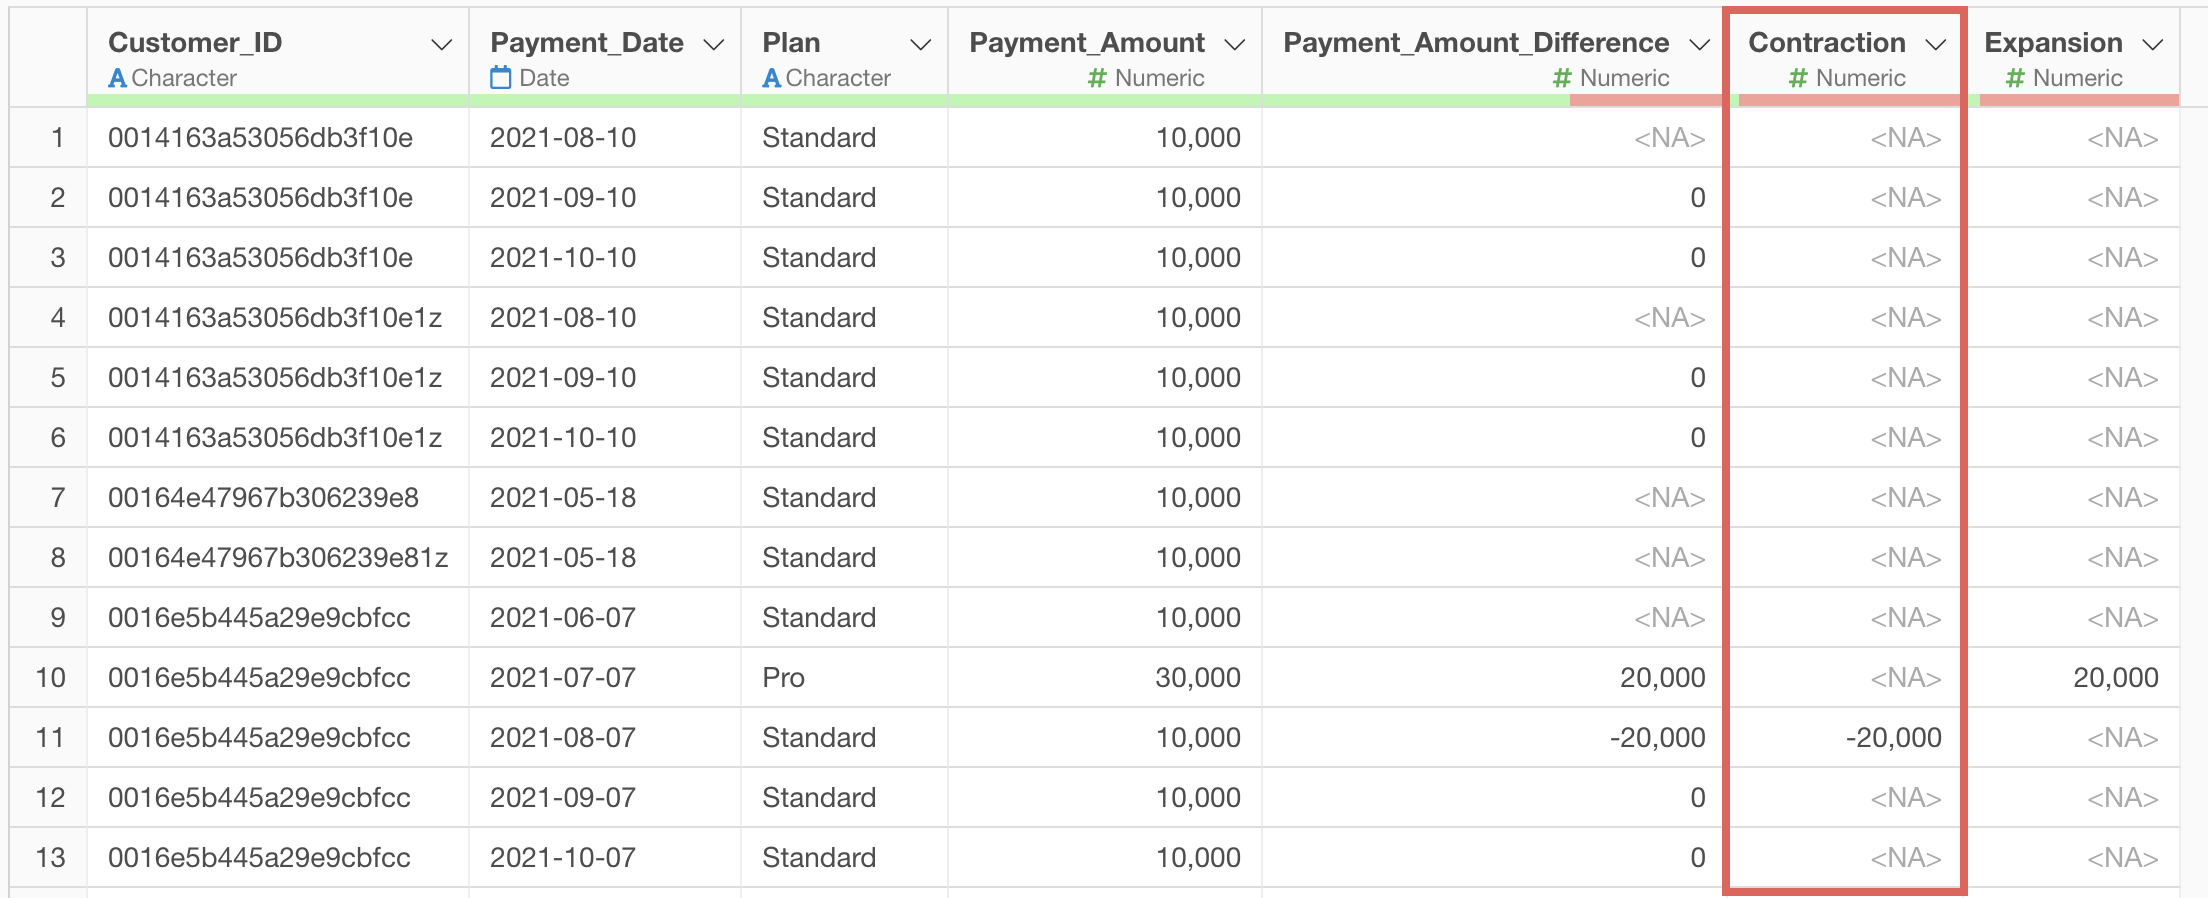
Now we’ve added the Contraction column.
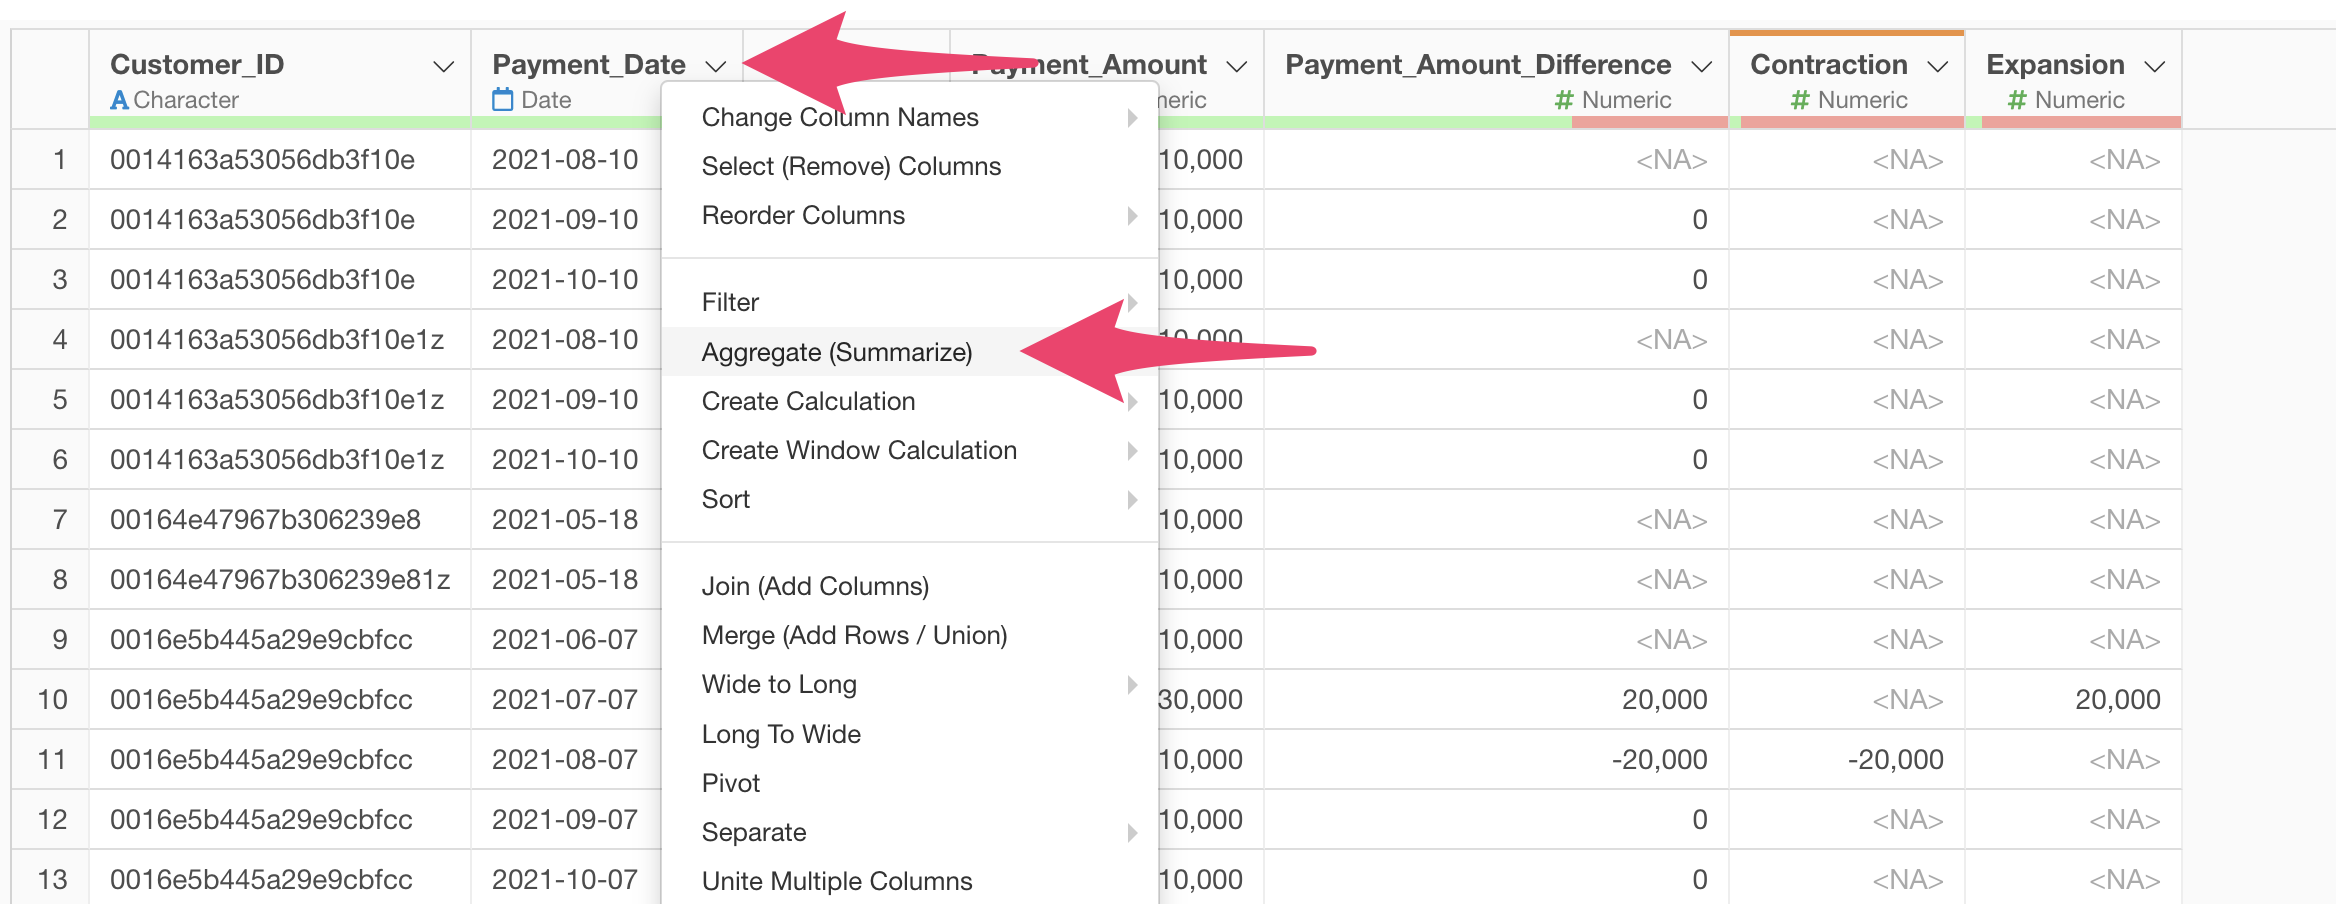
Finally, to aggregate expansion and contraction by month, select “Summarize” from the “Payment Date” column header.
When the summarize dialog opens, select “Payment_Date” for the group and “Month” for the rounding.
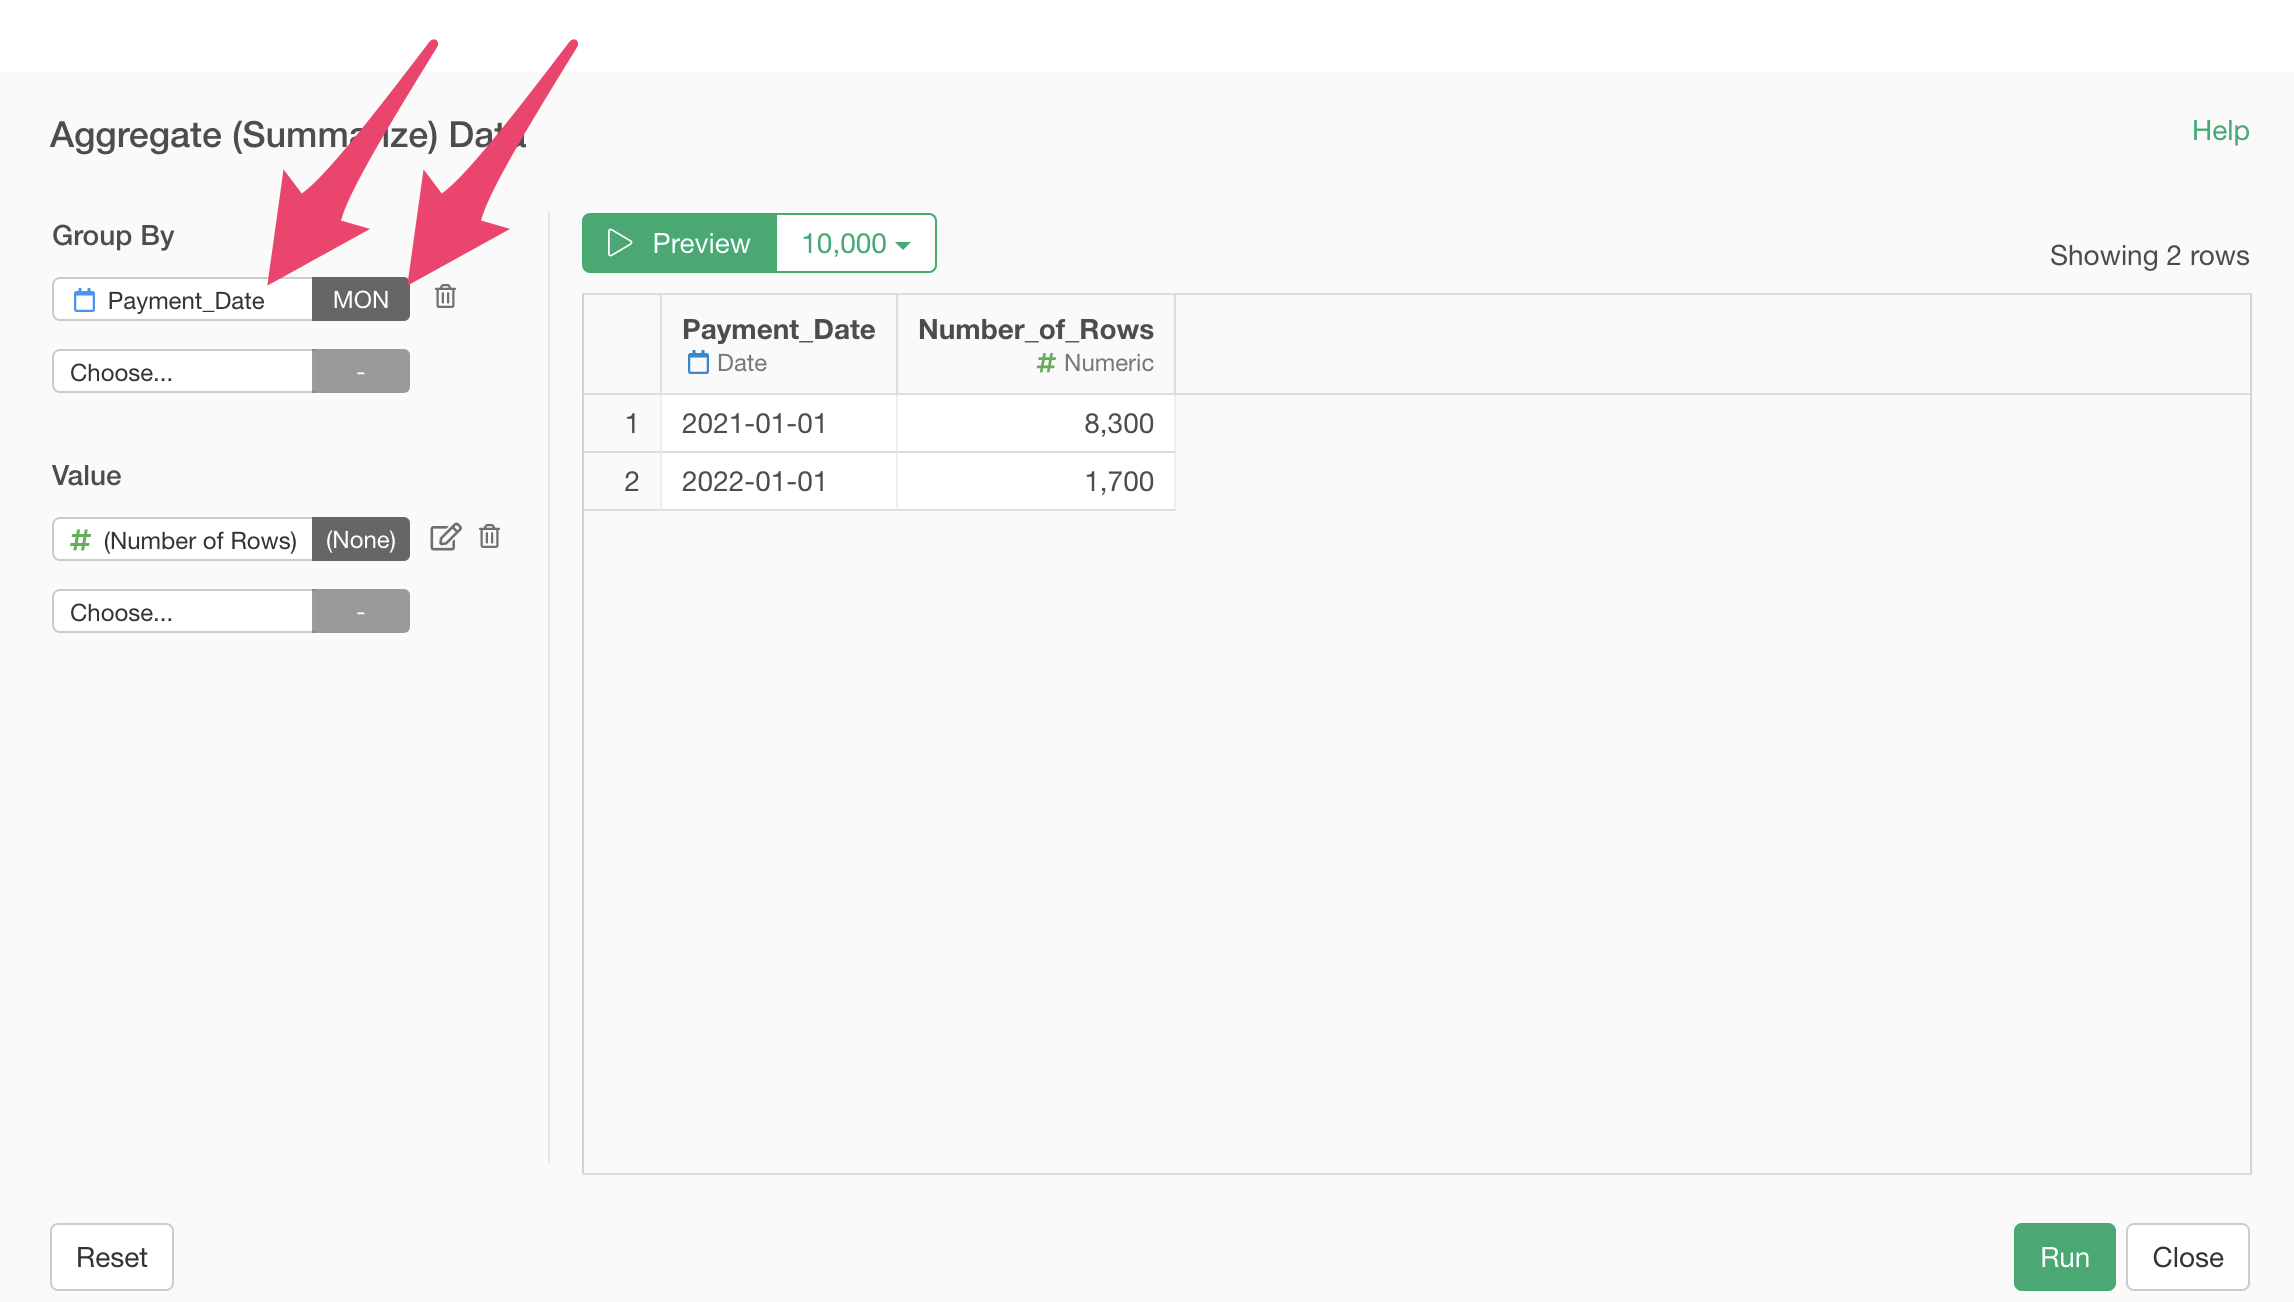
Select “Expansion” and “Contraction” for the values, select SUM as the aggregation function, and click the “Run” button.
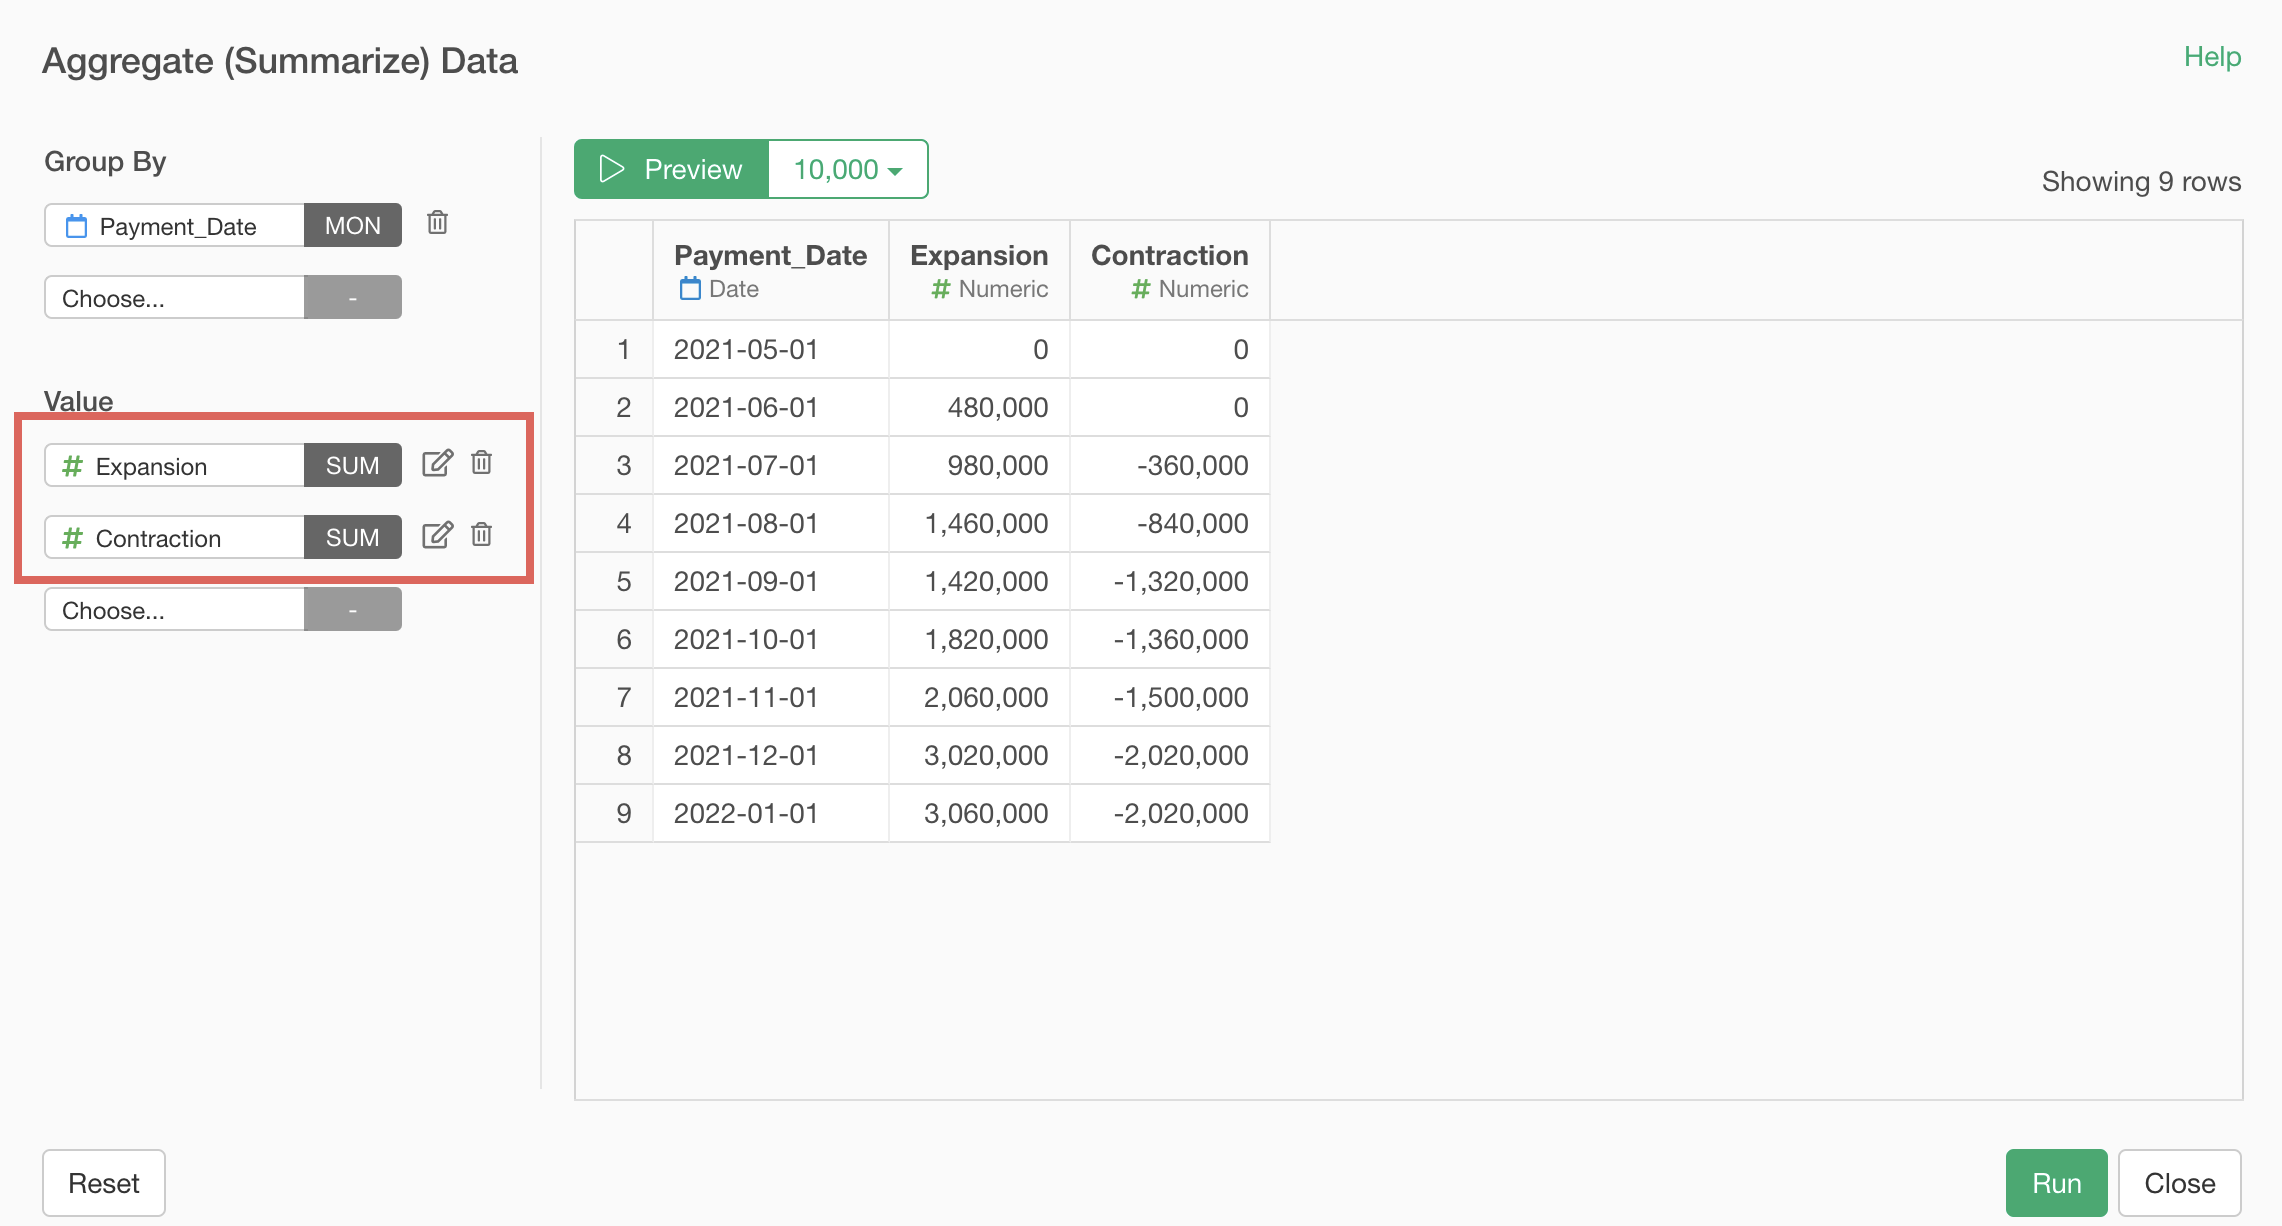
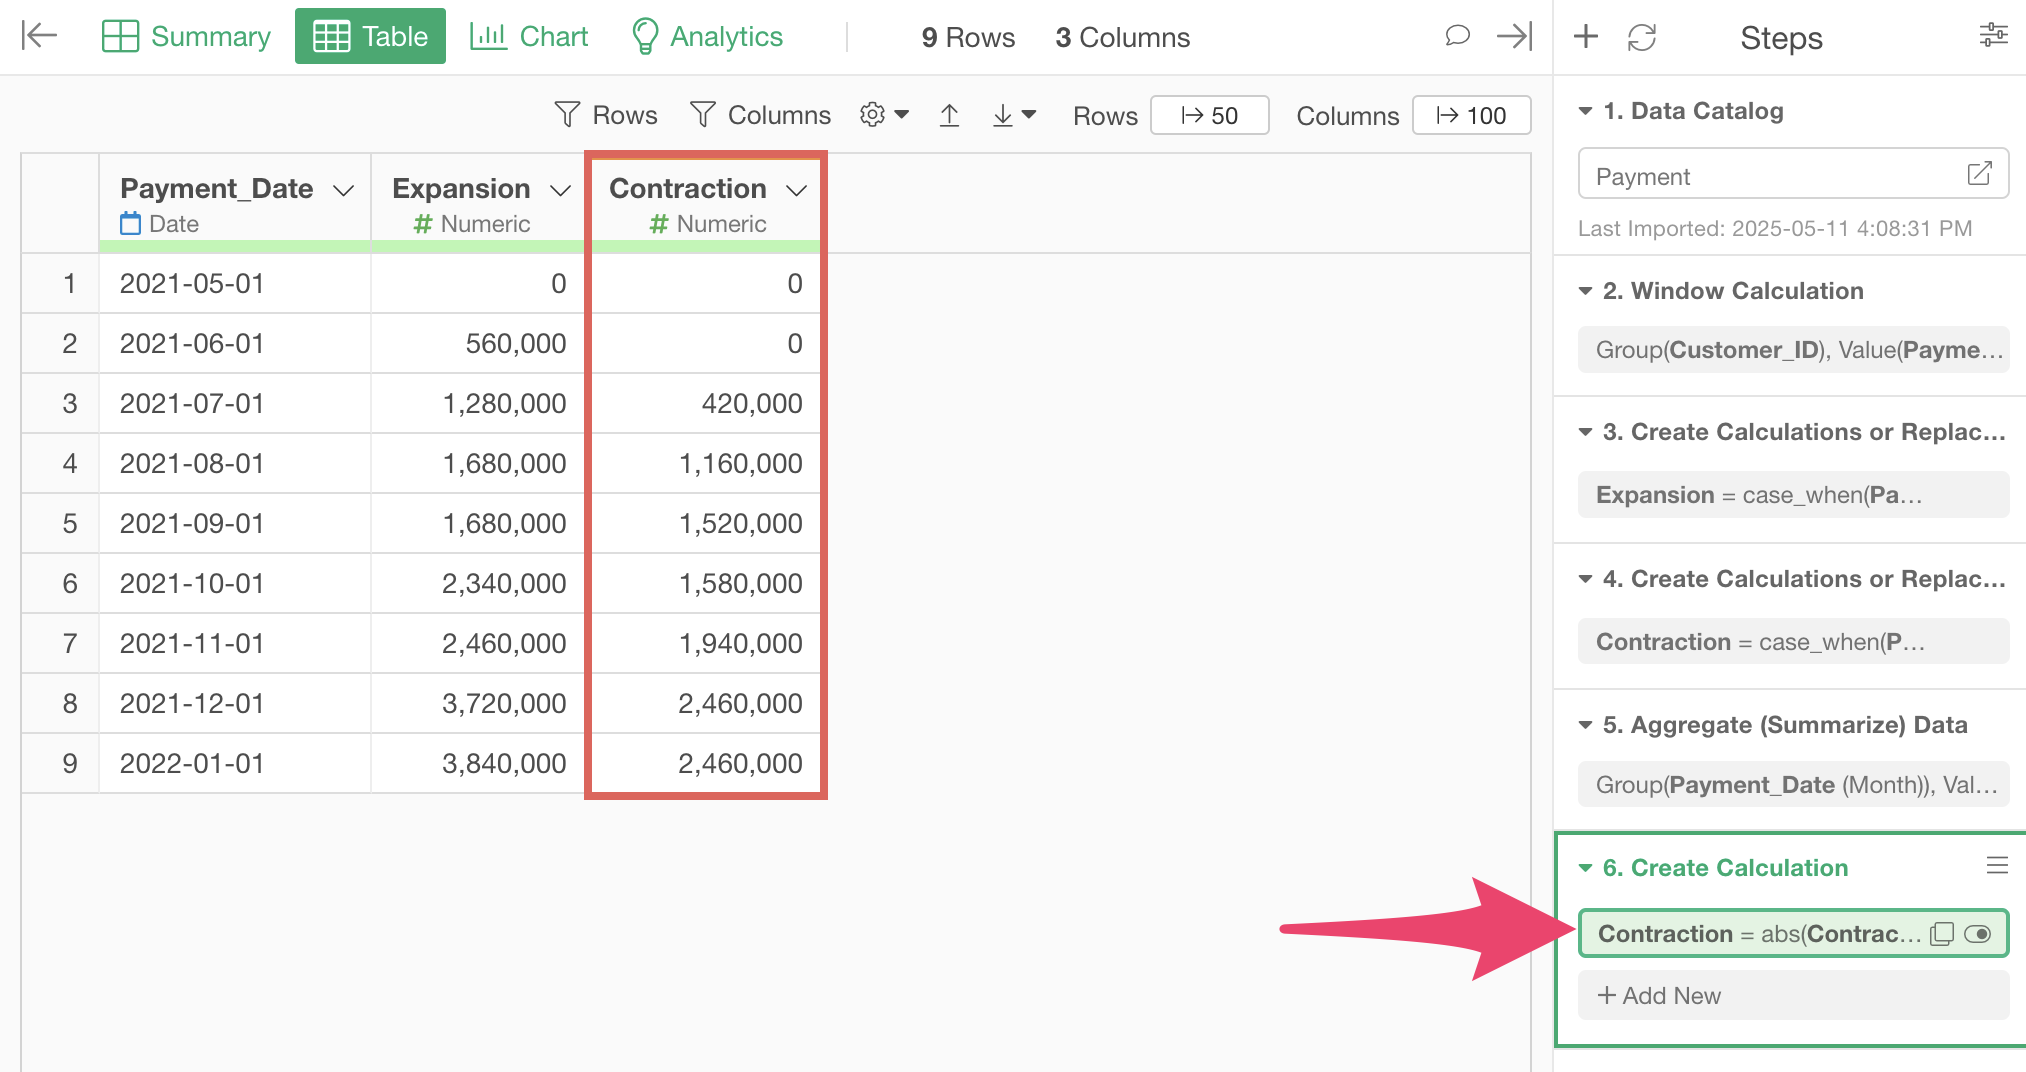
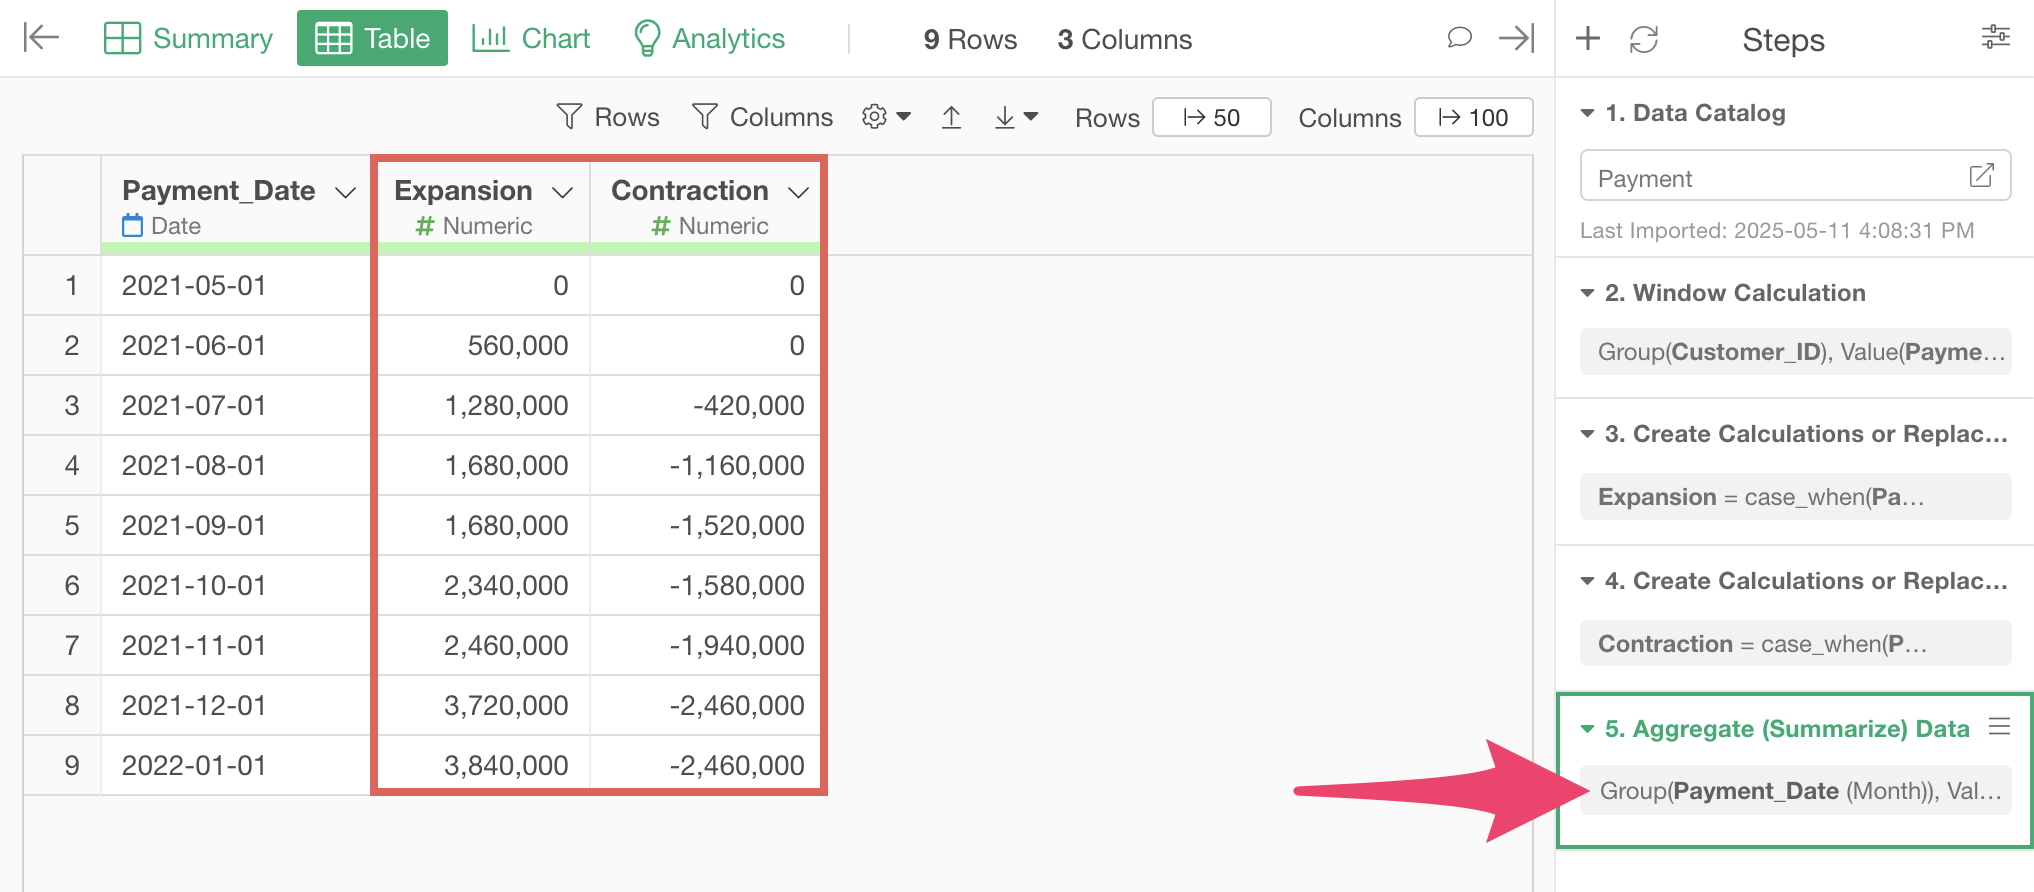
We’ve now aggregated monthly Expansion (MRR) and Contraction (MRR).
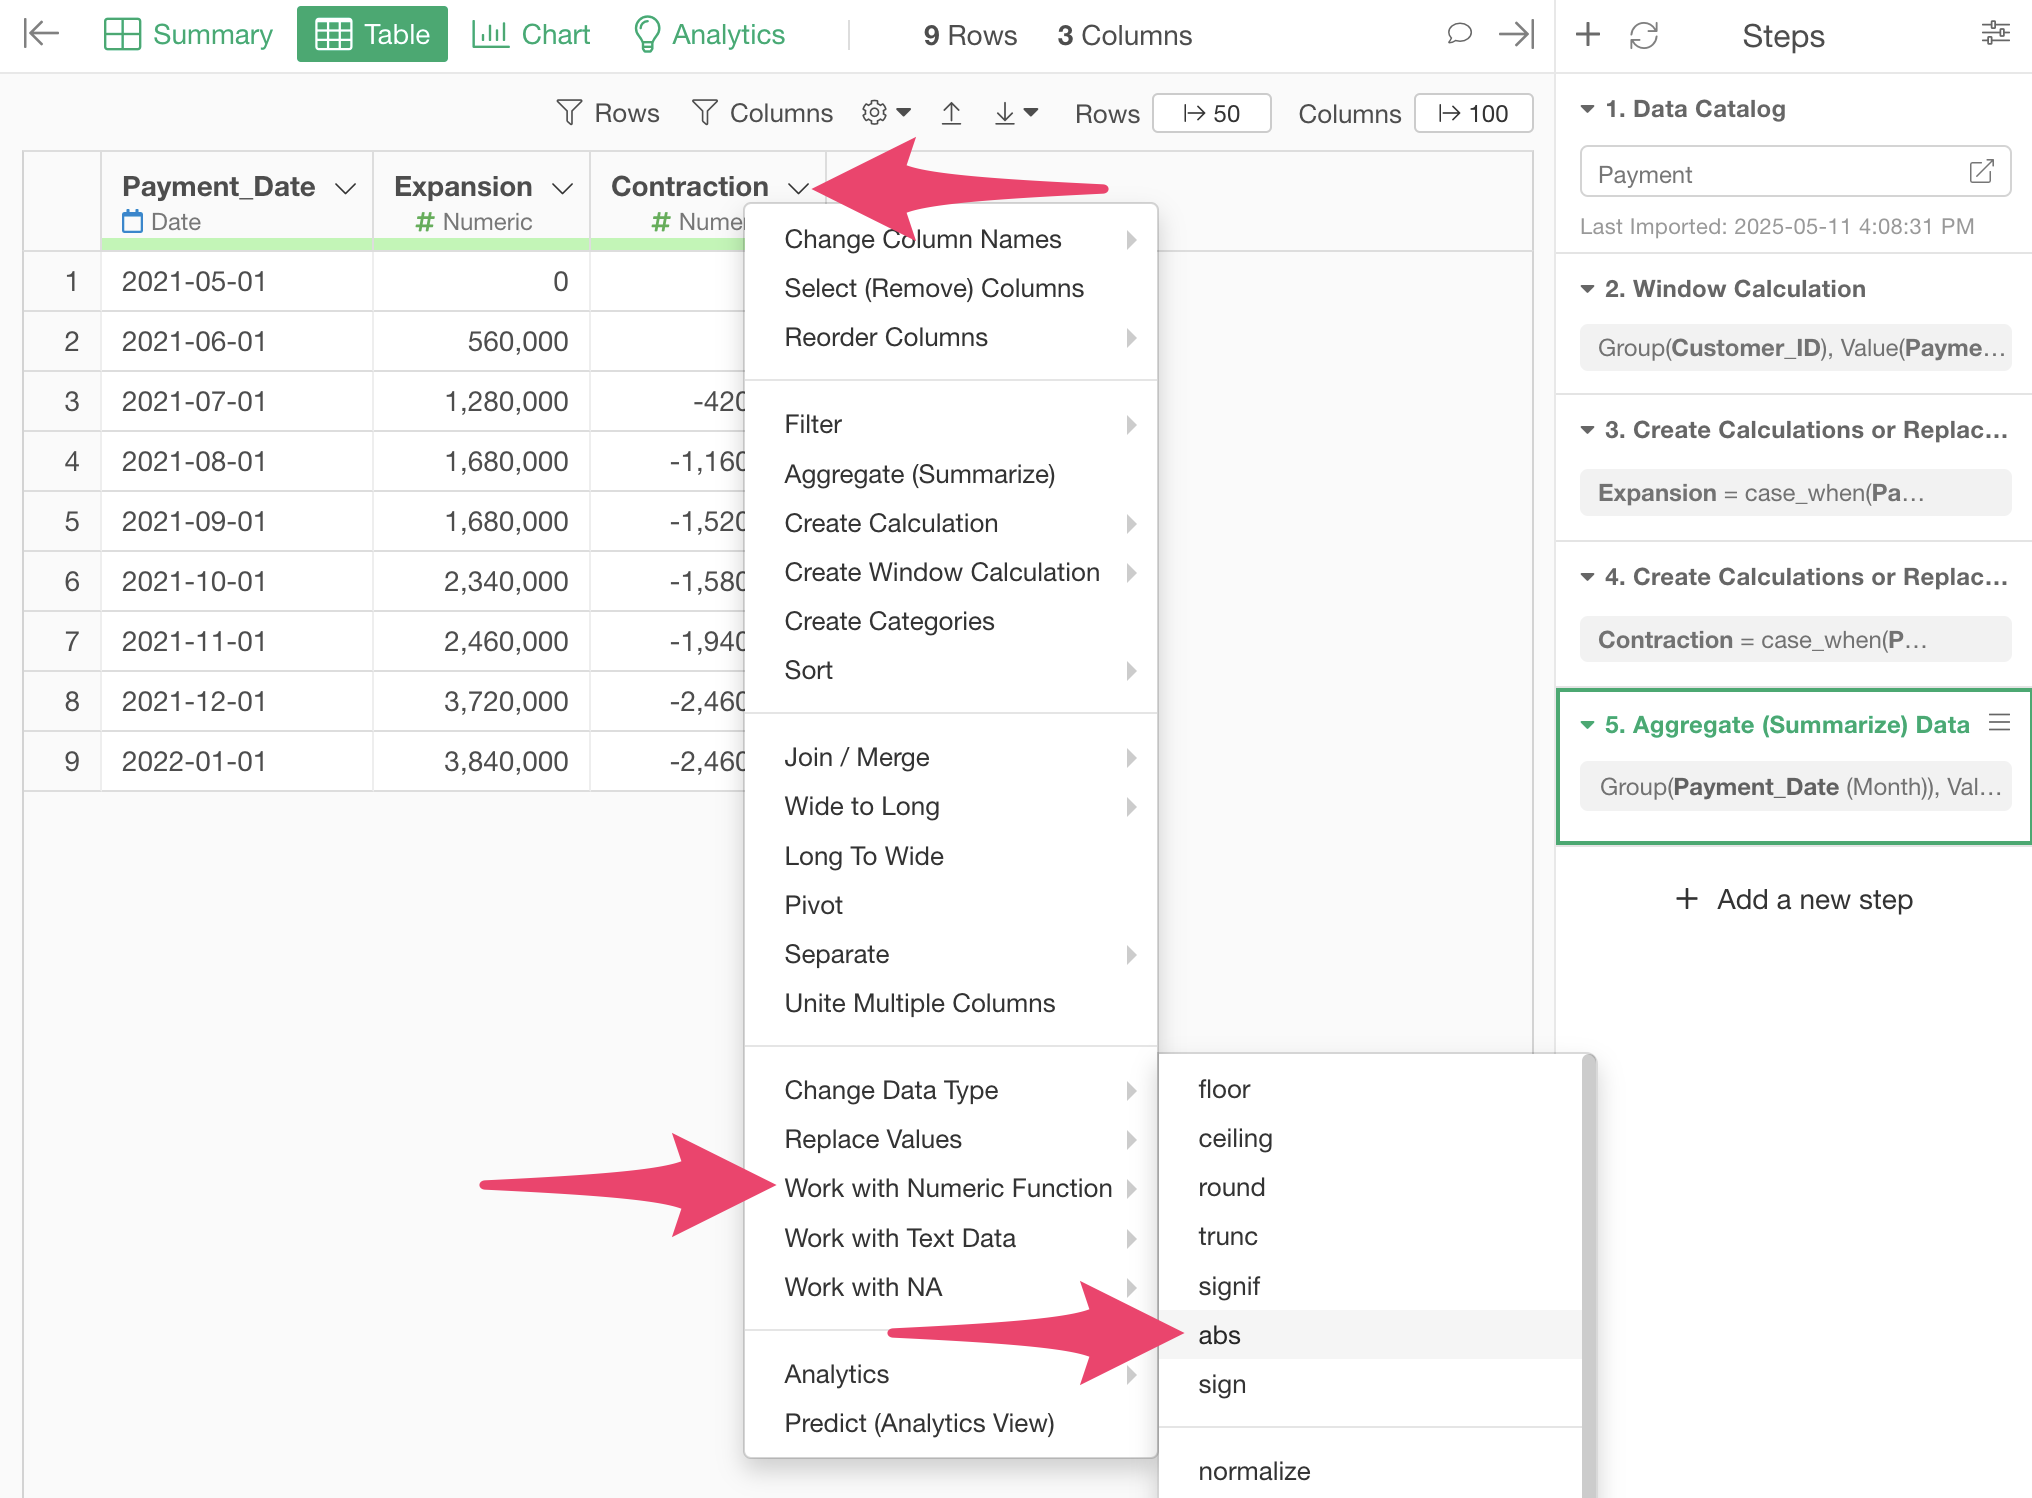
How to remove the minus sign from Contraction
Since Contraction represents revenue decrease, it has negative values. If you want to remove the minus sign, select “Work with Numeric Function”, “abs” from the Contraction column header menu.
When the “Create Calculation” dialog opens, click the “Run” button as is.
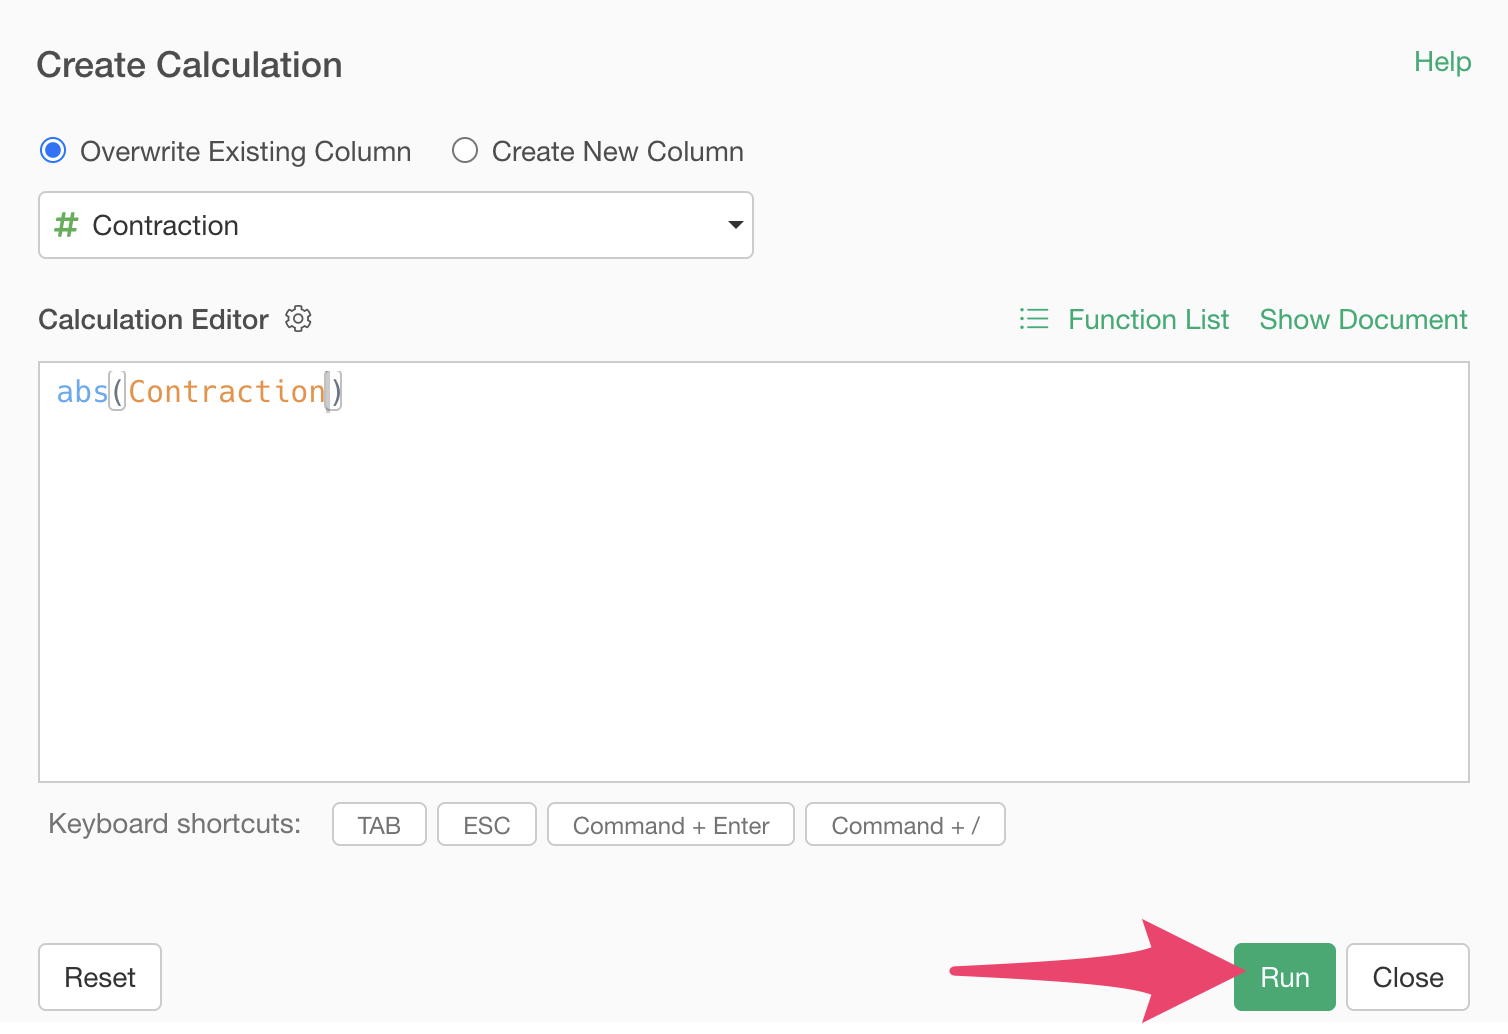
Now we’ve removed the minus sign from Contraction.